This month has been crazy busy for work, so I have not had as much time to work on my Amiga projects as I wanted. That said, I made some big progress this month on the rebuild of my Amiga 2000.
My Amiga 2000 really holds a lot of memories for me. I have had this Amiga 2000 from new, bought by my Dad way back in 1991 in Perth. as an upgrade to our Amiga 500. (which we traded in!)
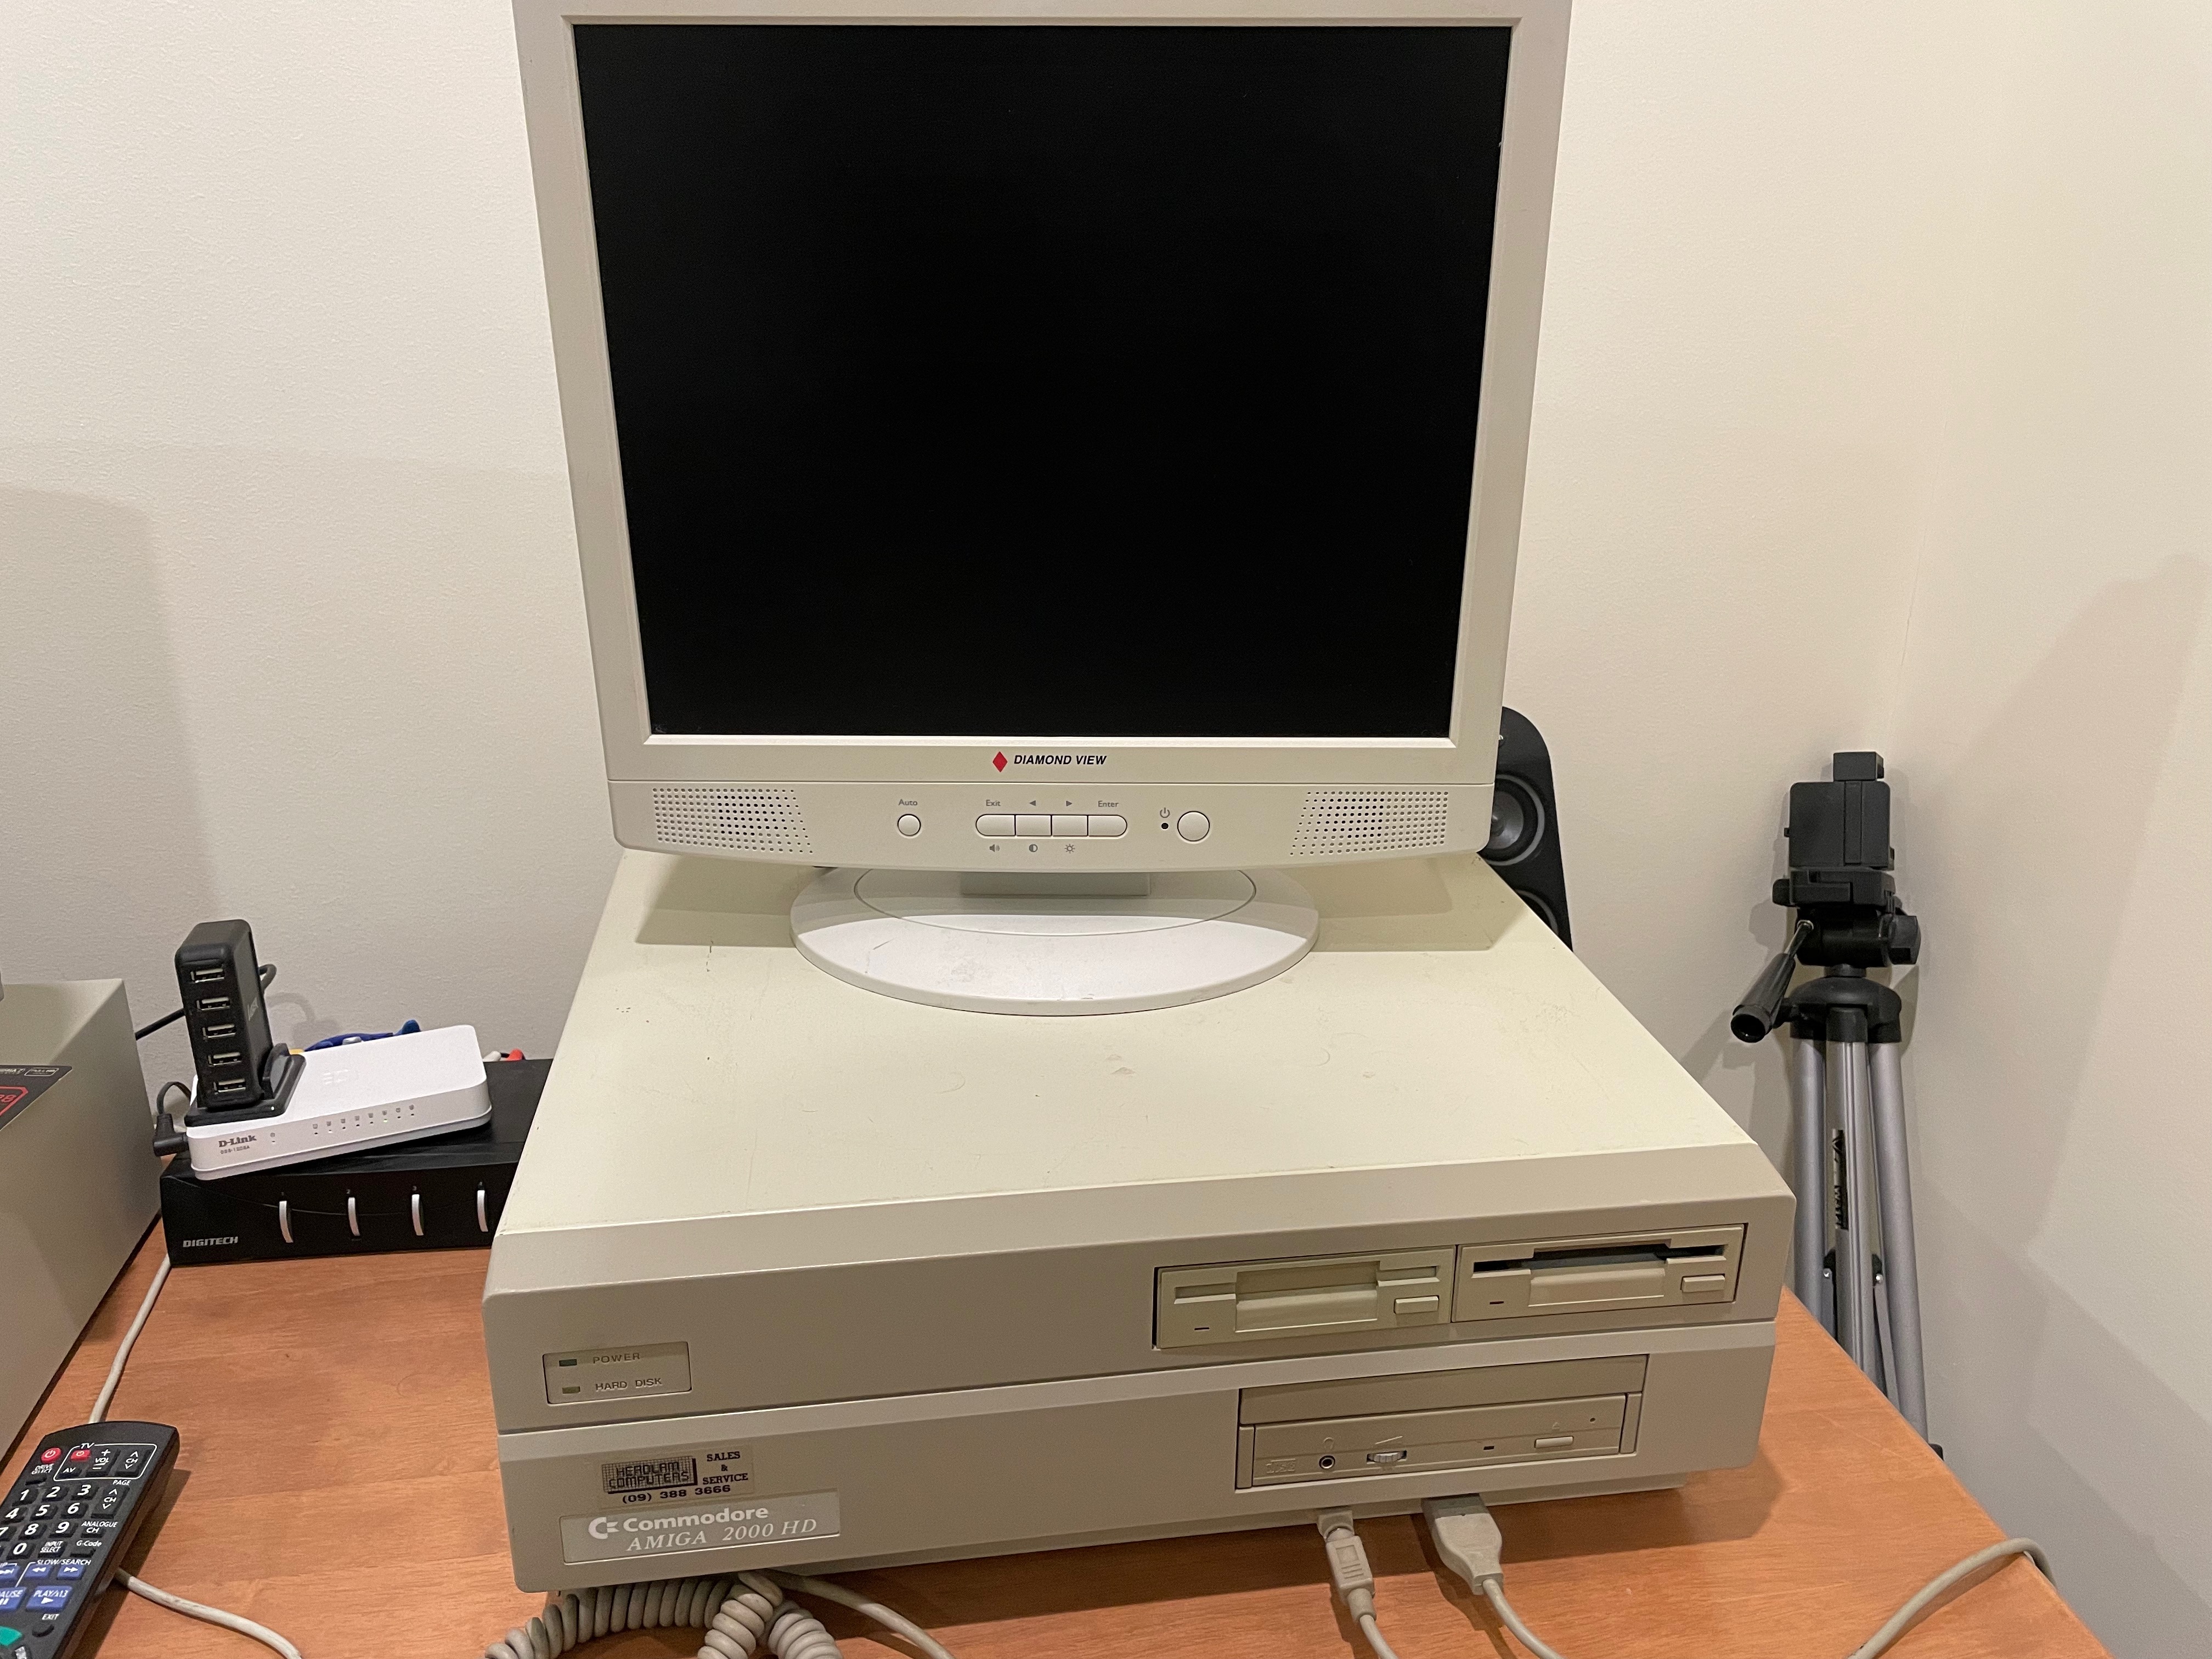
This Amiga 2000 has followed me from Perth, to Alice Springs and to Adelaide, where it has always been setup for use. Here is a photo of the setup in Alice Springs in the early to mid 1990's. I was so much younger then too!
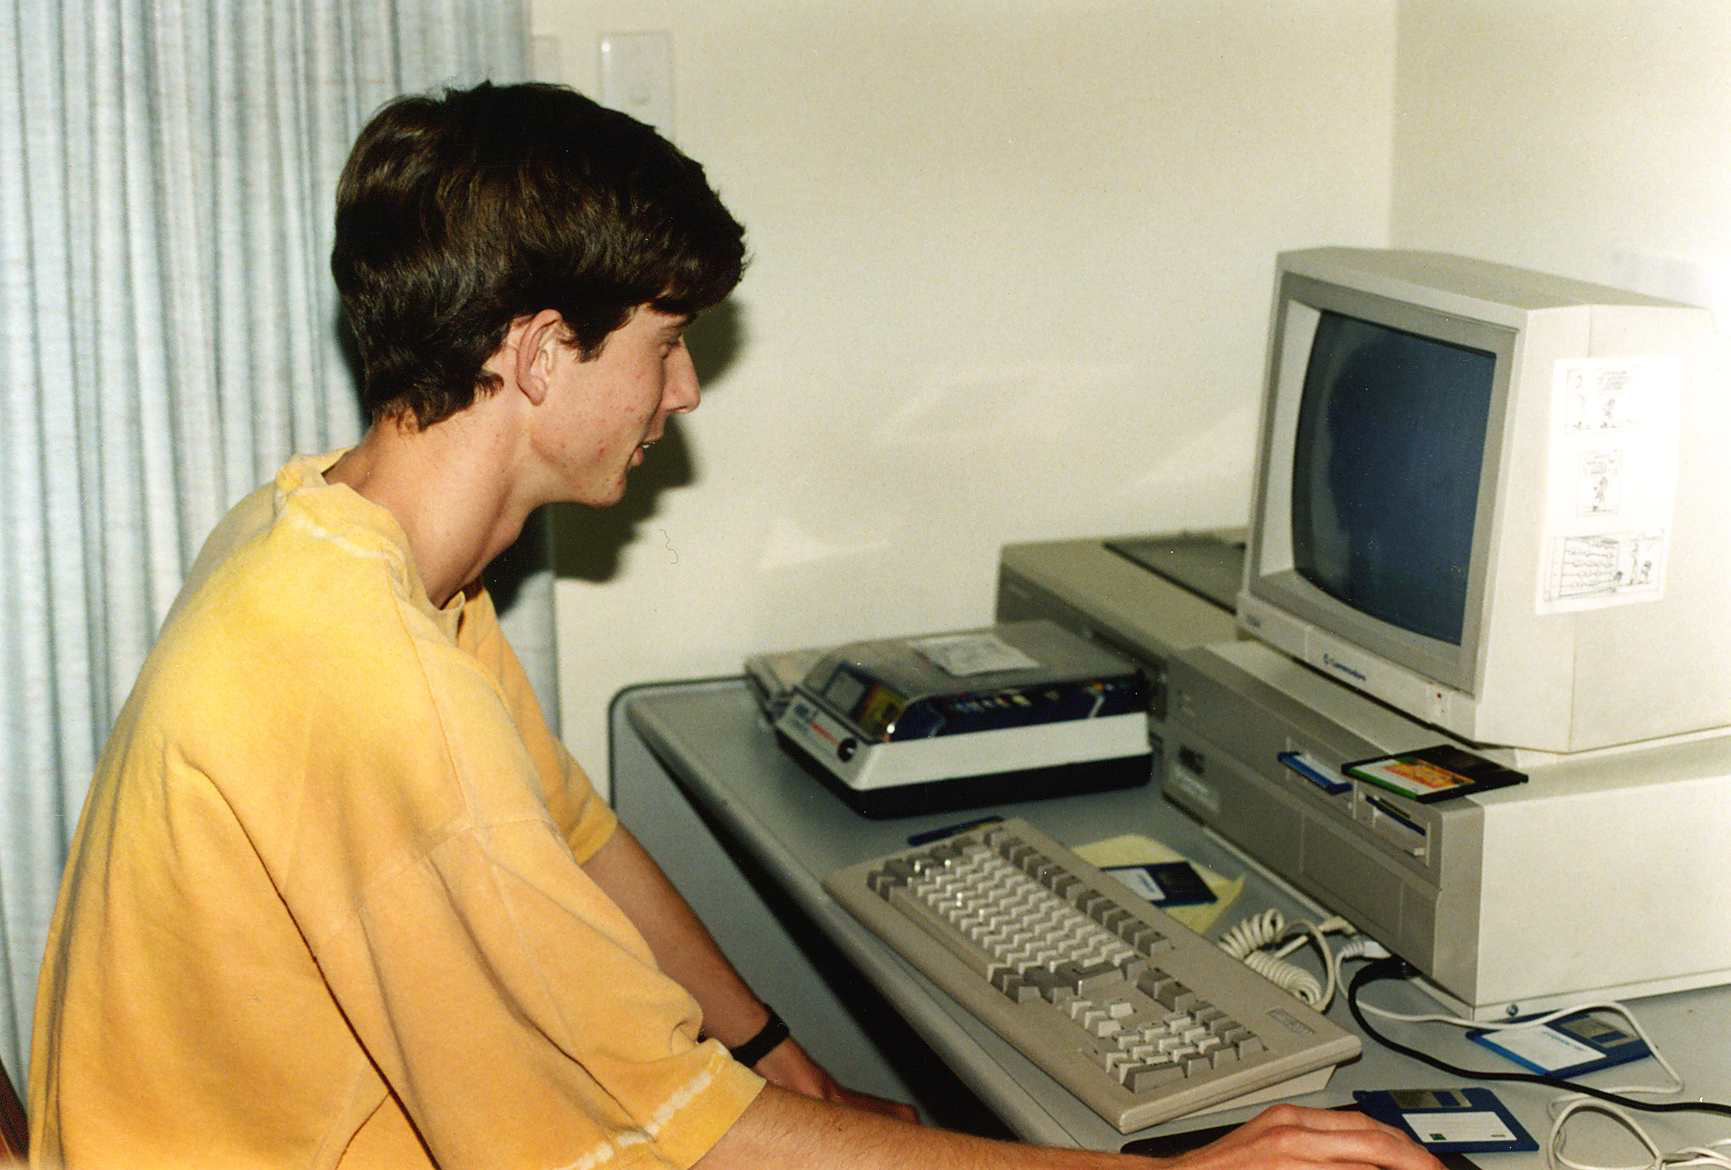
I did all my High School assignments on it, I connected to BBS's regularly with it, learned how to program Assembly on it, used MIDI connected with a Piano with Sequencer One and learned how to do tracked music on it using Protracker! This is just a taste of many things I did with it!


Excited to get to work I prepared my Amiga 2000 for it's heart transplant operation.

I have lost count how many times I have opened this system to do upgrades on it...

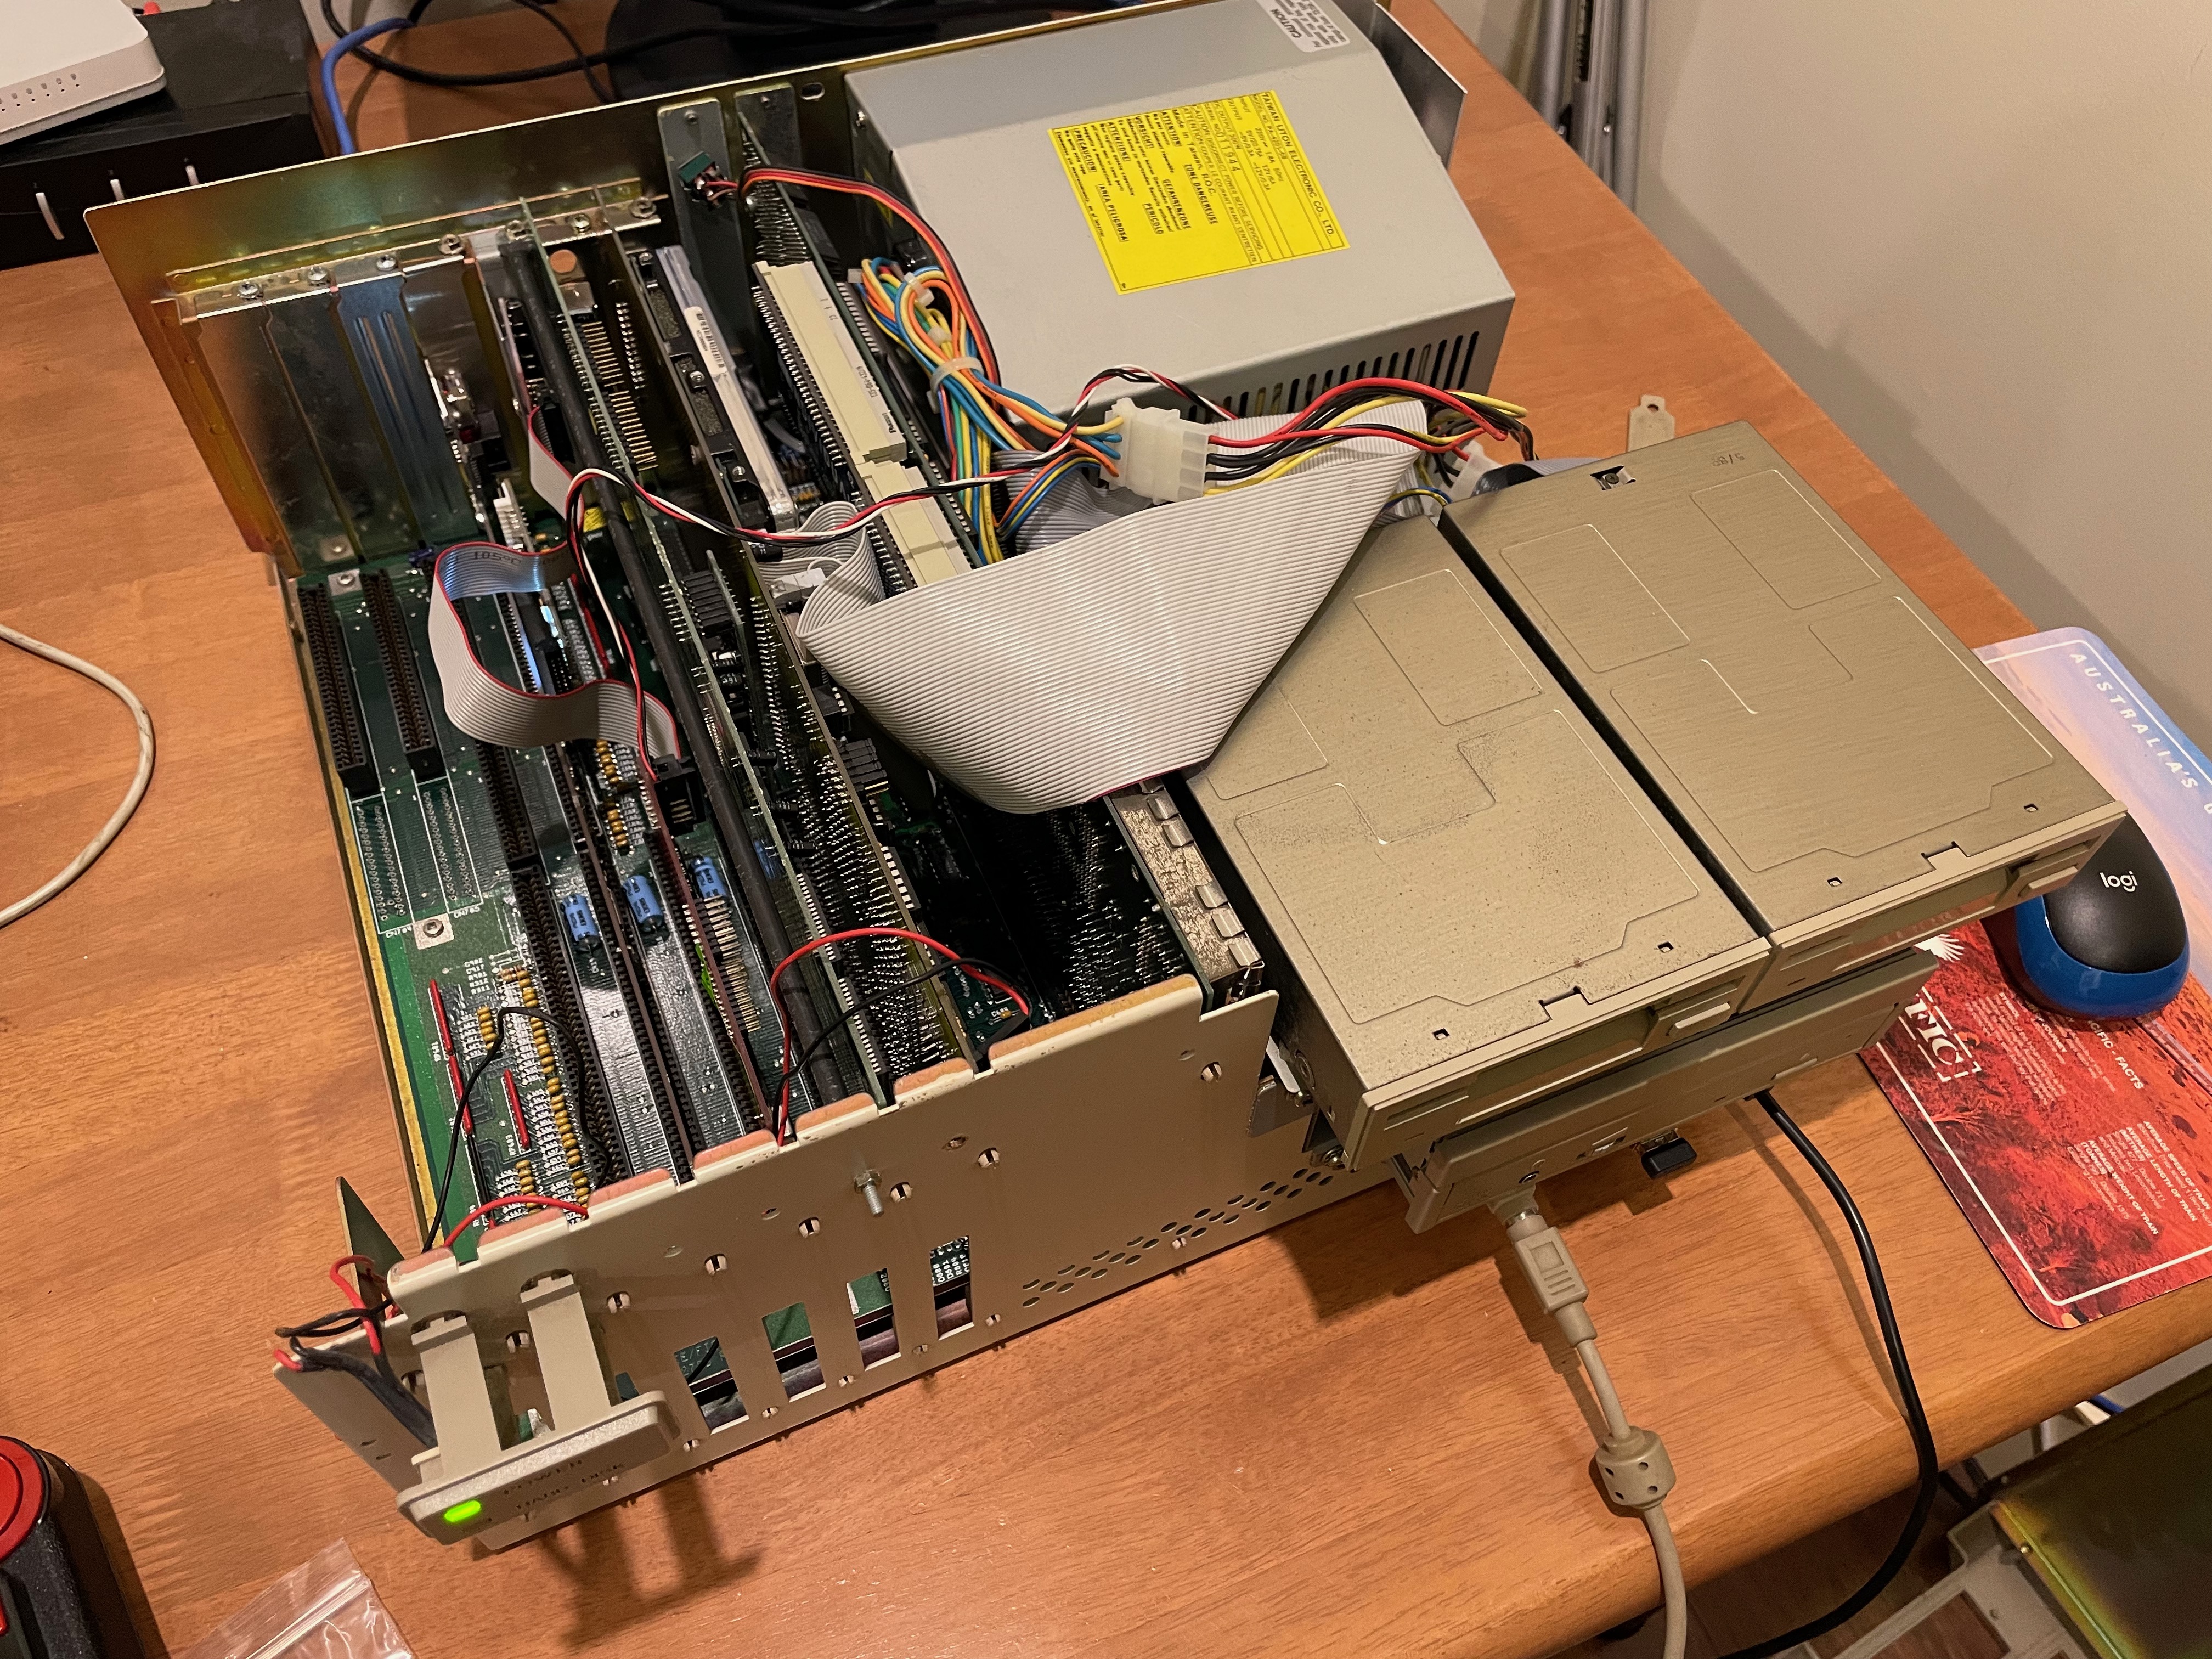
This time though I am pulling it all apart. First step removing all the Zorro cards and CPU accelerator.

That done, I removed the power supply frame that holds the 5.25 and 2x3.5 floppy drive bays, exposing the motherboard.

My Amiga 2000 has MegAChip 2MB expansion, Kickstart v1.3/2.0/3.1 multi-selector (with switch mounted on rear of one of the rear slots), and Indivision ECS for scan doubled video output to my TFT screens.

Here is a closer look at the MegAChip, Indivision ECS and Kickstart Multi-selector:


Checking the faulty mouse port, I had to laugh. I remembered when one of the family (can't remember who) managed to break the mouse port by pushing too hard on it trying to swap the mouse for a joystick for a two player game of Lotus...

My Dad pulled apart the system, soldered the port back on, and screwed in the port to the board to make sure it never moved again!

I then photographed and noted the jumper positions on my original board, as I remembered that I need to adjust the jumpers to support two internal drives on the new board.


I then removed the Indivision ECS and kickstart switcher and removed the motherboard from the case.

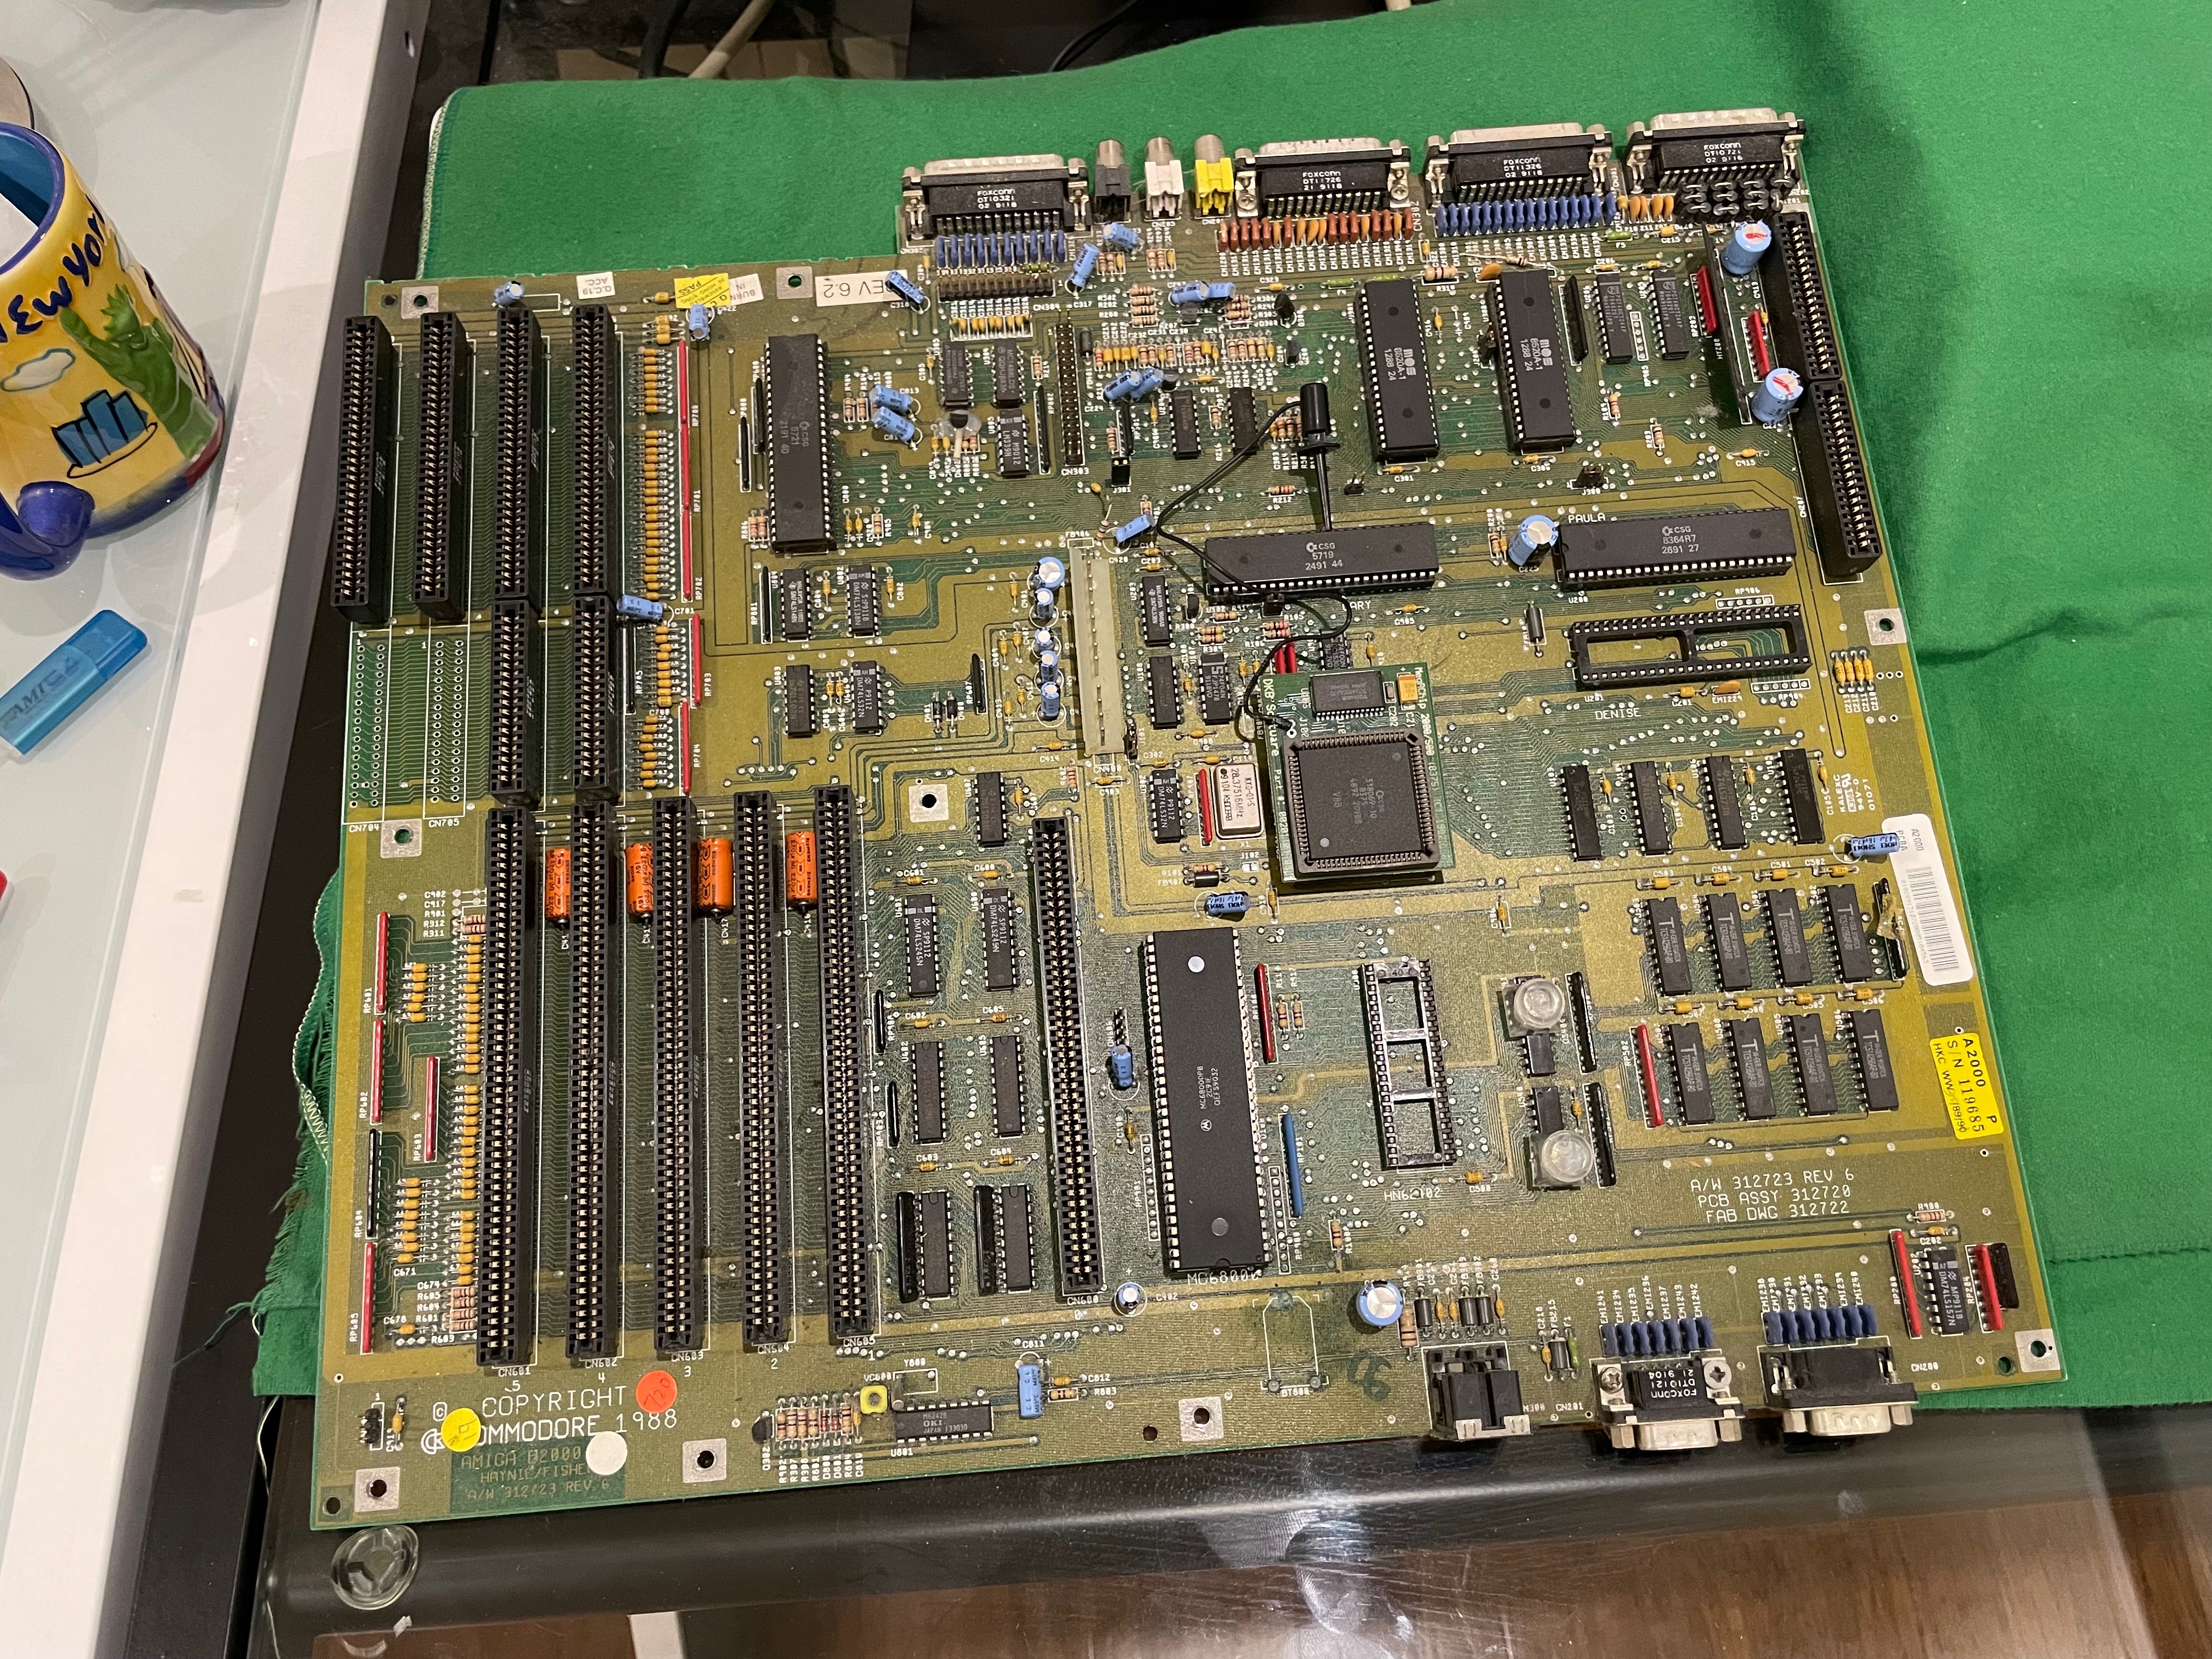
Here is the naked Amiga 2000 case, waiting for its new motherboard.

The new motherboard came with all the screws for it, and also a safe Real time clock easily replaceable button battery to connect to the battery location on the motherboard.

As mentioned, the new motherboard is the same revision as my current one.

I then installed the new motherboard into the Amiga 2000 and fitted the power supply frame back in.


It worked! I was so happy about that - it was my biggest worry.

I ran the latest version v1.20 of the Amiga Test Kit disk I have to check everything and all appeared fine, audio fine, memory ok, and the mouse WORKS!!! :-)


That done, I now set to work upgrading the motherboard to have the upgrades I had installed on the original Amiga 2000. I noted when removing the Denise Chip to install the Indivision ECS that the Denise chip on the new motherboard was newer than the one I had on the old one.

So I swapped the Denise chip on the Indivision ECS accordingly.

I then installed the MegAChip 2MB chip upgrade onto the motherboard:

In this case, I observed that my existing Chip version on the MegAChip was newer than the one on the motherboard, so I kept my newer one. I put the older one on the original board.

Installation of these pieces done:

I then powered on to check these both worked ok.

Powering on the Amiga 2000, and running the test kit disk again, I could see the 2MB chip and obviously the Indivision ECS worked (otherwise I wouldn't see anything!)


One of the big changes I wanted to do with this Amiga 2000 upgrade was to implement the latest 2021 AmigaOS 3.2 kickstart ROM in place of the v2.0 ROM. I bought physical AmigaOS 3.2 kickstart roms for most of my Amiga systems a while ago:

The intention is to build a new Amiga 2000 system based on AmigaOS 3.2. The old one used a 1GB physical SCSI hard disk running AmigaOS 3.1.

I then powered on the Amiga 2000 to test each of the kickstarts in turn, powering off in between each test to switch the rom using the switch on the back on the Amiga 2000.

The AmigaOS v1.3 and 3.1 rom chips also worked fine.

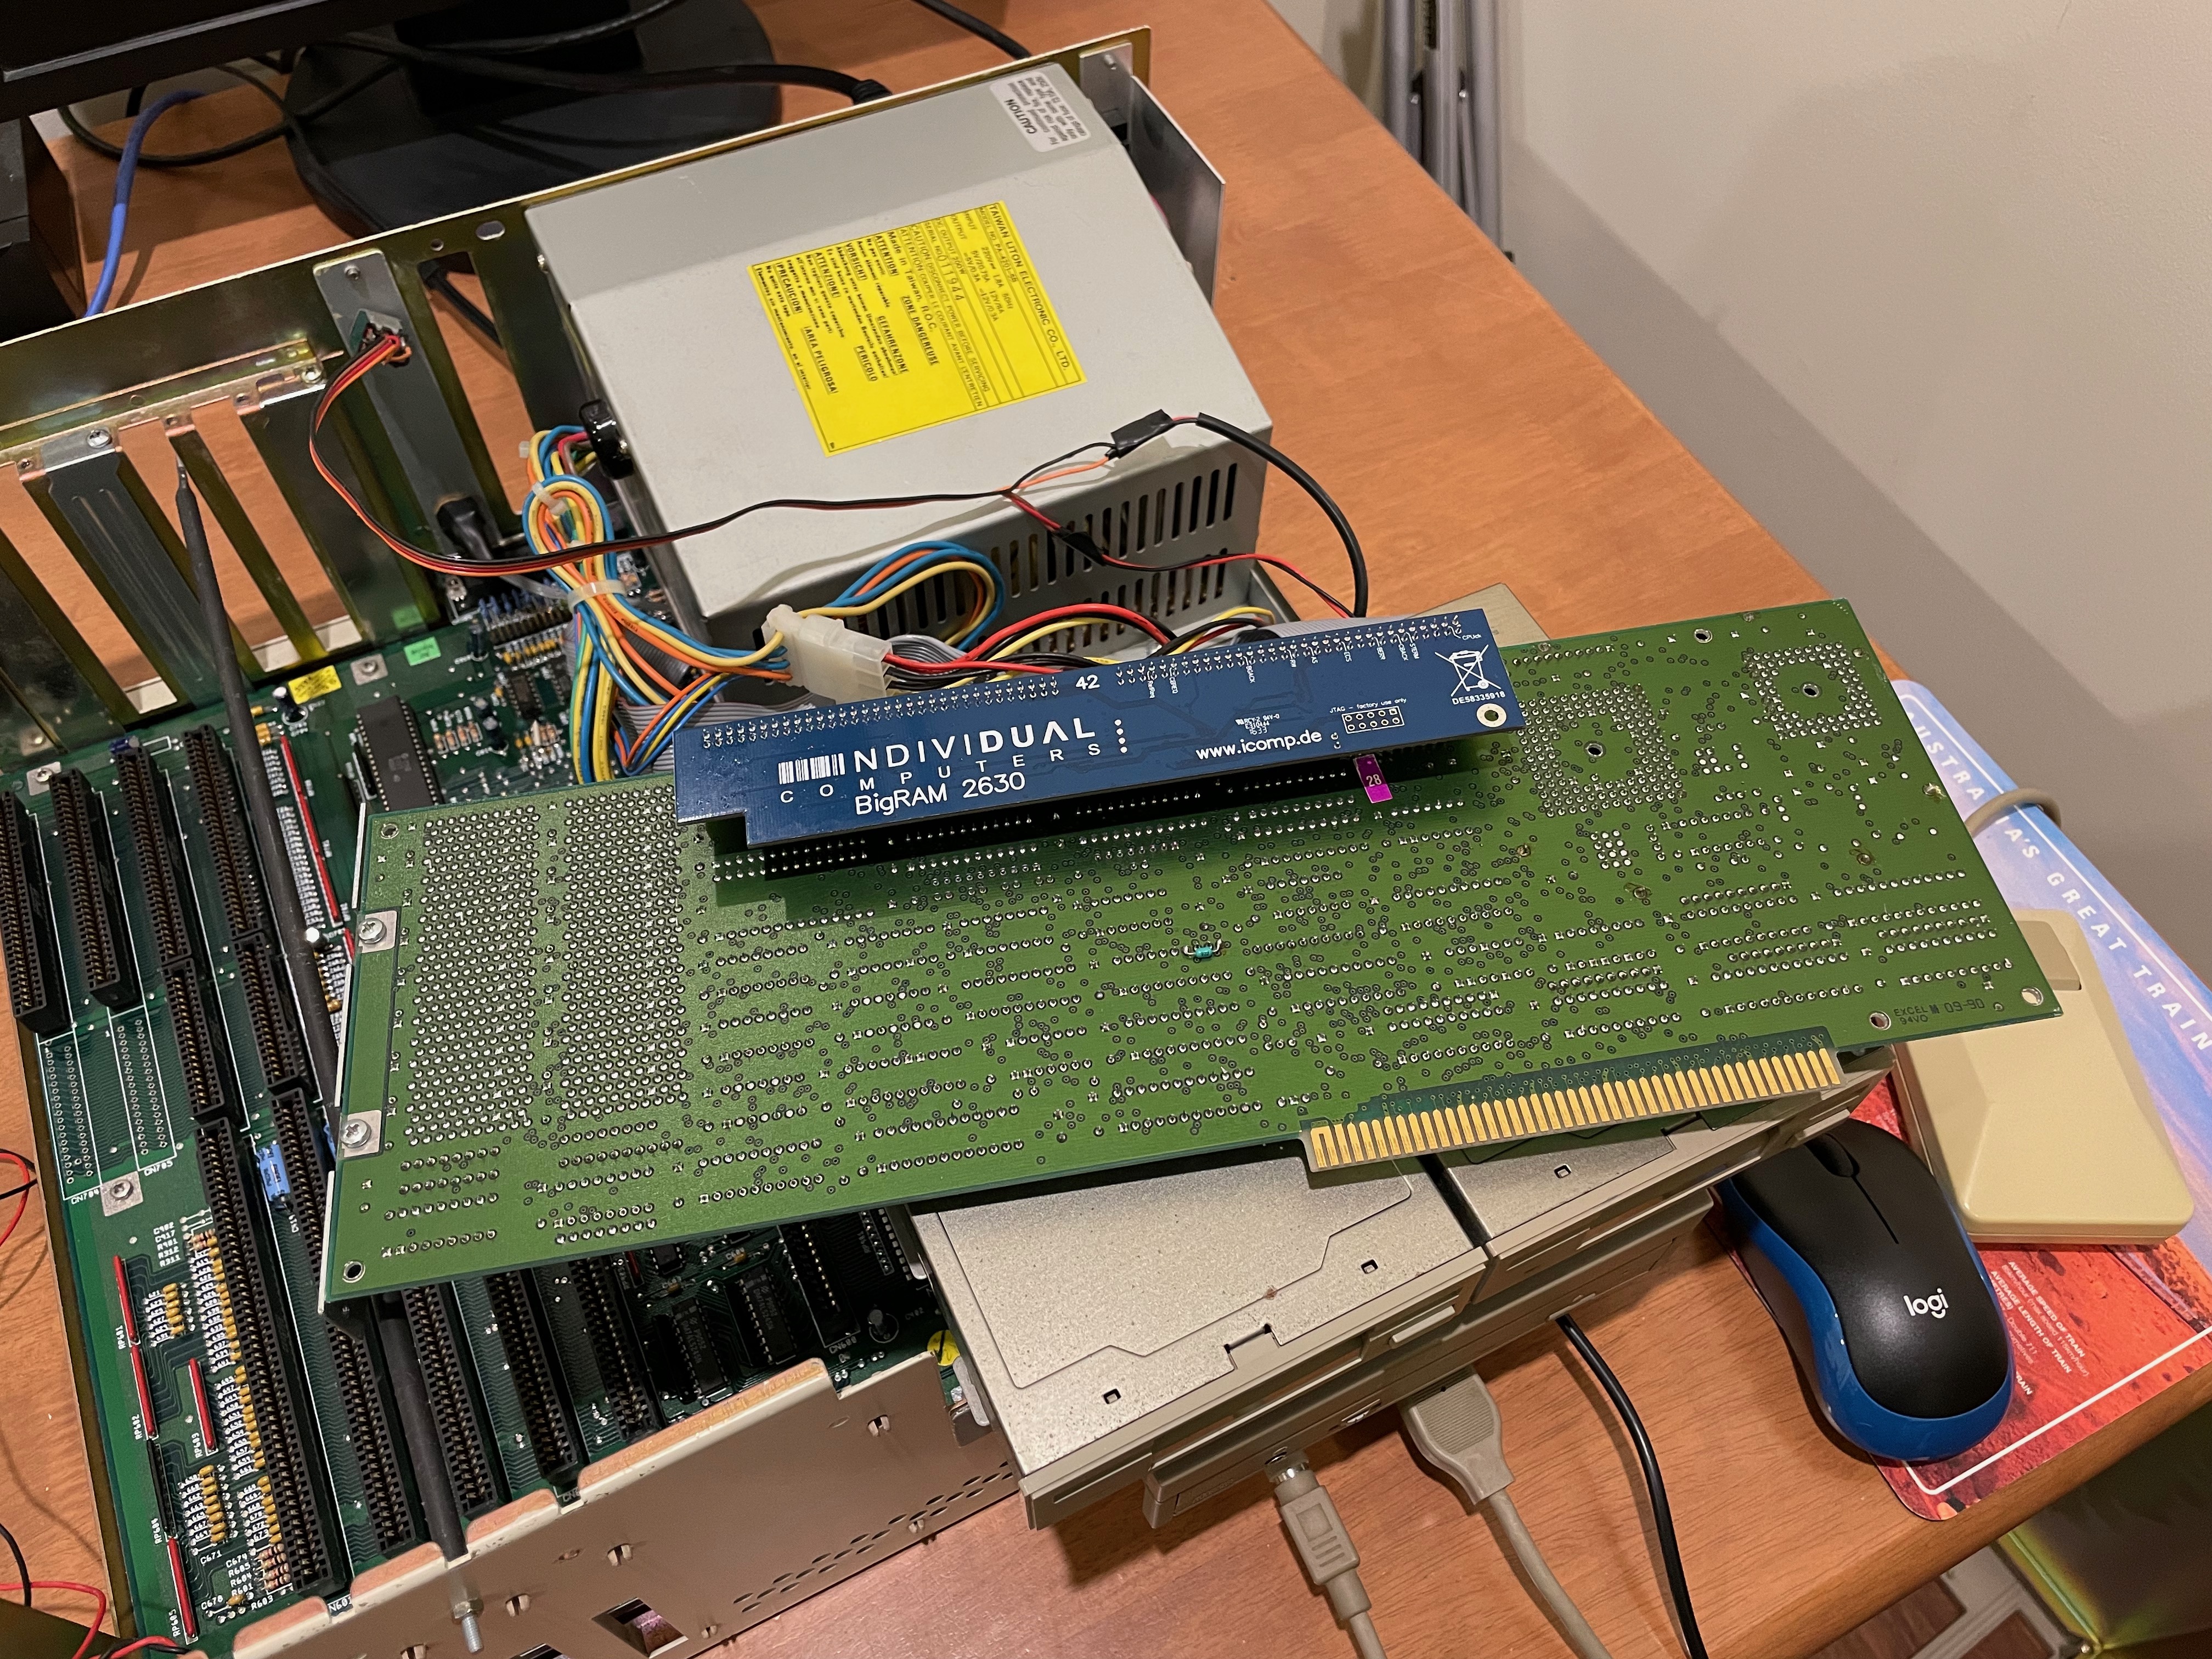
Next I started work on installing the 68030 accelerator (with FPU) and Individual Computers 119MB fast memory upgrade board on the back.


Running the Test Kit disk again after installation, I confirmed the 68030 CPU was detected and the 119MB fast memory also.


The next step was installing the Octagon 2008 SCSI card with hard disk. It also connects to the Toshiba SCSI CDROM I have in the 5.25 bay. I don't intend to keep using the hard disk attached to the card, but for testing everything was working, it was easier to leave it there for now. It was built already - just need to use the 3.1 kickstart rom temporarily for testing.

I use this SCSI card as the 2091 card was limited to 1GB hard disk due to the version of the SCSI roms installed in it. I don't have that restriction with this board.

I also installed the Prisma Megamix card, which allows playback of MP3, FLAC audio files in hardware. I used to have it on my Amiga 4000D, but I decided to use it in my Amiga 2000 as part of this upgrade.

Last, but not least, a Picasso IV Zorro card. I used to use a Picasso II card in this Amiga 2000, but I moved it to the Amiga 3000 as part of the work I did on that machine (since the Amiga 2000 wasn't working properly it made sense at the time). So I need a new card that works in the Amiga 2000.

I am aware that I need to "break" the card to use it in the Amiga 2000 - that will come later.

I switched the Amiga mouse for a wireless mouse by using a wireless mouse adapter I bought last year.

Pleased to say it works great with the Amiga 2000 too, now I have a motherboard with a working mouse port again!

Only one free Zorro slot remaining!

Powering on, I tested the X-Surf and USB worked as expected.

I then installed the Picasso IV drivers so I could test the card worked. I know I have to do more work to break the card to run to the video slot, but I can test the RTG with another screen.

So I stole the Amiga 4000's screen temporarily to test the Picasso IV and pleased to say it was working great.

Playing around with Picasso96 mode to get the resolutions right is frustratingly slow, but I got therein the end.

I can now use the Workbench on the Picasso IV in 24bit colour at 1024x768. Nice.

Looks fantastic.

Having confirmed it works great, I then powered down and removed the Picasso IV for it's "procedure" to pass through the scan doubler to work in the Amiga 2000 with one screen instead of two.


That done, I could save the configuration for rebooting:

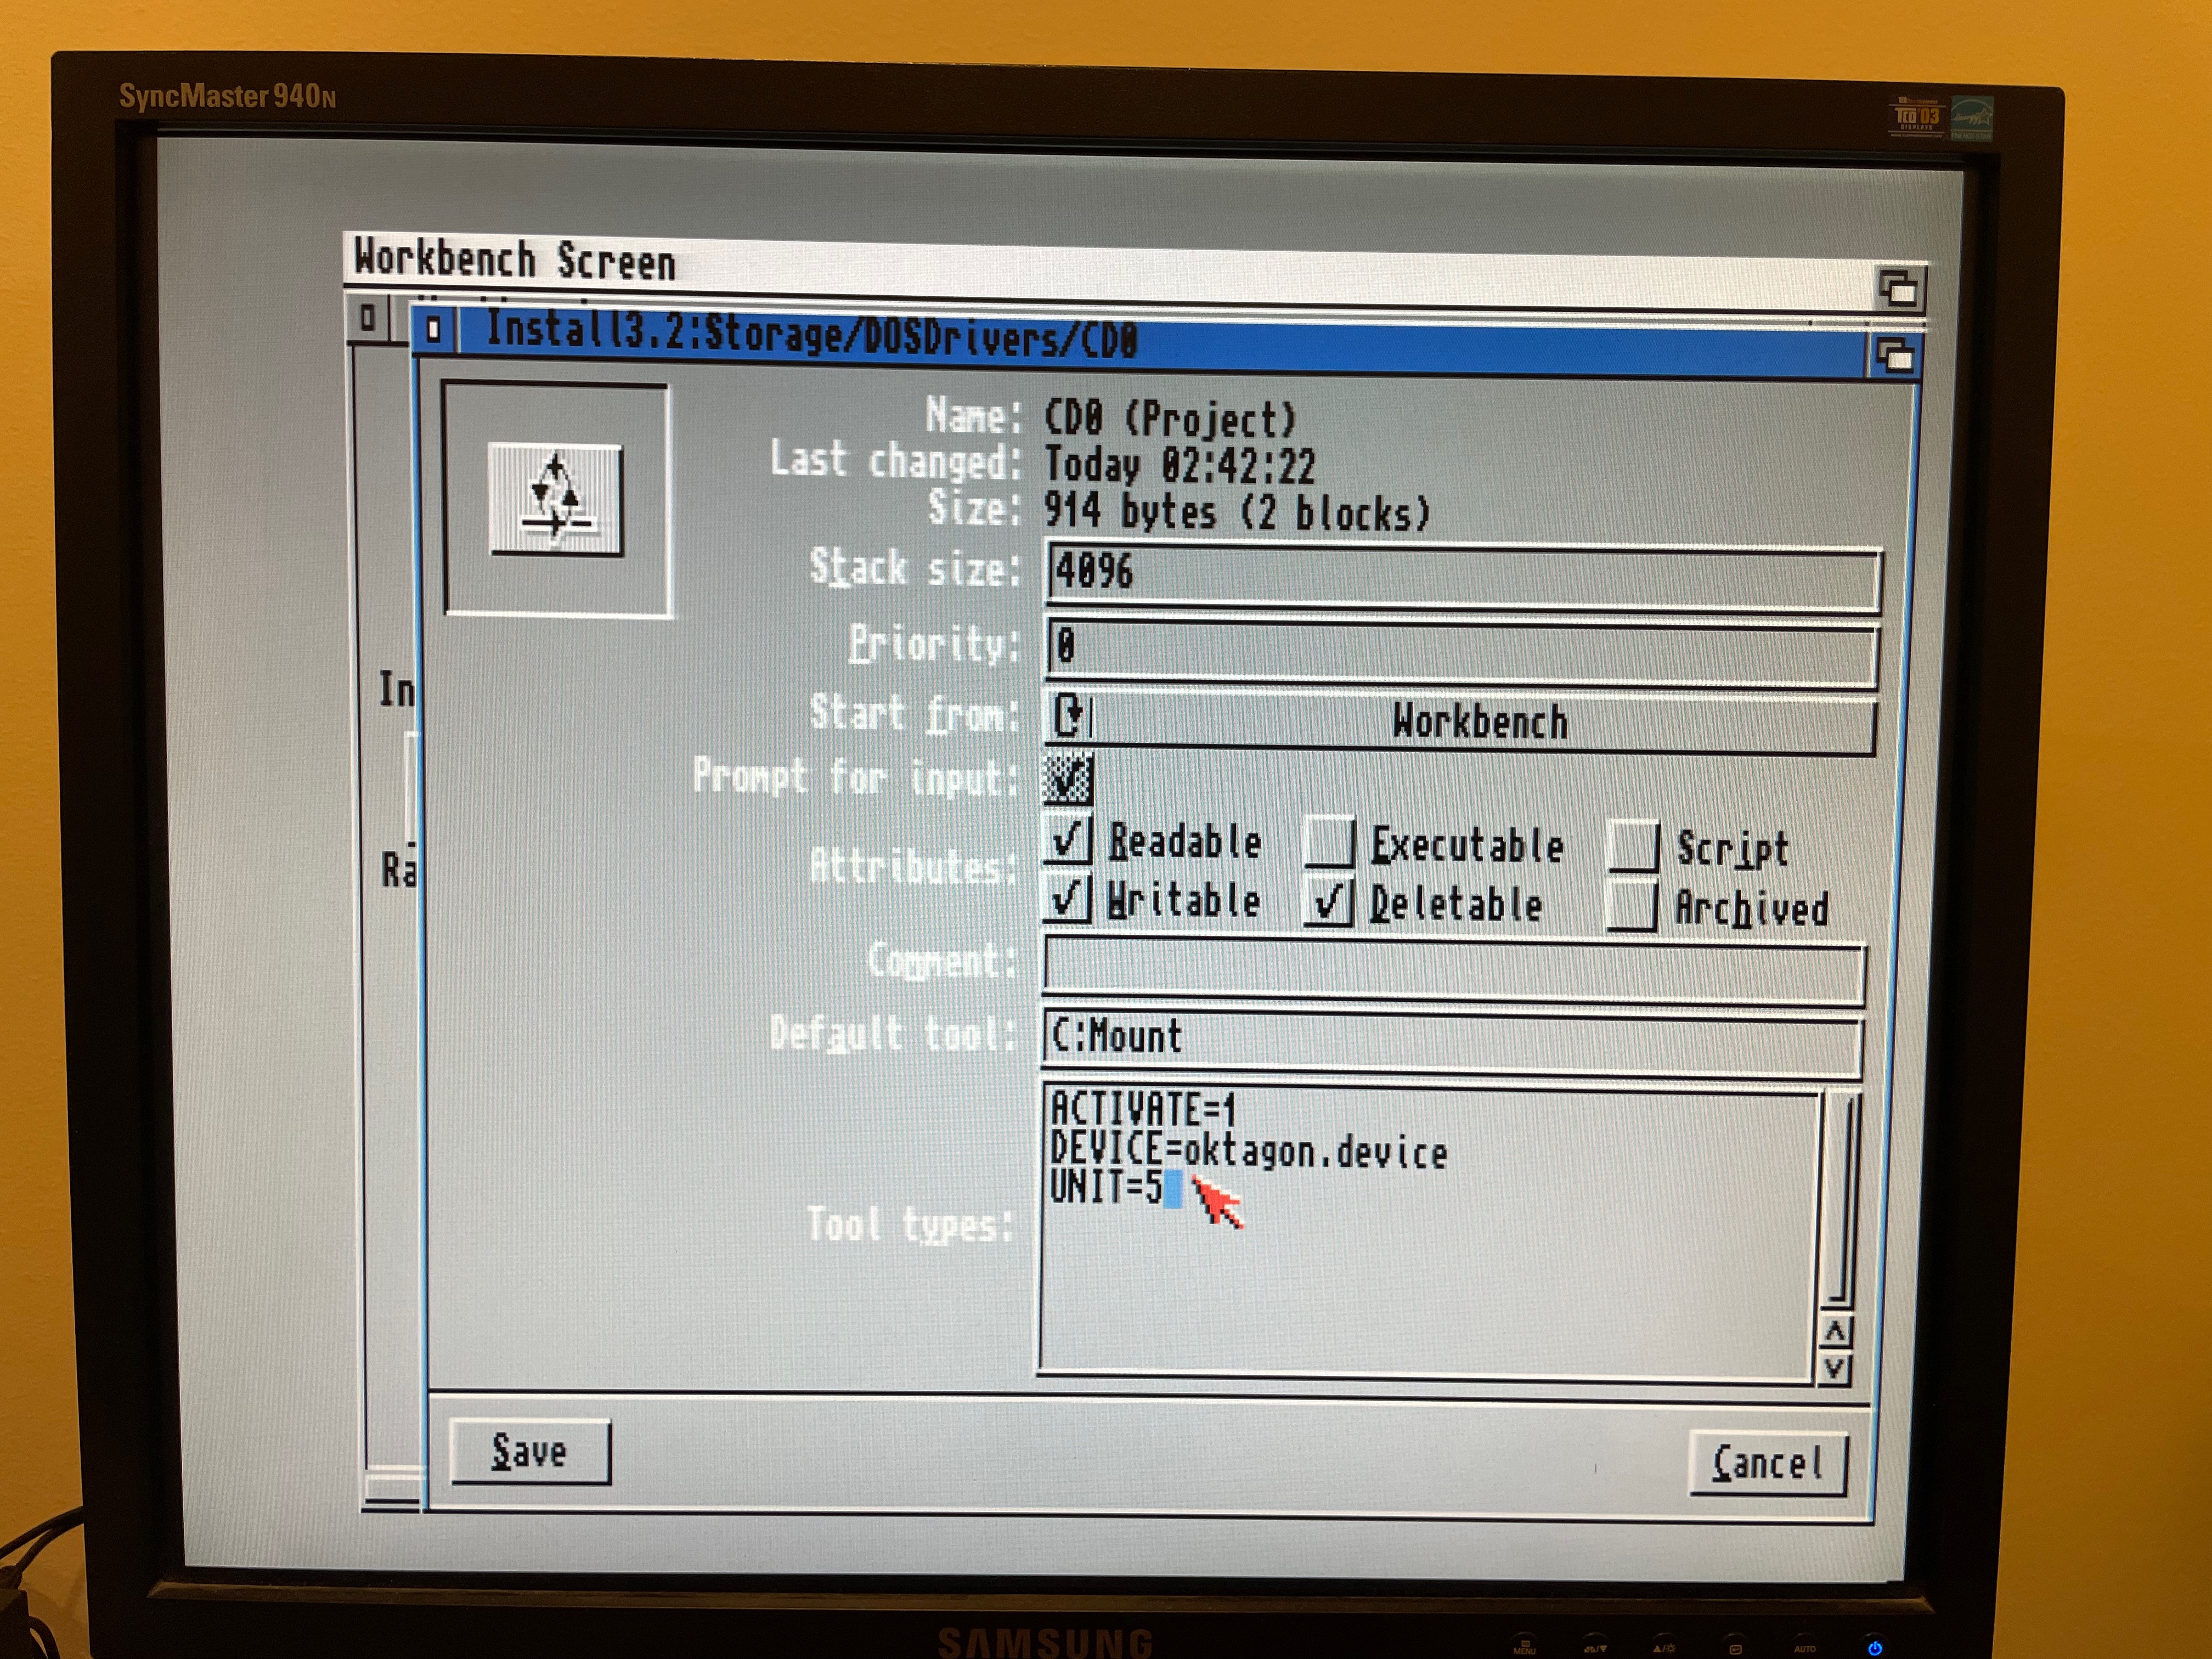
Reboot done, I then modified the CD0 mount from the AmigaOS 3.2 install disk to use the Oktagon.device and the right SCSI ID. For this install, I plan to use the AmigaOS 3.2 CDROM since I have a SCSI CDROM drive in the Amiga 2000. It will be a lot quicker than using physical floppies.

That done, I could then run the Activate CDROM program from the Install disk to mount the CDROM drive.


It worked, and the CD mounted and showed on the Workbench screen:


I ran the HDToolbox from the Install floppy to prepare the hard disk partitions:

I decided to use a 4GB primary DH0 partition for AmigaOS 3.2, and a 10GB DH1 partition for data, labelled as Work. I decided to use the new Long Names FFS file system for both partitions.


That done, I committed the changes and rebooted when prompted:

After the reboot I could format both partitions successfully, which meant I could now start the AmigaOS 3.2 installation to the newly formatted hard disk.

Nice thing about using the CDROM for the installation is it doesn't need me to sit there and swap floppy disks the whole time - it mounts each disk virtually as an adf files from the cd and runs through the installation. I chose to use the Glowicons.


Once AmigaOS 3.2 installation was completed, I reboot into the new environment on the Amiga 2000 from the SCSI2SD for the first time.


I then setup the CD drive again from the hard disk now - no idea what the installer doesn't take the working setup I did on the install disk as part of the installation though!

I then installed the MuLibs to install the 68030 libraries to remove the nag screen on boot that reminds you that you need to do this if you have a 68030/040/060 accelerator installed.


With that done, I decided to reassemble the case for now.

In case you are curious, I am using the Amiga 3000 keyboard on the Amiga 2000 as I had put the Amiga 2000 keyboard o the Amiga 3000 a long time ago as the A3000 keyboard is not the most attractive condition, with bad yellowing on it. I will probably swap them back now that the Amiga 2000 is working well again.


With that done, I got the Rapid Road USB working:

I then set to work on the data transfers, which has taken most of the weekend!

While waiting for the data transfer, I set to work on the Picasso IV card's "procedure" so it can be used with one screen on the Amiga 2000.

It involves "breaking" the video slot portion of the card (shown below), and using the the ribbon cables above to connect the ports. This then allows the video slot portion to be physically installed in the Video slot on the Amiga 2000, which is on the opposite side of the motherboard, and not in-line with the Zorro slots, unlike every other big box Amiga!

The manual suggested to break the parts connecting the sides of the video slot section to the main PCB and then "rock" the video slot part back and forth until it breaks. To say I am nervous about breaking an extremely rare and expensive graphics card doing this work is an understatement!


I managed to get the video slot part broken off without appearing to damage it. (hopefully!)

I then connected the data cables as instructed to the video slot module, ready for installation in the Amiga 2000.

I need to locate a CDROM CDDA cable as well - I seem to misplaced the one that came with the Picasso IV...more likely I used it on another project...

At this point I ran out of time for this weekend. The data copying is still going, and I can't install the card until it finishes.

I have upgraded it many times over the years...
Most recently the upgrades shown on the blog are the Amiga 2000 Vampire 500 accelerator build (Part 1 and Part 2) and restoring back to a 68030 accelerator setup with new fast memory board upgrade in 2017.
Sadly not long after that the mouse port stopped working completely, and some other weird things too. This then stopped me using it anymore...for the last 4 years it has been used for watching ECS demos that didn't need the mouse...
Needless to say, the Amiga 2000 holds a special place in my heart. I really wanted to fix it.
I knew I needed to replace the motherboard as I lack the skills to fix the hardware issues on the board.
One of the challenges of replacing the motherboard is that all Amiga 2000 systems came with a real time clock battery mounted on the motherboard near the CPU socket.
Unfortunately the battery eventually leaks badly onto the board (when they are left there without being pulled out), and sadly most Amiga 2000 systems for sale these days have large damage from this leaking.
The boards or systems for sale are badly damaged boards of unknown state (ie. not working), or confirmed actually not working....
Taking a gamble on these Amiga 2000 systems was not something I was willing to do, as they cost too much to potentially end up with a non-working board. Often people didn't show photos of the battery area as it is hard to get to on the Amiga 2000 without pulling it apart...
So it took a long time to take the plunge on a replacement motherboard. I picked this one as the seller had restored this one, cleaned all the (small) battery leak damage, and tested and confirmed operations.
It took a while to get here, but this week it finally arrived.

The board looks very clean, in good condition. Same version revision 6 as my current board. It came with the original chips, kickstart rom (v3.1) and CPU.


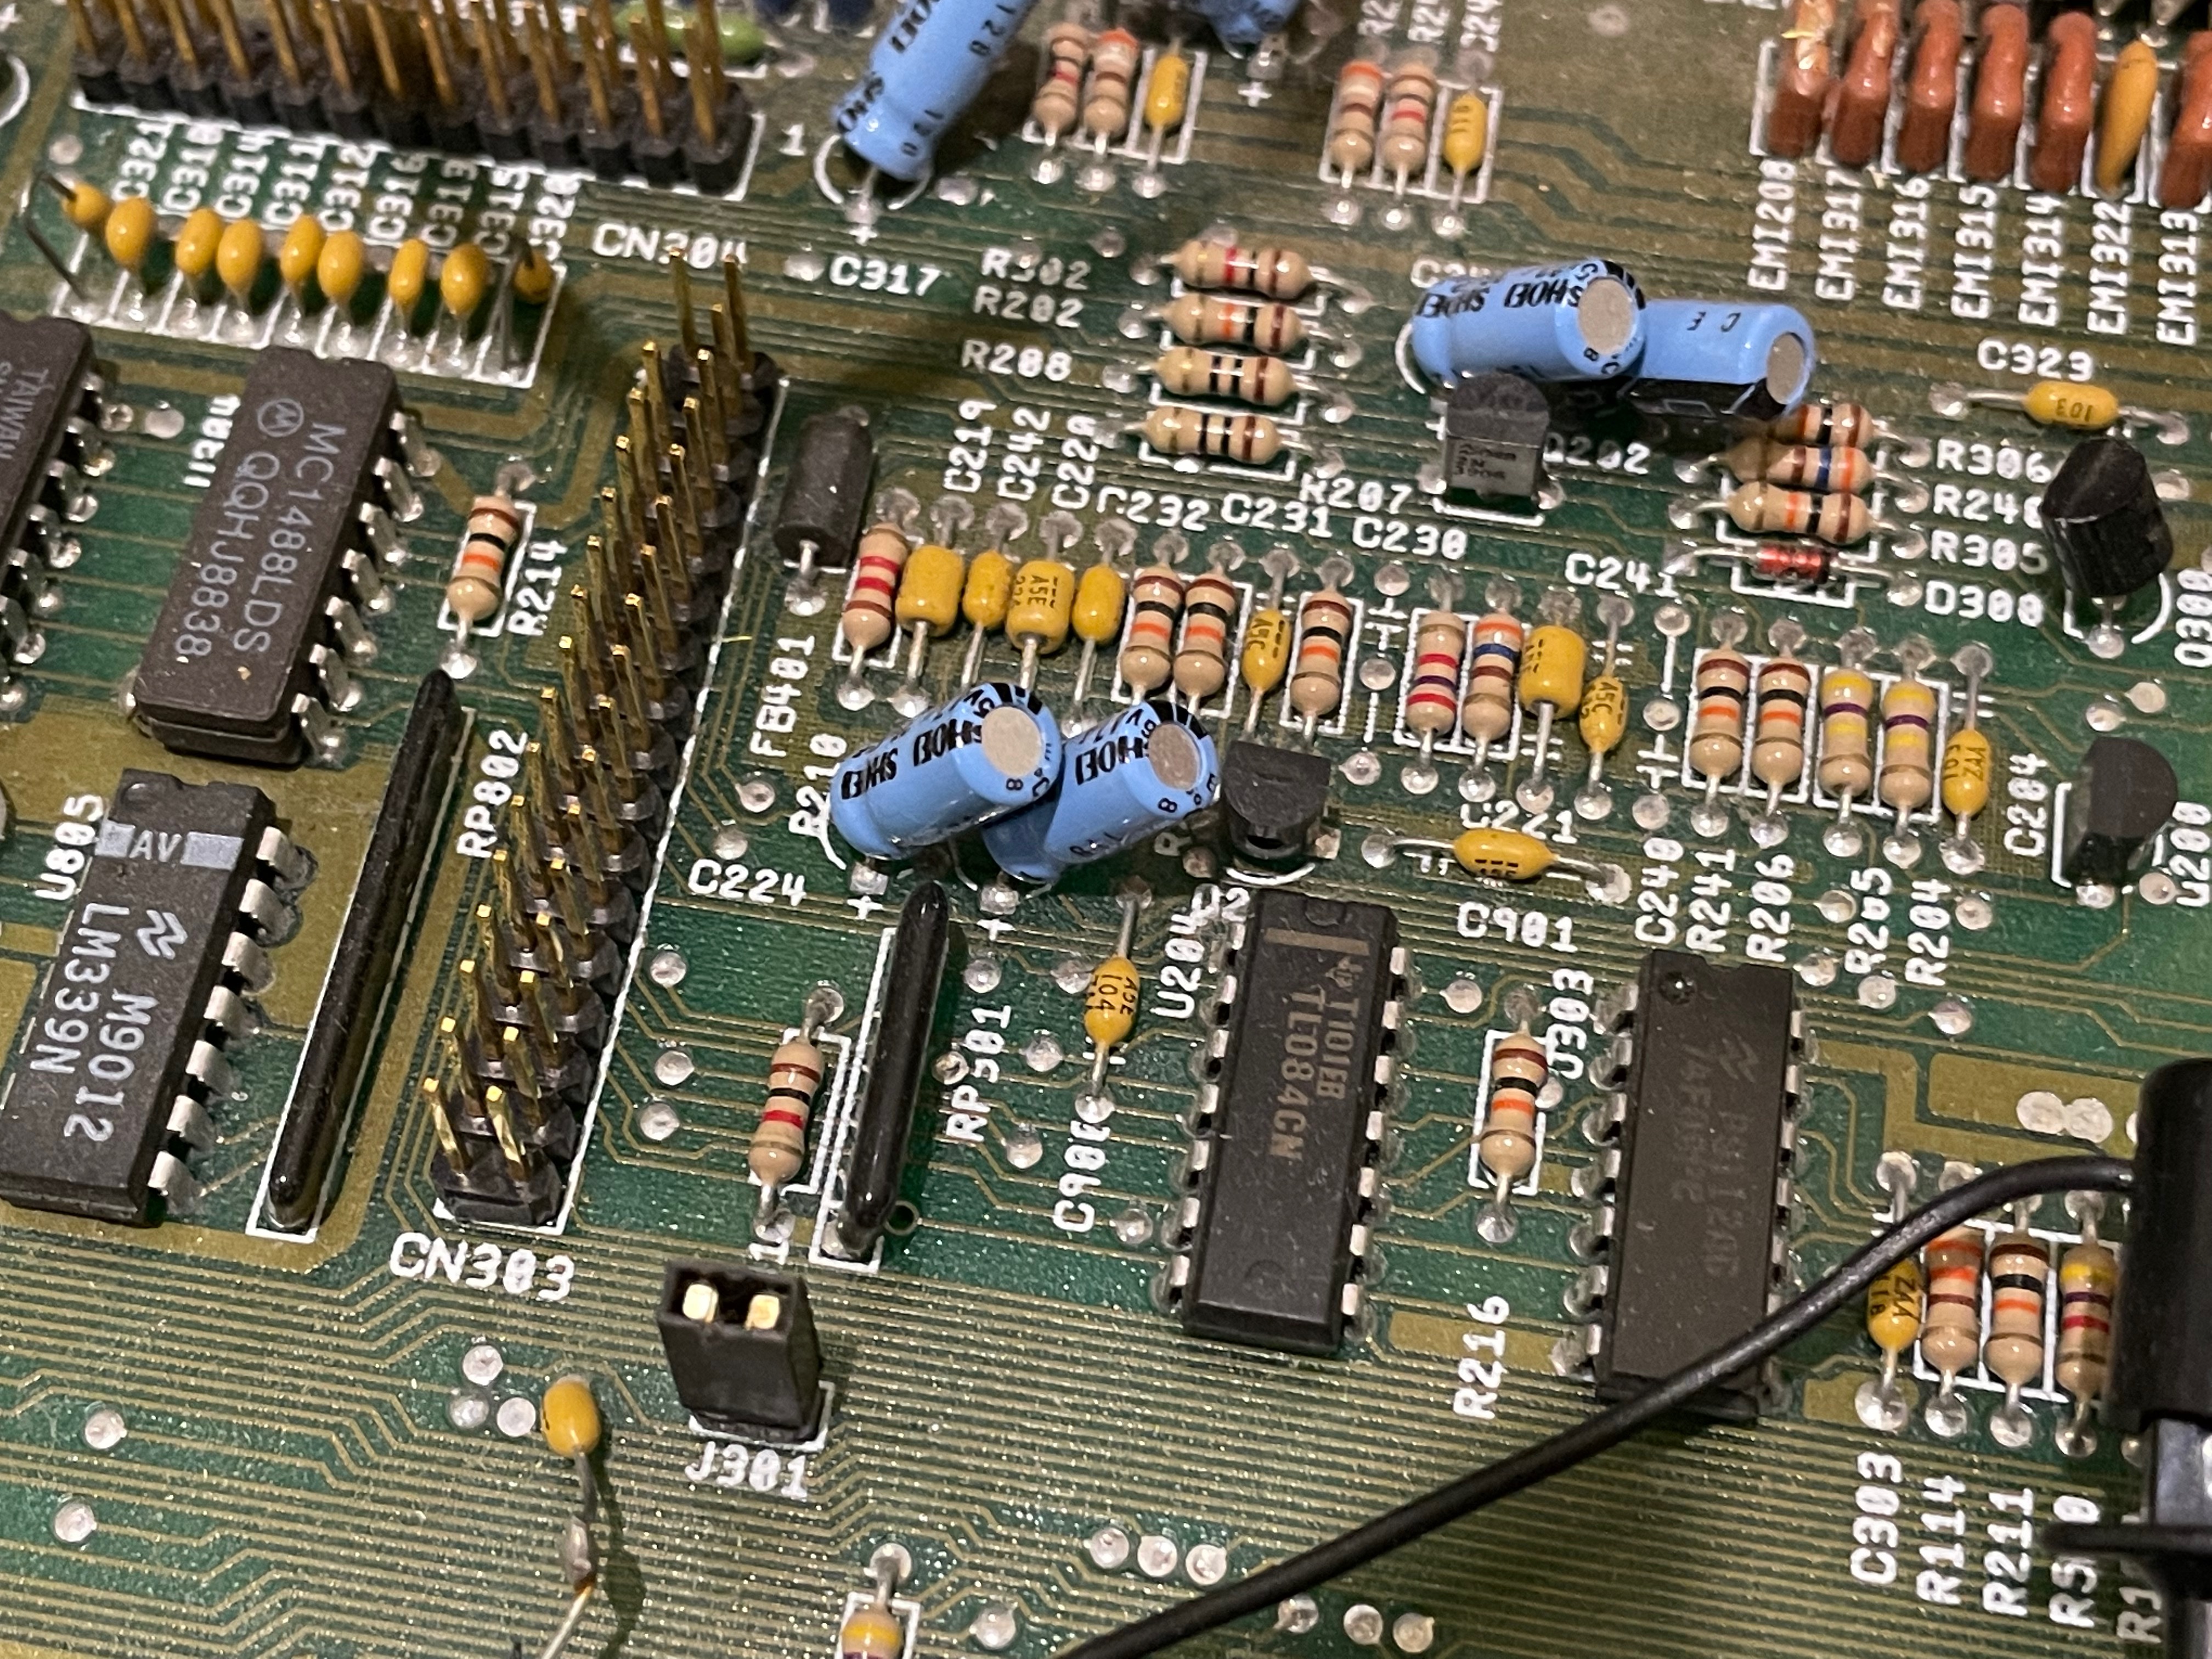
You can see the small battery leakage on my Amiga 2000 board too. I don't know if that is what led to the inoperable mouse port - who knows? I will keep the board in case someone can help me fix it.


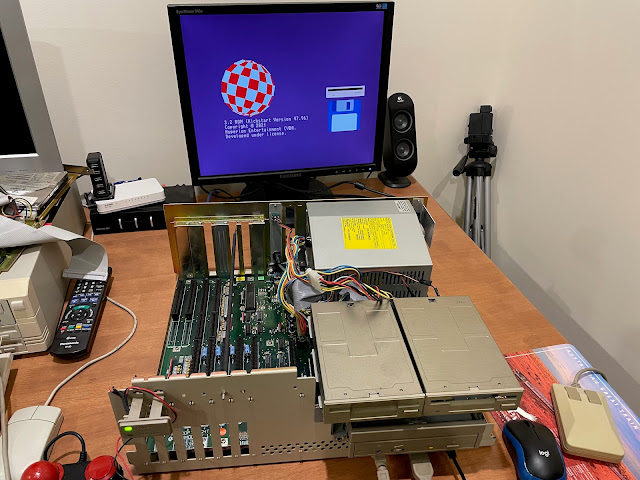
Initially I wanted to confirm the system was working, so I didn't add any upgrades to it, and used an external RGB to VGA scan doubler to confirm the system worked before proceeding any further.


I then ran a 2022 Amiga demos - TEK's very excellent Transhuman demo, which worked perfectly.


Here is the kickstart rom switcher installed, with the new AmigaOS 3.2 rom installed in place of the v2.0 rom chip:

AmigaOS 3.2 rom chip is working great:


Next I installed the X-Surf 100 with Rapid Road USB module:


I couldn't use this Picasso IV in the Amiga 3000 as it was having Zorro 3 issues at the time that caused constant crashes with Zorro 3 cards installed in it. Hence the Picasso II was used instead.
With the Amiga 2000 working with everything installed, I was excited.


Here is a closer look at the cards installed in the Amiga 2000 now - getting full in there.


I also removed the old 1GB SCSI hard disk from the Octagon 2008 card. I plugged in an externally cased SCSI2SD to the external Oktagon SCSI port.
This has a 16GB MicroSD card in it, which I thought should be enough initially for what I am working on. Coming from a 1GB hard disk before, this is quite the upgrade!
I switched the Amiga 2000 to use the new AmigaOS 3.2 kickstart rom using the switcher on the back, and then booted from the AmigaOS 3.2 install disk, so I could work on preparing the SCSI SD card for use.
I modified the HDToolbox icon to use the oktagon.device instead of the normal SCSI.device, so it would find my SCSI2SD hard disk - I needed to define a new drive definition and read the drive to create it. It detected the hard disk just fine:


Important thing I had to do when preparing the partitions was to make sure to select Direct SCSI Transfer in the options for each partition. If you don't do that, the format of the disks will fail (as I found out below!)
With that setting fixed, I set DH0 bootable, and then setup the other DH1 partition:


I plan to do a lot of data transfers and setup work, which involved leaving it running unattended for a while. So, I set to work on setting up Poseidon USB stack so I have Rapid road USB support to access my data from other Amiga systems.


Contrary to the instructions in the manual, I was nervous about breaking it and really didn't want to bend back and forth too much, for fear of breaking the main card, especially given the age of the card! So I used a knife to carefully wear down the connection points around the video slot until it was weak enough to easily break off.


I will continue work on this build and cover the remaining setup in Part 2 soon!