For those who may not be aware, Delitracker is a AmigaOS 3.x program which is used to play Amiga (and other PC format) module song files. Most commercial Amiga games prior to 2000 used modules for the in game music. If you don't know what a module song or how to make them using a Tracker is, then this Wikipedia entry will bring you up to speed!
On the Amiga, there were many different types of module files like MOD (Protracker, Soundtracker, etc), MED, CUSTOM, FollinPlayer(TF), TFMX, JCB, DW, OLDW and dozens more.
The issue is further complicated by Amiga modules being compressed to save more space (Powerpacker, XPK, etc) which required a decompression routine built into the module player to play them back!
On the PC there were also S3M, MTM, XM, ImpulseTracker (IT) formatted modules and many others too.
Delitracker supported nearly all these Amiga module formats, the PC module formats and even others like the Spectrum and Commodore 64 SID files!
These module formats all had their positives and negatives which is a topic too big to cover here! Ultimately modules were replaced by MP3, OGG, WAV and other modern day music formats as computers become faster and with substantially more memory, eliminating the need for space and cpu usage efficient module formats to be used.
So how do we play these module formats on the X1000?
Unfortunately most of the modern GUI music players on the X1000 I know of (eg. TuneNet, Schismtracker, Milkytracker) generally only plays the standard PC module formats plus some Amiga MOD and MED formatted files.
A command line module player on AmigaOS4 called UADE (Unix Amiga Delitracker Emulator) is able to play most (but not all) Amiga module formats, even CUSTOM format. However, it is CPU intensive and doesn't multitask well, breaking up audio when not in focus. It is also a command line based player which is crying out for a GUI. Seriously, can someone please write one for it!!
Screenshot below shows these programs in action on the X1000:

So we circle back to Delitracker, which I have been using on Amigas for over twenty years, right back to my Workbench 1.3 based Amiga 2000HD (which I still have!).
The last official version of Delitracker, 2.32, was released as freeware on www.aminet.net in 2000. It was never updated to work with AmigaOS4, and has many incompatibilities which mean it will lock up the X1000 when you attempt to play any module through it.
So, even though it is AmigaOS 3.x Workbench friendly (to a point), Delitracker has a lot of issues to overcome to get it to work on the X1000 under AmigaOS4.
My focus today is to cover the steps to install and config it so it works, with some limitations highlighted on what it can and can't do.
First, you need to download some files. You will need:
- Delitracker232.lha and AHI-noteplayer.lha from Aminet.
- Delitracker v2.34 update dt234.lha from here!
- timerhack.lha from OS4Depot.net.
Extract all these archives to the RAM: and let's start with the installation of Delitracker v2.32 first. Open the Delitracker_II folder in RAM as below, and then double click on the English installer (or whichever language you prefer) to get started:

The Delitracker install present a load of options so I include the detailed install progress screenshots so you can see what I did during the installation:


I installed in SYS:Utilities - it will created a Delitracker_II folder automatically:

Make sure all players in below screenshots remain selected and click Proceed With Copy:


For the next question, answer Yes, as we want to install the rarer module format players as well:

For the screens below keep all these players ticked as well, and click Proceed with Copy:


For the next step I recommend not to install the PlaySID player to play Commodore 64 SID tunes - I should note here that it doesn't work under AmigaOS4 and will crash the system if you try to play SID tunes with Delitracker:

I installed the Spectrum player, but I didn't test this as I don't have any spectrum songs - in fact I never owned a Spectrum either!

For the next screen I recommend unselecting any genie with xxx-NotePlayer in the title, as these will not work on the X1000 and will cause it to crash when playing songs:

Next up I disabled the Xmas-genie. I didn't understand the point of this genie in 1996 and still don't - it does nothing useful or interesting!

I didn't install the Arexx scripts - you can if you really want - but I have never used them:

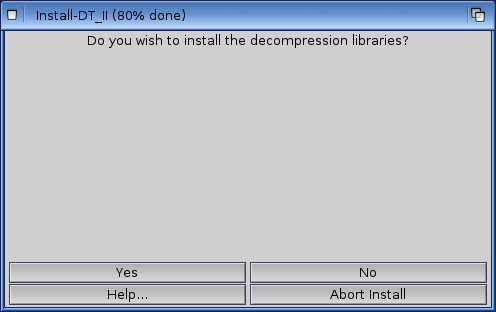
I said Yes to install the decompression libraries, as you need these:
The next two screen are just notes to finish the installation:


Ok, so now we have installed Delitracker v2.32, we next need to manually copy the Delitracker2 executable from dt234.lha over the top of the Delitracker2 executable in the installation folder, in my case SYS:Utilities/Delitracker_II. I did this from the Unarc program to save time copying the file manually but either way is ok. Once this is done, Delitracker will be upgraded to the last version available, v2.34. For whatever reason the Delitracker v2.34 update is not available on Aminet and only available on an obscure website! (I included the link in this article)
Next, we need to check the noteplayers. Navigate to the SYS:Utilities/Delitracker_II folder. Inside there you will see a folder called DeliGenies. As per the screen shot below, you will see a number of files in that folder, plus a GenieStore folder. I also have the AHI-Noteplayer folder (extracted from ahi-noteplayer.lha) on the RAM disk open, ready to copy the AHI-Noteplayer to the DeliGenies folder:

So first, move any xxx-NotePlayer files in the DeliGenies folder into the GenieStore folder. Next, as mentioned before, move the AHI-Noteplayer file from the RAM disk to the DeliGenies folder.
The result should look like this:

Next we need to install the timerhack.kmod file and update the kicklayout file to load this module on bootup. This file is needed so that Delitracker can play back modules to the correct older Amiga CPU timing, rather than the current CPU which is much faster and causes big problems with module playback.
As this file is a kmod file (Kickstart Module), it now needs to be copied from the RAM disk where you extracted timerhack.lha, to the SYS:Kickstart folder, as per the shell command in the screenshot below:

Next, we need to edit the kicklayout file using Notepad or similar program. The kicklayout file is located in the SYS:kickstart folder as below:

Now we need to edit the kicklayout file - be careful here! This file is used when booting AmigaOS4, and defines which kmod files are to be loaded as part of the startup of the OS. There are two sections of the file, one is the live "in use" loading configuration (labelled AmigaOS4.1_Update_5 as below), and one is the debug section. Make sure you add the new line to the correct live section of the file or it won't work! (I found this out the hard way):

In the live section, find the series of kmod files that has timer.device.kmod and then xena.resource.kmod. Then add a new line underneath them that says MODULE Kickstart/timerhack.kmod - as per the screenshot below:

You then need to reboot your Amiga to do the next steps of the configuration within Delitracker - we are not finished yet. Do not load any modules into Delitracker yet.
After the reboot, run Delitracker. You will get a prompt from two popups, one for PlaySID (if you installed it), and one for the Converter. Click on each window in turn, then right click the top menu and under Settings menu deselect Pop Up. Then right click the top menu again, under Project menu select Save Prefs. Do this for both windows and then select Hide for each window.
Ok, now we need to configure Delitracker itself. Click the ? button in the main program window, which will bring up the program options, as per the screenshot below. Make sure that Low Chipmem is selected. For your sanity I also suggest ticking the Songend option, so that looping modules stop when they finished playing once. It should now look like below:

Click on Ok to continue.
Next we need to stop Delitracker using the built-in Paula-noteplayer. This is not a file, so it cannot be moved to the GenieStore and must be deactivated within Delitracker. This will then force Delitracker to use only the AHI-noteplayer for playing back modules, which is what we need.
To do this, click on the Genie bottle icon in the main program window. On the Genie window that appears, click to highlight the Paula-Noteplayer in the right side, and the select the Show option, which will show the Paula Noteplayer v1.9 window, as per the screenshot below:

Click the Paula-Noteplayer window so it is in focus. Like the other popups discussed earlier, we need to now right click on the top menu, and under the Settings menu deselect Activate. Then right click the top menu again, and under the Project menu, click on Save Prefs. Then click Hide on the Paula Noteplayer window but keep the Genie window open still.
Ok, next we need to configure the AHI-Noteplayer. You should still have the Genie preferences window open, so now click to highlight the AHI-Noteplayer on the right (scroll up to see it), and then click Show. You should see the AHI-Noteplayer window as below:

Update 25/6/2014: this AHI-noteplayer prefs changes depending on whether you are running AmigaOS4.1.5 or 4.1.6.
Now, for AmigaOS4.1.5 users untick Use the best audio mode option, which will make the Audio Mode button available. Click on the Audio Mode button, and then select Unit 0:Hifi 16 bit Stereo++ and drag the frequency bar across to 48000Hz. This higher frequency is needed to play back IT and S3M modules files in good audio quality. It should look like the screen below:

Now click OK. then Click Hide on the AHI-Noteplayer window, and click Ok on the Genie Preferences window.
For AmigaOS4.1.6 users using the built in X1000 sound card with HD Audio driver, leave "Use best audio mode" checked in the AHI-noteplayer above, click Hide on the AHI-noteplayer window, and then click Ok in the Genie Preferences window.
Finally, we need to save all the settings we just did in Delitracker - we sure don't want to do all that again!
From the Delitracker main program window, click to make sure it is in focus and then right click on the top menu and under the Settings menu, select Save Settings. It didn't for me, but if it prompts you for a filename just accept the defaults and click OK.
Now close Delitracker by right clicking on the Top Menu, under the Project Menu click on Quit (Note: closing Delitracker from the close gadget on the main program iconfies it on the desktop and does not close it). You can edit the tooltypes of the Delitracker icon if you want to have the close gadget close the program instead of iconify it.
We need to close Delitracker so that it initialises using the AHI-Noteplayer only.
Now you can rerun Delitracker and load a test module - I chose a very customised David Whittaker DW format song from a game called Quadralien, an even older OLDW format module from a game called Obliterator, and a VectorDean formatted module from a game called Cannon Fodder - and now Delitracker works fantastic now on AmigaOS4 on the X1000 as below:


Some important notes about what can't play in Delitracker under AmigaOS4 on the X1000:
- PlaySID (C64) SID files do not play and will crash the system if you try to play them
- CUSTOM Amiga modules (ie. CUST.filename) will crash the system if you try to play them. This is because CUSTOM modules have a built in replayer that expects to have the Paula soundchip from the Amiga present and it will not retarget through AHI.
Custom Amiga module formats can be safely played in UADE without a problem, but keep in mind it is a command line program that doesn't multitask well.
Overall, I am very glad to have Delitracker running on my X1000, although I have to say it took ages to get working! I hope this guide is useful for anyone out there trying to get this program working so they can enjoy the classic Amiga modules and save a lot of time getting it up and running!


