Ask yourself a question. If you could have the ultimate Amiga, what would it look like?
Would you get the most popular Amiga 500 and upgrade it with ACA500 Plus and other goodies? Make the ultimate games machine with iGame launcher? Put a Pistorm in it for RTG workbench and increased performance?
Perhaps grab one of the originally unpopular Amiga 600 computers and upgrade it with the myriad of amazing internal upgrades that turn it into a really amazing computer? Maybe even Vampire it and have HDMI RTG workbench?
Perhaps you like Amiga applications as well as games, and prefer a big box Amiga for this software and to upgrade with Accelerators, RTG cards, USB, network, Video toaster cards. Perhaps an A2000 build like here and here, or A3000 build (like I did here, here and here), or perhaps even a A4000D?
Maybe you want to keep the Amiga hardware completely stock standard, and enjoy how it is with no upgrades - just enjoy your Amiga 1000, 2000, 3000 or 500 as-is with floppy disks, and experience the nostalgia of an era of gaming and demos that was truly awesome.
For me, I LOVE upgrading and playing with my Amigas. All of them.
Asking which Amiga I like best is like asking which of your children is your favourite...I love them all.
The reason I love upgrading and tinkering with Amigas so much, is that it is the final realisation of many dreams I had as a teenager. Maybe it is the same for you as well.
I still remember clearly looking with jealousy at all the upgrades and software I could never have on the store shelves at Myer, Kmart, Bruining Headlam computers, Valhalla, and electronics shows in Australia too.
The Amiga software and hardware upgrades kept coming, even after Commodore went bankrupt.
Amiga got PowerPC accelerators, Warp3D, Picasso IV RTG cards, USB cards and driver support, CD Burners, Network cards, Internet browsers, FTP and telnet clients, Remote Desktop/VNC, MUI, AmiTCP, games and applications needing 030 and 060 accelerators, Geek Gadgets for Linux application cross compiling on AmigaOS, AmigaOS 3.5/3.9, AmigaOS 4.0 and MorphOS for Classic Amiga PPC, and so many more.
In more recent times, AmigaOS 4.1 Final Edition Classic for PPC Amigas (Classic and NextGen), AmigaOS 3.2.2 for standard Amigas, Gotek floppy drive emulators, ZZ9000 RTG cards, BFG 060 accelerators, Vampire accelerators, Pistorm, MP3 hardware decoders, AmigaOne Sam 460/X1000/X5000, and more. The innovations and new software releases continue in 2023 for Amiga.
Be still my wallet. The Amiga is a demanding mistress.
For me, I dreamed to own an Amiga 4000T ever since I first read about it in Amiga format and CU Amiga back in the day.
The A4000T was the top model released by Commodore just before it went bankrupt in 1994, and subsequently re-released by Escom as an 060 based A4000T with a new Amiga logo until 1997.

I could never hope to afford one. They cost more than $4000 even then, just for the base machine. Today, the prices for an Amiga 4000T are just plain scary.
After the trauma of owning an old second hand 386DX40 clone MS-DOS/Windows 3.11 PC for two years with no Amiga (the Amiga 2000 was still with my parents then), I finally bought an Amiga 1200 in 1996.
This was achieved from putting money aside while working a night-fill job at Kmart 5 nights a week while full time studying IT at University and paying all the usual bills!
Upgrading the Amiga 1200 with an 030, SCSI, Zip drive and CD-ROM drive (and later towering it as shown below) took all of my money and then some. I had little money to spend on software, so I had to choose only a few items to buy, and missed out on so much.
Cover CD's on Amiga Format and CU Amiga helped a lot in that period, along with Aminet downloads via internet 56k dial-up modems (remember them?) to try out new software inexpensively.
I picked up other Amigas from second hand stores in the late 1990's, in an era when no-one wanted them and they were not "retro". Most I got for $20-$50 - my Amiga 500, 600, A1000, and CD32.
If you think that was just a 1990's thing, it isn't. Go take a look at the price of a Nintendo Wii or Sony PSP today - no one wants them. You can buy one for $20 and sometimes less. I bought a Wii to get software I never tried on it, which sells for $5-$7 each now, and also try out running linux on it!
There is a period that no one wants these old systems and they cost almost nothing. Eventually people get nostalgic about them and they become "retro" and increase in value as the rareness increases over time due to them being thrown out.
As Amiga faded from the general public view in the late 1990's in favour of PC's and Macs, Amiga software was still being released at a slower rate, but now required higher hardware specs than I had.
I was frustrated, but I had come up with a plan.
I picked up a PowerMac 6100AV (my first ever Macintosh) courtesy of a university clear out of old hardware in the late 1990's. I played with it for a bit, and then sold it on for a profit on eBay as I had little interest in anything that was not an Amiga back then.
This was the first time I had sold anything on eBay, and I was impressed I could make money from a computer - I assumed they always lost value!
I did the same with other computers I bought second hand (in the late 1990's) in the early 2000's - C64, Amstrad, Atari, 3D0, PC and lots of other systems. I got some old laptop computers for free from work too when they were end of life and they just wanted to get rid of them.
I kept them for a while and sold them on as they appreciated in value. If I knew how much some of them were worth now I definitely would have kept them longer!
The aim of selling them of course was to build a fund to buy my dream Amiga 4000T.
By then Escom had folded, and A4000T's were no longer available new. Remaining stock then sold out. I had to act quicker or miss out entirely.
In my desperation I even sold off some of my Amigas too, including my Micronik tower converted Amiga 1200, A600, A500 and A1000 too.
I reasoned they would be easy to buy again as there are more of them around. I had picked up some Amiga Technology A1200's from a G-Soft store clear-out of Amiga stuff. I also sold them on, keeping one for myself.
It took 4 years of selling computers and saving money from working while paying off loans, but in 2004 I finally got the money together to buy my Amiga 4000T. It was advertised on Trading Post (a long gone local newspaper that was for selling items) from a Queensland seller.

I was so happy to finally get one, even though the previous owner had definitely not been kind to it.
Given the sacrifices and years of hard work to get it, I will NEVER, EVER, sell it.
In time, I also eventually saved enough money and bought back all the Amigas that I sold in order to buy my A4000T! I was right - it was much easier to find those systems again than an A4000T.
I was determined to upgrade my A4000T with all the hardware and software I had ever wanted to buy for the Amiga.
For my Amiga 4000T, I saved up some more over the following years and slowly added:
- Phase5 Cyberstorm PowerPC 060 accelerator (until the PowerPC CPU failed)
- Mediator PCI bridge board expansion with PCI slots
- Voodoo3 PCI graphics card to play Warp3D games and RTG Workbench
- SoundBlaster 128 PCI for higher quality sound playback
- RTL8029 PCI network card for internet access
- Deneb USB Zorro Card with flashrom to preload Poseidon for USB boot support
- Indivision AGA Mk2 for scan doubled output (two TFT screens - one for native, one for RTG)
- CD drives (2)
- AmigaOS 3.9
- Large 127GB IDE hard disk (which was later replaced with a MicroSD card converter 64GB hard disk).
But it turns out I was very wrong about that.
I never had or used a tape drive on an Amiga, or a SCSI scanner, a CD burner, or used a decent laser printer with it. There were many applications I had never owned, that I still wanted to try on Amiga.
I saw videos lately from people trying some of these features out, and realised I just had to try it on my Amiga 4000T as well.
In addition, the release of the Zorro 3 ZZ9000 RTG card with HDMI output, USB and network interface added a new hardware upgrade I wanted to put on my Amiga 4000T, along with the upgrade of the kickstart roms to the latest AmigaOS 3.2.2 in 2023. I also wanted to rebuild my hard disk.
So this is the first part of a new series of blog posts on the next phase of upgrades to my Amiga 4000T - the ongoing realisation of a dream!
I ordered a IDE to CF card converter, AmigaOS 3.2.2 kickstart rom set and IDE cable from Amigastore.eu.
I plan to install the CF converter in the rear slots of the Amiga 4000T. Here is the current situation with the slots:
You can see the PCI cards are offset, which is due to the Mediator PCI bridgeboard, which causes all the cards to sit higher than they would if connected to the Zorro slots underneath.
There is also an unsightly cable I have running from the AUX in port on the Soundlbaster 128 PCI card which connects to the standard Amiga audio RCA ports. This routes the native Paula Amiga audio output into the sound card so I can hear it via the sound card output, mixed with the ahi and CD output. Otherwise I would need an audio switch box to switch between them.
Opening up the Amiga 4000T reveals a mess of SCSI, IDE and floppy cables that makes it hard to see what is actually in there!
At the bottom you can see the Mediator PCI to Zorro bridge card, that connects the PCI bus to the Zorro bus.
The PCI bridgeboard has served me well for many years, but finally it has reached its retirement.
With the ZZ9000 and ZZ9000AX, it replaces the need for all the PCI cards I have in here! The Voodoo 3 PCI, Soundblaster 128 PCI and Realtek 8029 PCI network cards are no longer needed. One card replaces them all! Moving away some of the mess of cables makes it a bit easier to see the bridge board and the PCI cards installed.
The previous owner, for some reason I cannot being to understand, decided to physically snap off the metal bar over the top of the CPU accelerator board.
I guess it makes it easier to install and remove the accelerator board, but seriously, how did the previous owner make such a hash of doing it?
These edges cut my hands so easily, and have several times. It is a terrible thing - I really should cover the super sharp edges in electrical tape. Just afraid of cutting myself again while doing it!
You can see the Cyberstorm 060 accelerator with the 68060 and fully populated 128MB of fast memory on it. You can also make out the Indivision AGA Mk2 CR next to it. This is the reason I need two screens with the A4000T - one for the native output, and one for the RTG output via the Voodoo3. Another thing that is about to change.
Speaking of changes, I need to remove the CPU accelerator so I can get access to the Kickstart roms, which are 3.1 on this system. They are shown below, with the CPU card removed:
The A4000T kickstart roms are special in that they needed to support IDE and SCSI on the same system, the only Amiga that has this. The extra requirement for both meant the kickstart rom chips were not big enough to fit them. So to do it, the workbench.library was removed from the rom and moved onto the hard disk. You need to ensure this file is on the hard disk or the system won't boot.
This means that the kickstart roms are specific to this model, and that is why you can't use the A1200/A4000 kickstart roms in the A4000T.
So, I ordered the specific Kickstart 3.2.2 roms for the A4000T model, and set about installing them into the A4000T.
One thing that took me some time to work out is the correct positioning of the two kickstart rom chips.
Recently, the new 3.2 rom chips just state HI or LO on the label, which means nothing useful to me when trying to work out which socket they should be installed in!
Seriously, for vendors - please include instructions with the kickstart roms to identify which socket they go into.
Or better yet, put U176A and U175A on the rom label itself...What the hell is HI and LO anyway?
For those who want to know, the HI chip goes in the U175A socket on the A4000T. The LO chip goes into the U176A socket. I include the close up photo above to make it clearer still.
With that done, I turn my attention to the Deneb USB Zorro card I have in the A4000T.
Sadly you can't buy this card anymore, which is a shame as it is a great card. I wish I had bought more than one but I couldn't afford it!
I will need to install the Deneb drivers and Poseidon setup, which is stored in the Deneb card itself. It is accessible by closing the jumper set on the board near the zorro connector to Rescue mode (RES). The instructions are printed on the card to help out. I have done it below.
With the onboard flashrom, via workbench tools, you can also load all the poseidon related device support on power on, allowing the A4000T to boot AmigaOS from a suitably prepared USB drive. There is an internal USB port I presume is intended for such a purpose.
As putting the A4000T back together is a bit of long thing and I have more work to do in there, I left it open while I tested the new AmigaOS 3.2.2 kickstart roms work - fortunately they do!
I then set to work to install the IDE to CF card converter to the rear of the Amiga 4000T:
This will make it easier for me to remove the CF card to backup.
I connected the other end of the IDE cable to the primary port on the Buddha IDE Zorro card I also have installed in my A4000T.
The reason for this card being needed is because I already have an IDE to SD converter installed on the IDE port on the A4000T, which houses the previous AmiKit Real 9 system installation.
I also have a IDE CDROM drive in the A4000T, which is connected to the Buddha secondary port as the IDE to SD converter does not play nice with a slave drive on the same bus.
I then use the early boot menu to force the system to boot from the pre-built 32GB CF card Amigastore.eu prepared with AmigaOS 3.2.2 ready to use for the Amiga 4000T.
With the system booted into AmigaOS 3.2.2 on the CF card, I can see the Deneb install disk now appears on the Workbench screen, which I will run the install onto the CF card shortly.
Checking the partition layout from the shell, I can see Amigastore.eu has set the partitions in a logical way. 500MB Workbench, 1.6GB Work, 1.6GB Games, and the rest (26GB) as Data:
It is a good thing they are set as GDHx as drives, since it means no clashes with the SD card I also have installed (but not connected at the moment as I wanted to boot from the CF card).
So with that working, time to move onto the next thing, assembling the ZZ9000 card and ZZ9000AX sound card cables.
Connecting all the required cables takes some time, and care needs to be taken to ensure they are connected to the right places.
You may also note that I changed out one of the TFT screens. The previous ones are VGA input only, and I need one with DVI input for the ZZ9000, which actually outputs HDMI output.
I then use a HDMI to DVI cable to connect it to the monitor.
A great thing about the ZZ9000 is the scan doubler option which allows it to scan double and pass through the native Amiga video via the HDMI port on the ZZ9000. This means I no longer need two screens!
The separate module for this needs to be connected with ribbon cable. They learnt from the Picasso IV that people really don't want to physically break the card to use it on an Amiga 2000. So this separated module gives flexibility for this card to work in the Amiga 2000 with Zorro 2 firmware, 3000(T) or 4000(T) with Zorro 3 firmware.
You can even potentially use this with an Amiga 500 which in a desktop case like the checkmate 1500 plus with the zorro backplane adapter attached - it requires a separate ZZ9000 part for this to work on the A500 and I have not tried it myself, yet. (I do have the part though)
Here is the scan doubler native video module connected to the main ZZ9000 card:
Next I complete the wiring for the ZZ9000AX audio card section. The instructions are great, and walk you through exactly where to connect everything.
For fun I decided to see if the card could be installed with the PCI bridge board in place. Here you can see the scan doubler section in the 1st video slot pushed right up against the bridge board edge. The 2nd video slot is covered by the PCI bridgeboard.
I guess technically you can do this, but I am not sure of the benefit unless you want to use other PCI cards I don't have installed like a tv card or something? The TV part is analog and wouldn't work anymore anyway, with only a handful of digital tv PCI cards that work with the Amiga...
Anyway, I decided to remove all the PCI cards, and then the Mediator bridge board too. Here it is removed:
It makes the inside much cleaner, and less stress on the A4000T PSU itself since it no longer has so many cards to power. I connect the CF card converter and Deneb USB ports to the rest of the case, which I had to remove in order to remove the Mediator PCI bridgeboard.
Curiously I have to locate the audio card section of the ZZ9000 to the slot below the card itself, due to a silly design flaw in the A4000T which provides no securing screw hole for the 2 video slots. Seriously, why?
Anyway, I soon have everything connected back up again:
Another nice benefit with the ZZ9000 with the ZZ9000AX module is that it passes through the Amiga audio directly, without the need to touch the Paula onboard audio ports like I used to have to do. This means just one output audio plug from the ZZ9000AX to get all the audio.
Until the ZZ9000 is setup, I keep the Indivision AGA mk2 and it's scan doubled output just in case.
I power on and I didn't need to worry about that at all - the ZZ9000 scan doubled HDMI to DVI output works perfectly.
AmigaOS 3.2.2 system is still working, booted from the new CF card. I still keep the SD card which contains my previous A4000T setup and data removed at this stage.
I put the A4000T case back together before I moved on to the next part.
Amigastore.eu included the contents of the AmigaOS 3.2.2 CD on the CF card to make life easier, along with WHDLoad and some other utilities like DOpus, etc. I copied the Deneb Install drive contents from the flash drive to the CF card so I have a backup on the disk. Once I switch the Deneb to non-rescue mode I can't see it.
I then install the Deneb drivers:
There is a clockport on the Deneb also, and in the past I used to use a MP3 decode hardware Dlefina sound card via this port. Sadly it blew up spectacularly on a recent project...
Anyway, I need to select a card you don't have in the A4000T but is likely to have drivers support for the clockport on. The Deneb then pretends it is that card for the purposes of the clockport device driver you want to use for the device connected to the clockport. Very clever.
I already have a Buddha flash installed, so I select X-Surf since I don't need a network card with the ZZ9000 installed.
The installation then completes.
As an aside, I mentioned earlier about being able to modify the contents of the Deneb flashrom. You can do this using the Luciferin tool installed with the Deneb tools install we just completed. You can load the A1000 jingle so the Amiga 4000T makes the A1000 boot noise on power on. Nice.
I can't modify the contents of the flashrom right now though as the Deneb card is in Rescue mode.
Next up is installing the Poseidon USB stack software to work with the Deneb.
I then install the FAT95 driver included with Poseidon to get the USB FAT95 file system support for USB sticks.
Next I powered down to remove the Rescue jumper from the Deneb, and to connect up the IDE to SD converter again, now mounted to the rear slots. I couldn't do this before as I had no free slots.
It's kind of hard to see, but the IDE to SD converter is in the slot below the CF card slot:
Now, at this point, I wanted to upgrade the 64GB SD card I had in the A4000T so I could have more space. Removing the original 127GB IDE hard disk many years ago meant I really didn't have room for my mp3's, photos and videos anymore.
I backed up the 64GB sd card using my Alienware PC and Win32diskimager, and then restored it onto a larger 256GB SD card.
I also removed the second TFT screen and indivision AGA port connection as I no longer need them.
I then powered on the A4000T, and went into HD Toolbox to check the configuration restored ok from the SD card backup image, and add a new partition for the data. The drive is picked up in HDToolbox, so that is a good start!
Checking the partition setup on the SD Card, as expected I now have more space:
I created a new partition to use the remaining space, named Data - you can also see the USB support with the Deneb is now working following the reboot, with an inserted USB Stick as the 30A9-C1A7 volume:
With the Deneb USB now working, I set to work on data transfer. Copying across fonts and other essential libraries and tools from the AmiKit: volume I was using before I installed the 32GB CF card with AmigaOS 3.2.2:
Then I worked on the big one, transferring data from the various smaller 4GB partitions on the Sd card to the larger partition I just created, which is easily large enough to fit them all.
I thought things were going well, and they did for a few hours. And then it didn't. Checksum error time. Great....
I tried it again after reformatting the disk, but I got the same result.
At this point I decided to press on with building the AmigaOS 3.2.2 hard disk on the CF card, and come back to the data transfer another time. I put the original 64GB sd card back in for now.
I picked up AsimCDFS boxed application recently, and was keen to try it out. Previously I used other free drivers from Aminet and this is the first time to have a commercial CD driver product to try out.
I also got some commercial CD burning software that requires this driver to work, so that is why I am installing it also.
The installation is easy to step through, and has a now SCSI query tool to locate the CD drive and create the required mount list entry for it.
In my case it is on the 2nd.scsi.device. At this point I realised why I have had problems with the scsi NEC CD-ROM drive - it is shown using all the ID's except one!
I know it is setup to ID 3, so I selected that, and completed the installation. After the reboot, I inserted the latest K&A Plus cover CD and it worked straight away! :-)
The default cd player AsimTunes included with AsimCDFS is not a patch on the way cooler looking GroovyPlayer, but it works, and here it is:
There is also a AsimPrefs to see the configuration. Curiously it is not setup as a CD0 device icon in the DOSDrivers folder...
I then installed the much cooler Groovyplayer, and configured it to connect to 2nd.scsi.device, ID3 in it's settings so I can use the CDROM with it.
You may remember earlier I showed the Luciferin utility to upload contents to the Flashrom of the Deneb, which I couldn't show as the rescue jumper was set. Now that is removed, I can see and adjust the contents of the flashrom - at the moment I have disabled the flashrom to avoid issues with the newer Poseidon version.
I will need to update the files on the Flashrom to the later 4.5 poseidon files to re-enable it safely.
I started to get busy with application installations on the CF card at this point, installing Cubic IDE (editor), Hippoplayer, AmigaAmp, IMP3 for streaming modules, AmigaGPT, and the latest iBrowse web browser.
At this point I really do need to get the ZZ9000 RTG card and the ZZ9000AX module working. For this I need to install Picasso96 first - I am using the later Individual Computers commercial version, rather than the free one on aminet. This is because the commercial one fixed some issues with the ZZ9000 RTG screen update which I saw when using the free one on the
Amiga 2000 ZZ9000 setup I did last year.
I followed the instructions for the installation from the ZZ9000 manual.
I then also installed AHI version 4 from Aminet.
I installed the commercial version of Roadshow for network support. Lastly, after a reboot, I ran the ZZ9000 installation:
I chose to install the Roadshow specific drivers for the network support:
Installation completed, and ready for rebooting.
After the reboot, the new RTG screenmodes are available to select from the ScreenMode preferences - I choose to use 1280x1024 in 32bit colour, as that is the highest resolution my TFT screen supports:
I tested and confirmed it displays perfectly:
Having saved, the Workbench screen now changes to 1280x1024 and the font is now very small indeed, and plenty of screen real estate now!
I then changed the Workbench background to something more appropriate to a true colour workbench screen:
Much nicer. Looks wonderful.
I played around increasing the text size to Size 13 instead of 8, and using black shadows on white icon text so it is readable on my background image.
I then did a ping test on the network via the AmigaShell and confirmed the network port on the ZZ9000 card is also now working under AmigaOS 3.2.2. Excellent!
I adjusted the AHI settings to use the ZZ9000AX module instead of native Amiga audio. This means with the supplied MHI driver for the ZZ9000 AX, I can use hardware MP3 decoding through MHI enabled applications like AmigaAmp and the latest Hippoplayer version, which now supports MP3 playback.
I added the MHI driver configuration to AmigaAmp and Hippoplayer next:
So now I can enjoy hardware decoded MP3 playback on the Amiga 4000T again!
I also enjoyed some modules too.
I celebrated this milestone and enjoyed some AGA demos, which output via the scan doubler video module of the ZZ9000 perfectly.
So strange after so many years of having two screen to just have one again! It gives me more room for more of my application boxes too, so win-win!
I also setup IMP3 so I can playback streaming modules from the internet. I love this software.
The setup is now looking good, but much more work still to do.
Next up I installed Octamed SoundStudio V1 from the original CD. I do wonder if I was the only one who bought this? Most people I know used the free Octamed versions on multiple Amiga magazine cover disks.
It is nice to have this working on the Amiga 4000T RTG screen modes, allowing much more editing space in Octamed SoundStudio:
I then updated AmiSSL to the latest version from Aminet, while enjoying mp3 playback from AmigaAmp on the hardware decoding ZZ9000AX:
I decided at this point to move my Amiga 4000T to the other side of the desk, as I needed the space underneath with future upgrades to come.
I could then start web browsing with the latest iBrowse web browser version:
I also installed Eagleplayer and setup the nice stereo GUI option for it. At this resolution Eagleplayer fits very nicely on the screen.
I then tried Aladdin 4D, software I recently purchased. It was still shrink-wrapped and had never been opened. What a waste. I immediately opened it and installed it!
The rendering takes a little while, but the results are pretty cool!
Here is an another one rendered with Aladdin 4D - it looks incredible on the RTG display. Amigas can do so much more than play amazing games - it is well worth exploring:
Next up, I installed Twist 2, a database program I bought last year as I had never heard of it! It was released after Commodore went bankrupt, while I was in the timeframe that I didn't have an Amiga to use, which is why I missed out on it.
One of the example database programs included with Twist 2 is an Aminet CD Database searcher - I inserted one of my Aminet CD's to try it out:
It helps you to search the CD for specific files
I then installed Deluxe Music 2, which I have looked at previously on this blog.
I also bought another application recently called Maxon Magic, which I had never heard of or used before:
It gives you some screen savers and allows you to custom system events to specific sounds. I remember having a Homer utility on my A1200 back in the 90's that would play random homer sound samples on various system events and on startup. Made me smile everytime. I should try to find it again...
Anyway, Maxon Magic provides a much slicker interface and easily customised to your preferences.
Here is the Aquarium screen saver.
I suppose if I had a non-RTG system, these screen savers would be ok, but on this system they look very basic and low resolution too. I should load this on my Amiga 500 instead!
Next I installed SCALA MM400. I have the original box, manual, software and dongle to connect to the port on the back when running it, not a dodgy hacked version. So hard to use these applications without the manual.
This is software I would love to spend more time with - I know SCALA is still around today. I would be curious if you can upload a project created in this version to the new version for Windows today? Anyone know?
You can select the RTG modes for playback, as below, but this didn't work for me.
When I changed it back to a normal Amiga mode it works fine:
Next up I installed Photogenics 2 from the original CD.
Being able to use the RTG modes and full colour palette (unlike the newer Personal Paint which is limited to 256 colours) is a big strength for Photogenics.
I also recently located and purchased a boxed copy of Final Calc to complement my purchased Final Writer, Final Copy and Pen Pal applications from the same company (Softwood):
Again, another program I should try to see how functional it is to export content to Excel...by the way the date and time is wrong as I currently have no battery installed in the A4000T.
I also bought an older version of Pagestream. I wanted to buy the latest version which is still available, but unfortunately the website refuses to allow me to register on the website to purchase - it keeps saying the postcode is wrong...anyway. For now I use the older version:
Next, I moved the Roland SC-88 Pro midi device and sound sampler hardware from the A3000 to the A4000T. I used a Serial MIDI port converter (with cables) to connect to it. I then tested playing MIDI files with Deluxe music 2 and it works great!
I also tried it with Horny, a MIDI sequencer you can download from Aminet. MIDI playback through the Roland works great with this too.
I also installed Bars N Pipes Professional to play around with the MIDI on that too - another unopened boxed application I bought! It cost over AUD$500 when it was sold back in the day - the price is still attached!
Because Amigastore.eu set a low partition size for the AmigaOS 3.2.2 system partition, I could installed AMOS Professional on it, so I set to work on that next.
Amiga Addict's newest issue arrived while I was doing this, which gave me something to read while feeding in the disks!
I installed the AMOS Professional Compiler also:
I also finally got around to installing the commercial product
Hollywood 9 and the associated Designer product, which allows programming script language productions and software through a large setup of plugins. You can compile projects for AmigaOS, MorphOS, Windows, Mac and Linux! All from your Amiga :-)
Since I bought it last year, it has been sitting around for a long time for me to get around to installing it. So long in fact that now it has been replaced in 2023 with
version 10!

I installed Art Department Professional and Morph Plus next, which come from the same company ASDG:
Pixel 3D and Anime workshop, two more programs I bought last year that were new in box, never opened. Below I already opened Pixel 3D, but you can see Anim workshop still shrink wrapped with the price attached. Yikes.
Of course I removed the shrink wrap and got to work installing them.
The animation workshop examples included show what is possible with it, and it is quite impressive:
A still screenshot hardly does the animation justice...
Next I played around with World Construction Set. The initial render was tiny:
I played around with the settings and it soon got to work.
This is going to take a while....
Definitely time for a coffee:
I also installed the newest Personal Paint version for Amiga, released by A-Eon technology:
I know a lot of people used Personal Paint back in the day, and it is good to see development of this software continue in 2023.
The 256 colour limitation drives me crazy though when I have 32bit RTG available.
For brevity I also installed Hotlinks, ImageFX and Brilliance on the Amiga 4000T
I have no idea how anyone could use Brilliance without the manual by the way...
Just before completing this blog post I also received Photoworx, an application that allows you to read the contents of PhotoCD discs and view the images on the Amiga.
Actually, I only have one PhotoCD. I think it is quite rare and hard to come by. I found it in a Salvos second hand store in the cd section for 5 cents many years ago now. It didn't play for them since it is not an audio cd and no one there knew what it was - they were happy to get rid of it.
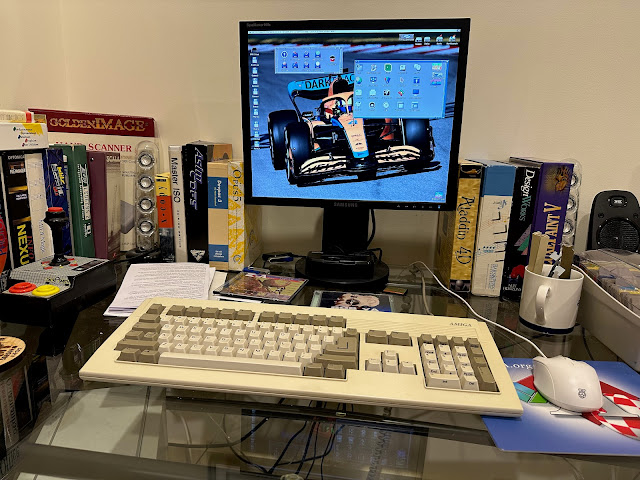
I did know what it was though. It was a special PhotoCD issued as a gift from Marlboro as the primary sponsor of the F1 Mclaren team to their staff or maybe Ayrton Senna himself back in 1993.
The PhotoCD was to celebrate my childhood idol Ayrton Senna's final race for the team in Adelaide, Australia. It includes photos of Senna's time with Mclaren from 1988 to 1993.
As you can see it was not for sale. I installed the Photoworx software on the Amiga, and it then read the CD:
You can load the .pcd files individually with a small preview:
You can also view in a preview photo mode which looks much better, taking full advantage of the ZZ9000 RTG screen size!
It is great the Amiga had software like this - now I can enjoy my PhotoCD on the Amiga:
There is much more to come with the upgrades for this Amiga 4000T - a tape drive, scanner, printer, cd burner and more too! Stay tuned for another part of this build on my blog soon.


