Working on my Amiga 4000T for this latest build has been refreshing and fun - setting up AmigaOS 3.2.2, getting the ZZ9000 and ZZ9000AX and applications working well was very satisfying. You can read the first part of this build here if you want to get up to speed.
Let's get started.
I think for most Amigans we are well aware that Amigas were used to make the graphics used in Babylon 5 in the first series, before they switched over to SGI machines.
It was a pleasant surprise when I was installing Imagine on the Amiga 4000T to find a Starfury fighter example file someone created to load into it!
It's not the original file of course, but it is a nice reminder that Amigas were used for more than just games and demos.
It is a shame I have little to no graphic creation talent, so I can only look at and be impressed by the work that someone put into this.
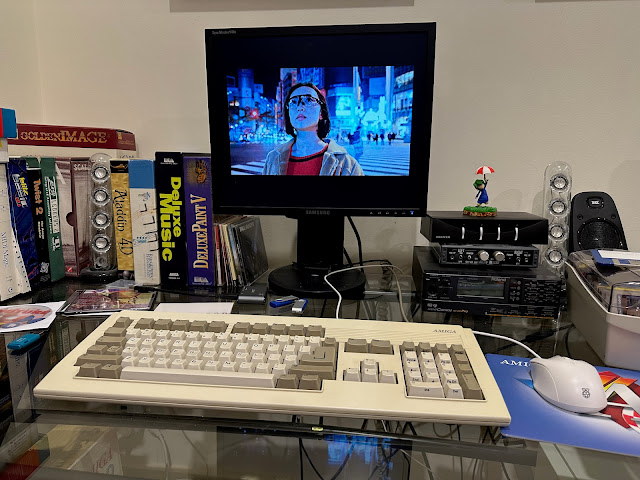
It was around this point I changed my background on the Workbench - an oldie but a goodie.
I set to work titling some of my audio cd's in Groovyplayer so they appear when I am playing the CD's. We are spoilt these days with internet cd lookups filling in this data automatically on modern computers - would be nice to have this on Amiga too since this machine is internet connected...
Next, I set to work setting up my IDE CD drive, and removing the other drive which was getting a little unreliable.
Here is the drive installed into the Amiga 4000T. I moved the IDE and SCSI drives to the top, to make room for the Tape Drive I plan to install also.
Here is my hard disk and drive situation - CD0 is not showing as I commented it out of the user-startup at this time while I had it disconnected.
Before someone mentions it, yes I know you can install SFS or PFS for larger drives instead of using FFS. I had this situation previously on this SD until the PFS partition decided to corrupt itself while copying a file to it, losing all my data. Since then, I just use <4GB FFS as they were reliable. You will note that I am only using 32GB of the SD card when it is 64GB - that is because of what happened with the PFS before.
I plan to fix this mess later on, since partition sizes are no longer a problem in AmigaOS 3.2.2.
For now there is also the GDH0-GDH3 drives on the CF card, which was set by AmigaStore.eu when they prepped the 32GB CF card. There is also more unallocated space I can use on the CF card, and I will definitely need it, as you will see.
I open HD Toolbox and prepared the remaining 21GB on the CF card as one GDH5 drive:
With this done, I turned my attention to the next task, which is getting CDXL videos working.
While researching I enjoyed some mp3's played from the QNAP network drive using AmigaAmp.
It was quite low resolution due to the 68000 CPU, and restricted in colour depth on CDTV with an ECS chipset, but the CDXL format was capable of more, when using faster Amiga systems.
It can also do HAM mode for greater colour depth video playback, but I didn't test that in this blog post. I plan to try it - though I am concerned how big the files will be as the non-HAM ones are already huge.
I know there is some old cdxl videos floating around, but that is pretty boring. What I want is to convert some modern videos to CDXL to try on my Amiga 4000T.
The issue is creating the CDXL videos. Doing it on an Amiga is painfully slow, but the tools do exist.
A recent AGAConv package on Linux has made this process so much easier. I am sure the purists will be enraged I "cheated" to create the CDXL files, but it took a tiny fraction of the time, and I could create so many more videos as a result. I am comfortable with it.
I then used wget to get the files needed for the converters and other tools.
I expect these conversion will take much longer and use unusual HAM screenmodes which I assume while be much slower. However, I haven't tried that yet to confirm.
The AGAConv tool converts the videos into optimal format for playback with AGABlaster on a AGA Amiga with 060 CPU.
I then converted a few more mp4 files I have saved from YouTube and elsewhere - music videos are a good size for cdxl conversion, being 3-5 minutes long in most cases. The generated CDXL files are huge, much bigger than MP4.
The videos convert really well. I was really surprised.
I used a mix of 1080p, 360p, and lower resolution MP4 videos too, they all are converted well and playback perfectly.
Some audio is a bit scratchy as CDXL audio outputs in 22,050 Hz and not 44,100 Hz. This impacts some videos more than others, but all can be heard fine.
Note that AGABlaster runs faster from the command line. You can launch from the icon which presents a dialog box to select the cdxl file, but I found it plays back much slower that way - why I don't know.
The videos "Terminal Slam" by Squarepusher, and Boards of Canada's "Reach for the Dead" video were 1080p source MP4's saved from YouTube, but both look great converted to CDXL and playback on my Amiga 4000T.
No Vampire, no Pistorm. Just standard 68060 with excellent 256 colour CDXL video playback in 2023. :-)
I also converted the
Perth Amiga group meeting video on YouTube that I attended a few months ago to CDXL, and supplied it to the group as a CDXL download they can enjoy on their Amigas. I was interviewed in the video if you want to see it.
I recommend using AGABlaster with the AGAConv tool under linux to enjoy newer videos on your Amiga in 2023.
The files are large though, as I mentioned. A standard 20 minute video needs well over 2GB, and this created issues for copying the files across also.
I learnt some things about the limits of FAT32 sizing that the Amiga will work with in this process. I thought it worth sharing my findings, as maybe it helps you also.
First things first, there appears to be a hard limit to the size of the partitions which AmigaOS 3.2.2 will read using the FAT95 driver included with Poseidon USB installation on the Deneb card.
Given the large amount of cdxl files to transfer, I wanted to use a suitably sized USB stick to minimise the amount of transfers to do. I bought a 128GB USB stick, as I thought this was a good size.
The Amiga wouldn't read it at all. It has a 128GB FAT32 partition on it as default, so I expected it would work. It didn't.
Returning to my Linux Dell PC, I ran GParted to redo the partitions, as Windows doesn't allow you to format Fat32 partitions larger than 4GB. They expect you to use NTFS. Now I could use that, but the Amiga only support NTFS with a beta driver that operates read only. So, no thanks.
So I thought I would try reducing it to 32GB partitions - 4 of them. So I prepared that in GParted as below:
That didn't work on the Amiga either.
So then I halved it, reducing it to 4x16GB partitions. I didn't bother filling in the gaps as I was just trying to see what worked. I put no data on them yet.
In this configuration, with the Amiga I could see the first FAT32 16GB partition, but none of the others.
So it appears the limit is one 16GB FAT32 partition on USB stick if I want the Amiga to be able to read it.
This sucked, as it meant copying multiple transfers of files, deleting them from the usb, and then doing the next lot, and so on....
I tried using ext2fs (linux file system) partition on the USB as well (16/32/128GB sizes).
I installed the appropriate ext2fs linux file system driver on the Amiga. However, Poseidon only recognises NTFS and FAT32 types for mass storage class USB devices. I realised ext2fs also requires a mount list entry, which means it is meant for devices that are permanently connected, rather than USB devices that are plug and play.
I also tried copying the cdxl files to my QNAP and then copying them back onto the Amiga 4000T, via network connection. However, it continually crashed out the Amiga after an hour or so. I suspect the network driver can't handle the throughput, or something else was happening...
So, at this point I decided to stop fighting the technical limitation and learn to live with it. I slowly copied the cdxl files using USB stick, 16GB FAT32 partition size. Took forever, but eventually got them on.
Getting into fixing the large number of partitions on the SD card was net on my list to try to make the space I needed. After thinking about it for bit, I realised this would be quite an annoying task.

First, I needed to create a 28GB partition with the remaining space. Then copy the data from all the smaller partitions to the single larger one. Then delete the small partitions and create a new partition using the remaining space, leaving two partitions on the SD. I knew this would take a while, so I decided to push on with something more fun.
I decided to get AmiTube working.
AmiTube allows you to playback YouTube videos on your Amiga. As you would expect, it is not a straight forward thing given YouTube doesn't work on classic Amiga web browsers.
You can use YouTube with AmigaOS4 and MorphOS on next gen Amiga hardware of course. But for Classic Amigas there was not a solution until AmiTube came along.
So how does it AmiTube work. Well, it cheats.
When I mean cheating, it means the Amiga itself is not doing all the heavy lifting.
Essentially, you put a Youtube URL into the Amitube client on the Amiga, and it then connects using the local network to the amitube server installed on your linux pc to download the youtube video. It then begins conversion to CDXL to view on the Amiga.
My trusty Linux PC is needed for running the AmiTube server. The installation process is actually very simple and covered on the
author's website. You need to install docker first, which is a containerisation module for linux.
This then allows a service/application to run within a docker container on the linux computer, pre-configured and ready to run.
With that done, and the AmiTube Server installed, I then run it under docker by typing the following in terminal on my linux PC:
docker run -p 1234:80 alb42/amitubeserver
This specifies I will use port 1234 for the connection from AmiTube on the Amiga side.
I also took the opportunity to install ffmpeg, ffplay and ffprobe from aminet to have the conversion tools for mp4 conversion to CDXL.
I then downloaded and installed the AmiTube program:
I then need to modify the icon properties for AmiTube to specify the ip address and port of the AmiTube server I plan to use, using the SERVERURL parameter:
You can also specify the movie location, which is important as you will need a lot of space.
With that done I launched AmiTube:
I then searched for a youtube video using the youtube app on my iPhone, and then used the share function to see the URL. I then inputted it into the search function in AmiTube to bring up the video:
The description of the YouTube video appears on the right side, and the options to get as CDXL OCS, or to get Original appear.
If I get the original mp4, I would still need to convert it using ffmpeg before I could play it on the Amiga. The CDXL conversion option takes care of this task automatically.
Once it is converted, the option to play it appears in the AmiTube window
I played the video, and well, err, it is REALLY small and low res.
If you choose to get the original file, you get the choice of what format you want.
The save original file to mp4 video option works well, but of course you have to convert it to CDXL using ffmpeg to watch it...
I suppose the original file save option would be useful for music related videos as those could be saved as mp3 and then played back under AmigaAmp, using the hardware ahi driver as I showed in Part 1 of this build.
Here you can see the CDXL video I got converted using AmiTube:
I tried playing it full screen, and it does work, but the resolution is low and the OCS format means the colours are washed out.
I am not sure how to get it to work with AGABlaster yet. I have seen some screenshots from other people showing the option to generate agablaster CDXL but I didn't see when using AmiTube.
Something to explore more soon when I have some more time to read up on it!
In the meantime, time to move onto getting a tape drive working on the Amiga 4000T.
Why would I want to do that, you are asking.
Well, why not! I used to have a tape drive on my 386 PC back in the day, and I never had one on the Amiga. I used SCSI tape drives professionally for many years, working in IT.
I know the Amiga does support some tape drives, so I was interested to learn more about it.
Commodore released a chunky A3070 tape drive for the Amiga 3000, I believe mainly to facilitate the installation of Amix, a version of Unix made for the A3000UX distributed on tape only, and AMIX can also be used on the A2000 as well.
I don't have that A3070 drive, and to be honest it is such a small capacity I really can't see any value to having it.
I used to use DDS tape drives back in the late 1990's and early 2000's for companies I worked for at the time. I like the small size of the tapes, which are easy to manage. DDS drives are SCSI, and so they are easy to connect to the Amiga.
I picked a second hand untested Sony DDS3 tape drive taken from an old server, which is also backwardly compatible with DDS2 tapes. Importantly it uses the correct scsi interface connector to work with the existing scsi cabling in the Amiga 4000T.
I got to work installing it into the Amiga 4000T:

For whatever reason the drive rails I attached to the scsi drive are very slightly offset from the usual port location. Even after fiddling with them it is slightly out of position.
I worked out how to adjust it slightly, and now it looks ok.
To use the tape drive, I would need some backup tape software. There are a few available like Ami-Back, and also Diavolo. I decided to use Diavolo Backup, mainly as I had managed to find and purchase the software:
This is an old version though.
I have also bought Ami-Back which I want to try when it arrives. I didn't want to delay this information any further though as I would forget what I did!
I found the last Diavolo Backup 3.4 version online to use instead, since it includes support for later released tape drives. Hopefully it will work with the DDS3 tape drive.
The installation of Diavolo Backup was straightforward using the included installer.
Launching Diavolo backup software, it comes up with a nice interface using MagicWB themed functional icons to performa tasks. A lot of functionality exists in the menus.
I went into the settings in Diavolo backup and used the Autoconfiguration button to find the drive. Happily it found it right away!
It then asked me to put in a tape.
I bought some new old stock DDS3 tapes to use. I grabbed my first tape and put it into the tape drive.
DDS3 supports 12GB uncompressed and 24GB compressed data.
Diavolo prompted to start a test with the tape drive.
I clicked continue and this where things started to go bad. The drive crunched loudly trying to perform functions on the tape.
I went into the settings again to check them:
Everything looks ok, except that it says there is no tape medium present. There is, it is in the drive!
I noted that the tape type field in the settings was set to DDS-2. I couldn't see any DDS-3 option.
I decided to help it by defining the tape capacity manually to the actual size of the DDS-3 tape, which you can do in the section below the tape type in the screenshot above.
I then defined the backup job I wanted to do - just a small folder would be sufficient as a test. I picked the Devs folder.
You need to double click on the top folder in the selector window so that it highlights everything underneath.
The test changes to white when selected.
You will see the expected backup size and expected time to run the job, which it calculates.
I then start the backup, and specify the job name and password to protect the data if I want to - I didn't bother with that.
The job starts, and the grinding noises from the drive start again too, which clearly indicates a problem with the drive itself.
That didn't matter initially, as I then discovered I need to install XPK library. No idea why that wouldn't have been included with Diavolo backup given it is a commercial product...anyway.
I downloaded and installed XPK library from Aminet and then tried again.
In case you are wondering, I did this setup work on the tape drive some time ago, and lots of different tasks on the Amiga 4000T in July and August. I was too busy to do in progress blog posts so it is all together!
The backup starts, the tape grinding is back, and something is really not right. Sure enough, Diavolo backup complains of a SCSI hardware error trying to write to the tape drive.
I tried multiple new tapes, but got the same result.
Frustrating. I removed the failed tape drive, since it clearly would not work.
I decided to get one more second hand scsi tape drive to see if that was any better. The "new" SCSI tape drive is on the left, and is the same Sony DDS-3 tape drive model as the failed one on the right.
Here is the second drive installed into the Amiga 4000T. Have to admit I like the fascia on the failed one better..
Firing up the Amiga 4000T, the drive seems happier. I put a tape in and it didn't grind.
While waiting for the replacement drive, I also found the last version of Diavolo Backup 2000 software on the internet, so I downloaded that to try it out.
I also got around to installing Sgrab on the Amiga 4000T rebuild so I can capture screenshots instead of the grainy iPhone photos of the screens up until now. Sorry about that, but I lack the time to go back and redo the photos as screenshots.
Diavolo backup 2000 Looks very similar to the 3.4 version I had installed before.
I walked through the Auto configuration in the settings to detect the tape drive:
Again, it found the tape drive just fine:
I put a tape in at this point:

I then ran the test tape part - it started running for a while with the activity light lit up, but seems like it was timing out.
I went back into the settings and adjusted the size manually in case this helped it.
Still no DDS-3 tape type option in Diavolo 2000 though...BTW the tape capacity I set below is right, the box doesn't show all the text inputted, just the last 3 digits.
With that done, I went to select the Devs folder again:
With Devs selected, I can see the job preview - size, time, etc.
I name the job and try it again.
It appears to start working, the tape drive is clearly working in the drive, but after a while it stops and asks me to insert tape 1!
I tried different tapes, but still got the same result. Perhaps I should just accept that I am not going to get this working.
I wasted plenty of money to buy these two tape drives. Probably I should have bought a DDS-2 tape drive, but they were quite expensive on eBay compared to the DDS-3 ones. For something I just wanted to play with, I decided not to throw away any more money on this.
Time to move on.
I was hoping to use a LaserJet 6L printer with my Amiga 4000T, and had ordered one locally on eBay, with the intention to use the Turbo Print software I bought to use it. I used to use a DEC dot matrix printer on the Amiga 2000, and later a Panasonic KX-P1150 dot matrix, but since then I have never had a printer attached to the Amiga. I wanted to have a period correct Laserjet since there are Amiga drivers for it.
However, the person I bought it from did the worst ever wrapping job with the printer when shipping it. It arrived in the post completely destroyed, with the internal feeder broken the unit was totally useless.
To say I was disappointed was an understatement. The seller went AWOL and didn't respond to any messages to try to sort it out. I didn't get my money back either.
It is the first time I have ever has to leave bad feedback for a seller on eBay. I hope it is the last time also.
So with the tape drive solution not happening (buying two of them) and the printer being a total bust, something had to go right soon right? I lost a lot of money here.
Next job then is to get a SCSI Scanner up and running on the Amiga 4000T. I am very glad to say that I had much better luck with this!
I never had a scanner on the Amiga - I used a USB UMAX scanner on my Windows PC of the time, but couldn't afford a SCSI scanner - they were so expensive.
Nowadays luckily they are quite cheap. I bought an Epson Perfection 1200S SCSI scanner from eBay, sold as untested, so again I was taking a risk. They said it powered on and scanning arm moved, but without a scsi card they couldn't test it further.
The unit arrived well packaged from Western Australia, and also came with the optional film scanner attachment:
The unit looks clean enough - a little yellow around the base, but not too bad.
Looking at the rear of the scanner you can see the scsi ports (one pass through and one to connect to the SCSI controller on the Amiga 4000T), SCSI ID selector, SCSI Terminator switch, and option connector for the film scanner component.
It didn't come with a SCSI cable, which I bought separately. The Amiga 4000T is the only Amiga to use the more dense DB50 SCSI connector on the back rather than the old DB25 connector.
Normally this would be a problem, but that is a good thing here since this scanner uses the same type. Yes, I did research this before I bought it...
I added two shelves I bought new from Officeworks to the A4000T desk so I could slide the scanner underneath when not in use. It also allowed me to put the audio switcher, Roland SC-88 Pro, and G-Soft audio sampler hardware underneath, giving me room for the applications I had to relocate from where the scanner now sits.
I am quite pleased with this setup - it looks great.
I had planned to put the LaserJet 6L on the shelf above the scanner, but as covered earlier, that is not possible for now. Maybe later I will locate another LaserJet 6L - surprisingly hard to come by.
The vertical paper feeder means the LaserJet 6L needs less desk space, which is why I like it - I know there was a later LaserJet 1100 printer too as I used to use both in offices I worked in at the time. I'll keep an eye out for one.
Anyway, back to the scanner. To set it up, I needed to install some suitable scanning software. I chose fxSCAN 4.0, as it has native support for Epson Perfection scanners.
I chose the Epson device from the list of supported devices:
I set the program to use the 1280x1024 RTG screenmode on a separate screen to the Workbench, and selected the SCSI ID.
I noted that the SCSI CDROM I have still does this weird thing of taking a number of SCSI ID's for itself. Not sure why it does that.
So I powered down and disconnected the SCSI CDROM temporarily. fxSCAN could then find the SCSI scanner on ID5 as it is set.
With that done, time to try it out!
I grabbed an issue of Zzap Amiga magazine from 2023 and tried to scan the front page as a test.
It works! The scan worked exactly as it should!
You can then crop the image to cut out the bits you don't need:
Great feature is that you can then either save it as an image file, or export one or more images as a PDF! I tested greyscale and colour scanning as you can see in the image previews below:
I then exported the colour image as a PDF, and then opened it in APDF on the Amiga 4000T. I also had the image open at the same time:
I have to say I am really impressed with fxScan 4.0 and the scanner itself. I wish I could have bought one much earlier, but I am glad to have it now in 2023.
I was pretty happy with my progress at this point, even though a few things didn't go as planned.
I relaxed from all the upgrades and just enjoyed some photos from my Ayrton Senna PhotoCD, now working fantastic on the Amiga 4000T with RTG screen modes.
At this point I thought it would be good to take some nice shots of this side of my Amiga room - showing the A4000T on the left, upgraded Amiga 500 with ACA500+ / 030/network module, Amiga 600 with ACA630 030, Amiga 1200/030 for playing 030 AGA demos, and lastly the Amiga 1200 with Vampire 1200 in a modern A1200.net blue case (which I bought from Retrokit in Australia).

Beyond the A4000T, I recently added some monitor stands from Officeworks to give me a little more real estate on the other desks, especially for the A500, A600, and the A1200 machines as it became impossible on the desks to fit all the power supplies, external cd rom drives, floppy drives and PCMCIA cards.
Each desk (3 of them) has its own speaker set - the Amiga 4000T gets to have the best Harmon/Kardon speaker set which I got by using Qantas frequent flyer points many many years ago.
For the others, I chose the Logitech speaker/sub woofer setup because of the price, and also because the Logitech subwoofer takes two audio inputs. It allows me to hear both Amiga systems where two are installed on one desk, without the need for a switch box.
That said, for the two A1200 setups it proved impossible to totally avoid a switch box, as both have an external scsi CD-ROM drive with audio out, requiring 4 audio inputs (Native Amiga and CD). Actually I have a piggy back RCA audio connector on the Vampired A1200 audio out, which mixes the audio into one input.
For the 030 A1200 I don't have another cable. I will try to track one down next time I go shopping at Jaycar (local electronics shop).
Here is the view from the A1200 side - I am very proud of my Amiga room setup, it was a lot of money and work to make it happen and I think it looks great:
You can see the Amiga games in the background in the cupboard. I have rule that no game box is to be completely obscured. In my experience, if you can't see the box on the shelf, you are less likely to want to play it. This has got challenging of late with some game boxes on the shelves now partially obscuring boxes behind, but I can still read all the box titles.
BTW for the eagle-eyed reader the grey boxes in the cupboard are the sad remains of my decision 15 years ago to throw away all my Amiga game and application boxes when my wife moved into our old house and we literally had no space for them. It was the right decision at the time, but I regret it now.
In those grey boxes are the manuals, code wheels etc of those original game boxes, as I kept the internals and the disks. After a lot of effort and money over the past 3 years, I have replaced many of the missing boxes, but there are still many missing, and that is why I have the grey boxes still.
That said, paying over $600 each for replacing Hybris, Moonstone, Chaos Engine 2 boxes is something I am not willing to do. It makes no financial sense. So I guess that task will remain incomplete, but the grey boxes remind me regularly to think more carefully when throwing some things out.
I will continue work on my Amiga 4000T setup in another blog post soon, as there is more still to do, and the work is never completely done right? :-)