I am excited to try out the new smaller version of the case, designed for Mini ITX PC's, AmigaOne A1222, Raspberry Pi 4, UnAmiga, and Mister systems to be mounted in it.
I like the nice tribute to Jay Miner when you open the box (as above), and the ring bound User manual and Mastering Amiga AMOS manual positioned in their own section immediately visible.
Note that the AMOS manual (reprinted with permission) is not included in the package as standard. It was a kickstarter incentive add-on, and included for kickstarter backers when ordered as a complete system, ie. including a Pi 4B, Mister, UnAmiga, AROS Mini-ITX PC system, etc. I was lucky enough to get one!
Underneath is the main case, carefully packaged, along with the accessories and custom black Amiga keycaps to use on your own favourite Cherry MX or clone mechanical keyboard if you like. (you can have biege keycaps also)
You also get the mounting brackets for the DVD/CD drive, 3.5" USB/SD reader module / 3.5" floppy drive mounting frame, rear plate used by other systems to route connectors to the rear of the case, Amiga Forever 9, 32GB MicroSD for the Pi with AmigaOS 3.1.4 and AmiKit XE fully licensed and built, ready to run. Just need a Raspberry Pi 4B!
Luckily I have a Pi 4B already, because at the moment there seems to be a global shortage of Raspberry Pi systems due to component supply shortages. Hopefully this situation will sort itself out soon.
I also opted for the optional "Gold" feet to put underneath the case for extra style points - more on these later!
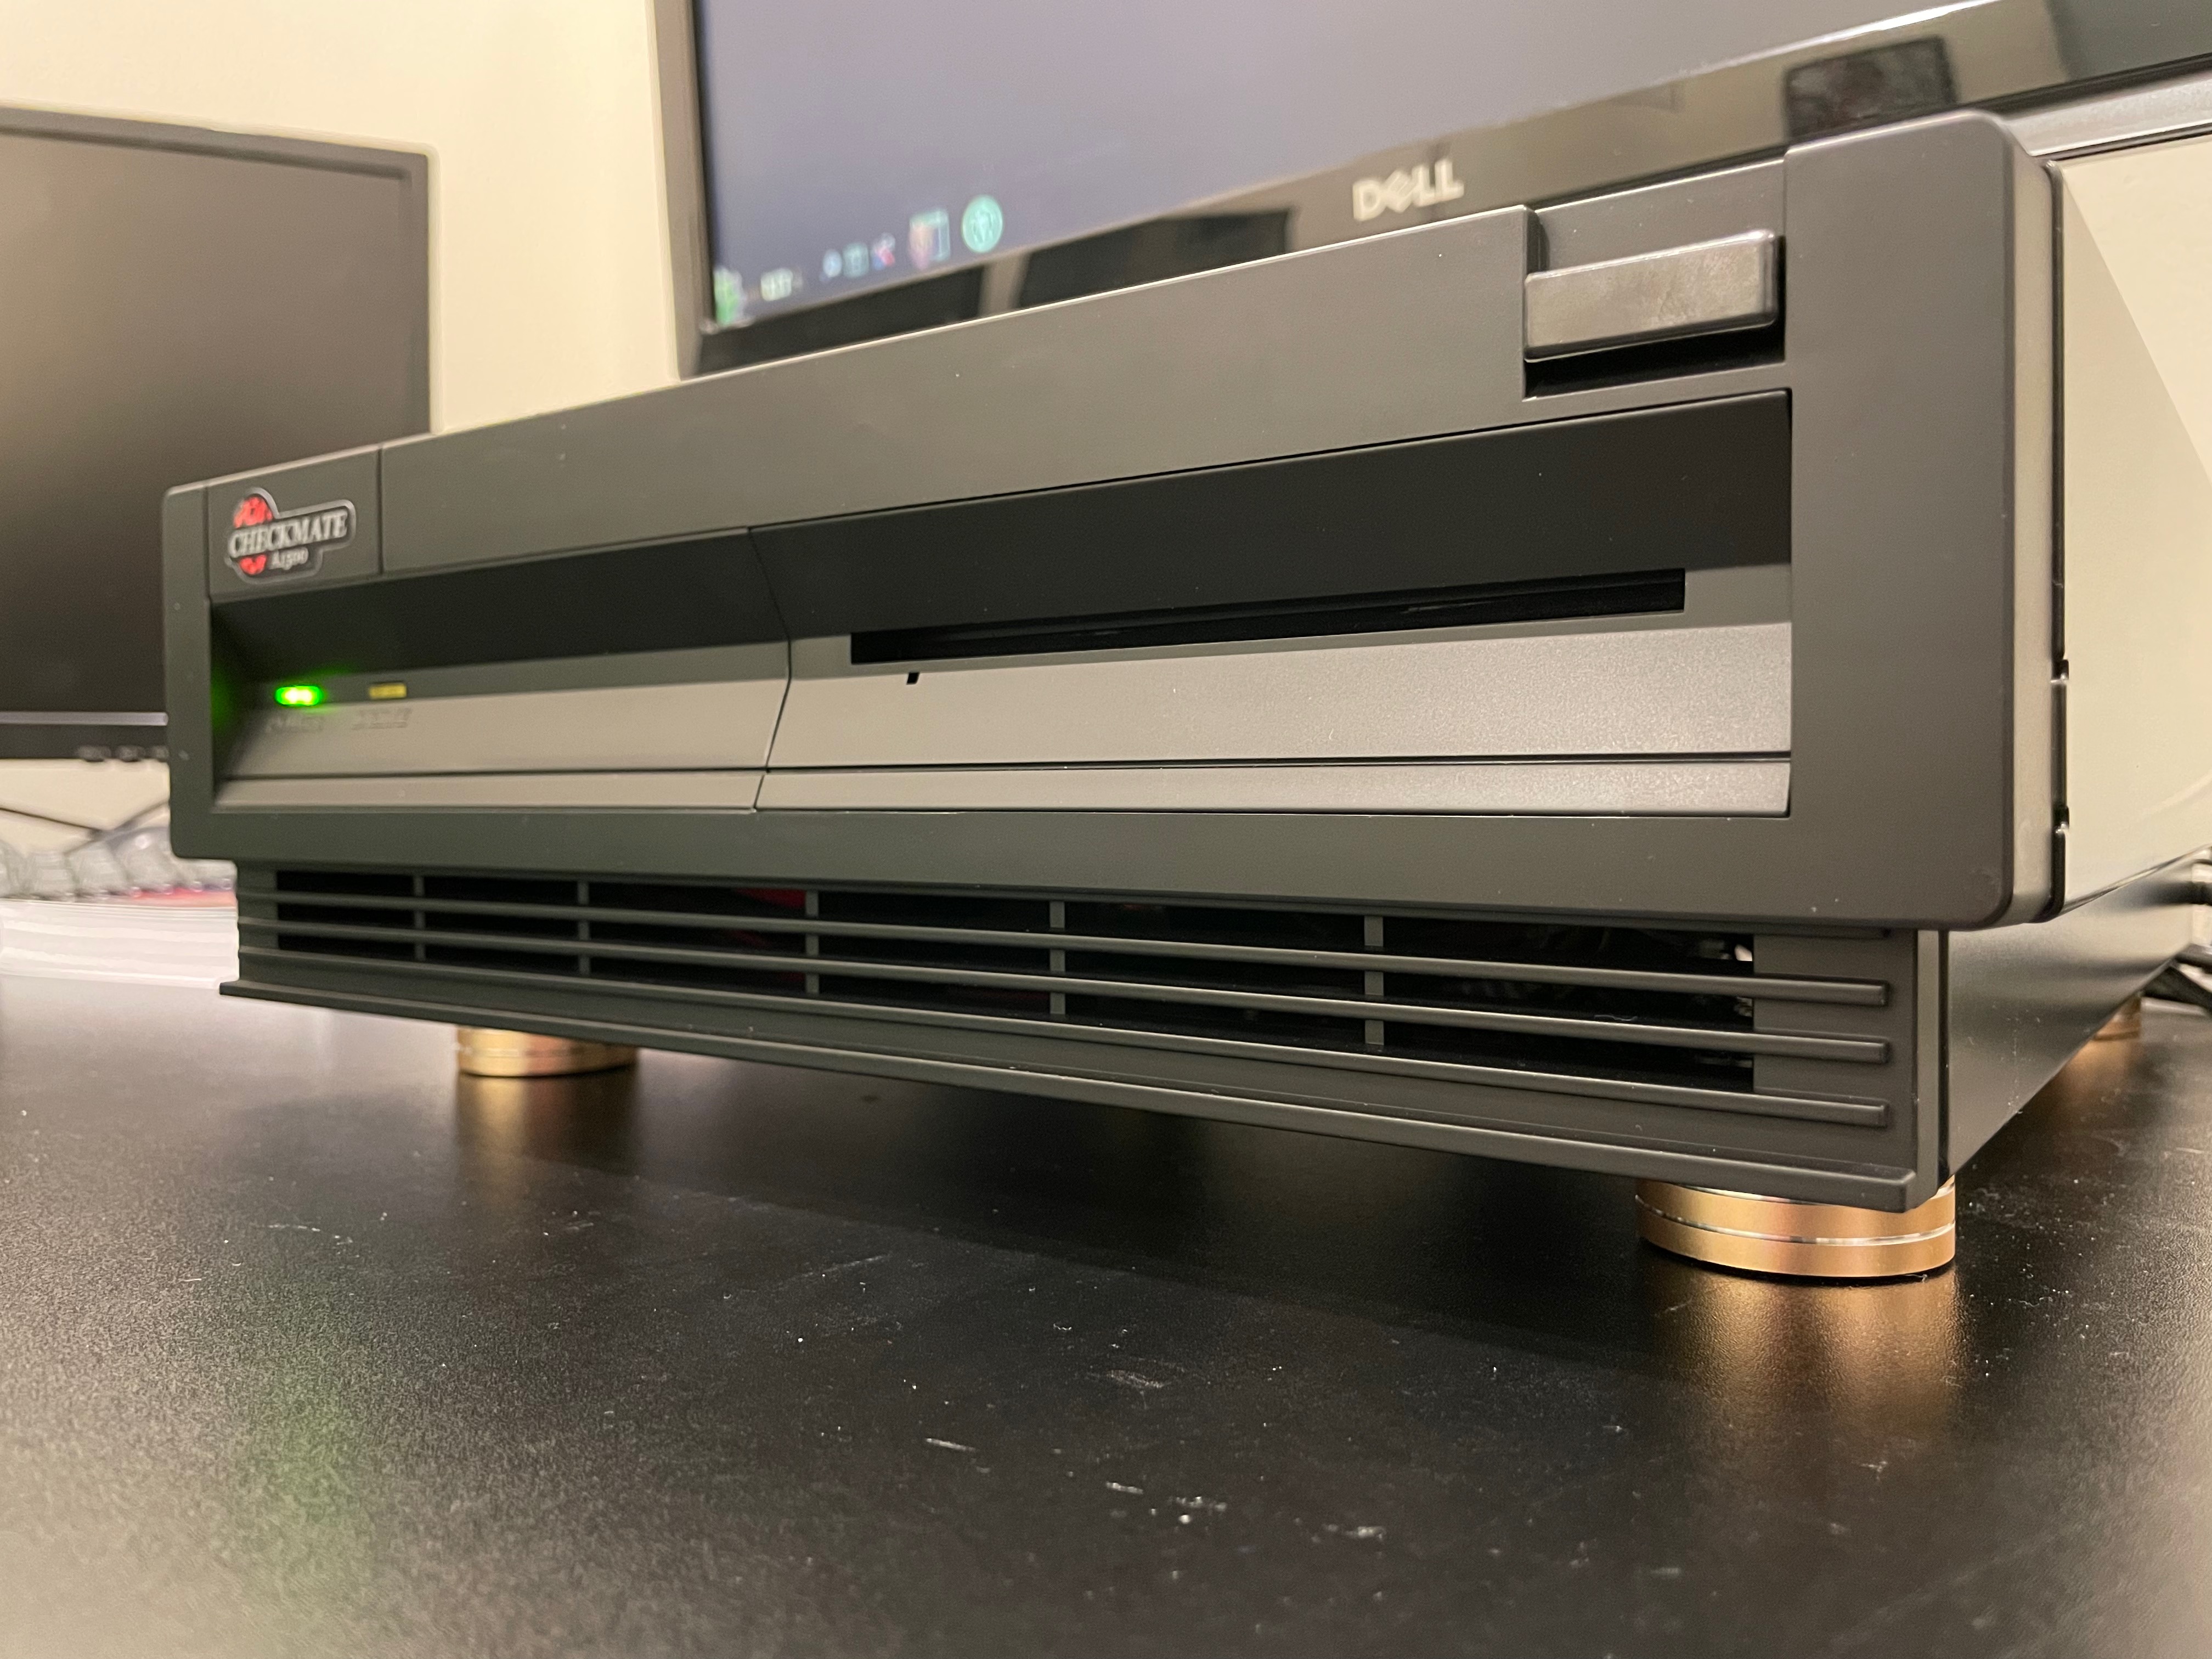
Here are some close up photos of the Checkmate 1500 Mini case, showing the injection-moulded front panel:
The style is clearly based on the original Amiga 3000 case. You can also have this case in a beige colour also if you want something closer to the original Amiga case colour. Personally though, I think the black looks really cool.
The sturdy construction of the case is evident, with a strong metal frame, rear, floor and top cover, and reassuring weight, without being too heavy to easily move around. The front injected moulded panel is the only part not made of metal, but it still blends well with the case and I don't expect it would yellow over time either, unlike the A3000 system case it is based on.
The view of the case from the rear, showing the ports in place as delivered, plus the slots and included small SFX PSU. Make sure the PSU Voltage switch is set correctly (on the back) for your country before turning it on!
Closer in, you can see the two HDMI ports USB-C, audio out port, and a slot open space for the Raspberry Pi 4 ports once installed inside the case.
Here is the Raspberry Pi4B I have, ready to be installed in the case!
As a comparison, you can see below the difference in size between the Checkmate 1500 Plus and Checkmate 1500 Mini cases:
The Checkmate 1500 Plus case gives you an extra 5.25 bay to play with at the front, allowing more front mounted CD/DVD/floppy/USB/other configurations if you need it.
In my Checkmate 1500 Plus case I currently run an Amiga 500, with a Gotek in one bay and a real Amiga floppy drive in the other, with a
DF0 selector switch installed on the appropriate chip and routed to the rear of the case to allow me to choose which one is DF0.
As with the Checkmate 1500 Plus case, it is important to read through the well prepared and detailed User manual, which explains what you need to do to build the Mini case for your planned host system - in my case, the Raspberry Pi 4B.
I checked over the parts list to make sure I had everything before I got going.
An obvious question one might ask is why would you take such a small system like the Pi 4B and put in a larger case like this?
Well, in my view, one reason is because the case allows you flexibility to install additional hardware internally rather than having a bunch of dongles, cables and external devices hanging off the Pi to provide the essential functions of a modern computer.
In addition, this case allows us to have a modern computer that looks like an Amiga, and runs AmigaOS, applications and games (emulated in this case), while still being a functional modern computer running Linux/Windows with modern browsers, modern applications, etc.
As an extension to this, the concept of Ami-Hybrid, is a level of integration between the emulated AmigaOS and the host Linux/Windows system.
Back in the late 1990's, this integration was achieved with products Steve Jones was involved with like the Amiga / PC
Siamese system. I remember really wanting this system back then, but unfortunately not being able to afford it! (2 pictures below of Siamese system reproduced with permission)
In the modern era, some other people also did concept solutions similar to Ami-Hybrid, like AEROS Linux on PC, which I looked at on
this blog back in 2015.
Ami-Hybrid is achieved with Raspberry Pi 4B running Linux as a host, thanks to work done by Steve Jones and the Amiberry author Dimitris, and later using RabbitHole functionality to interact with Linux from AmigaOS, using Jan's
AmiKit XE.
Steve Jones explains Ami-Hybrid and the history in more detail if you are interested, covered
in this video he did in 2020. More on how to use Ami-Hybrid later on.
For now though, lets move on, I have a case build to do!
Sliding off the top cover for the first time, I immediately noticed the improvement in the top cover over the Plus case, which means it no longer has to be removed at an 90 degree angle requiring the case to be positioned on the edge of a desk. Thanks for this improvement!
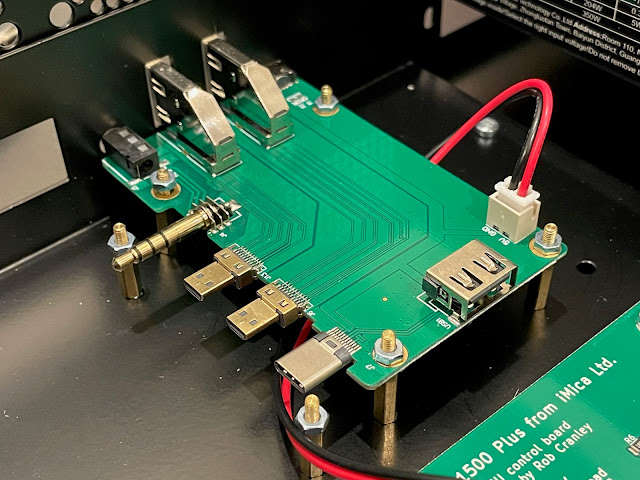
Inside you can see the two mounted boards, one for the connection to the Pi 4B (to supply power, redirect the HDMI, USB-C and audio out ports to the rear of the case. There is a internal USB port on this board also, but this is not currently usable from the Pi.
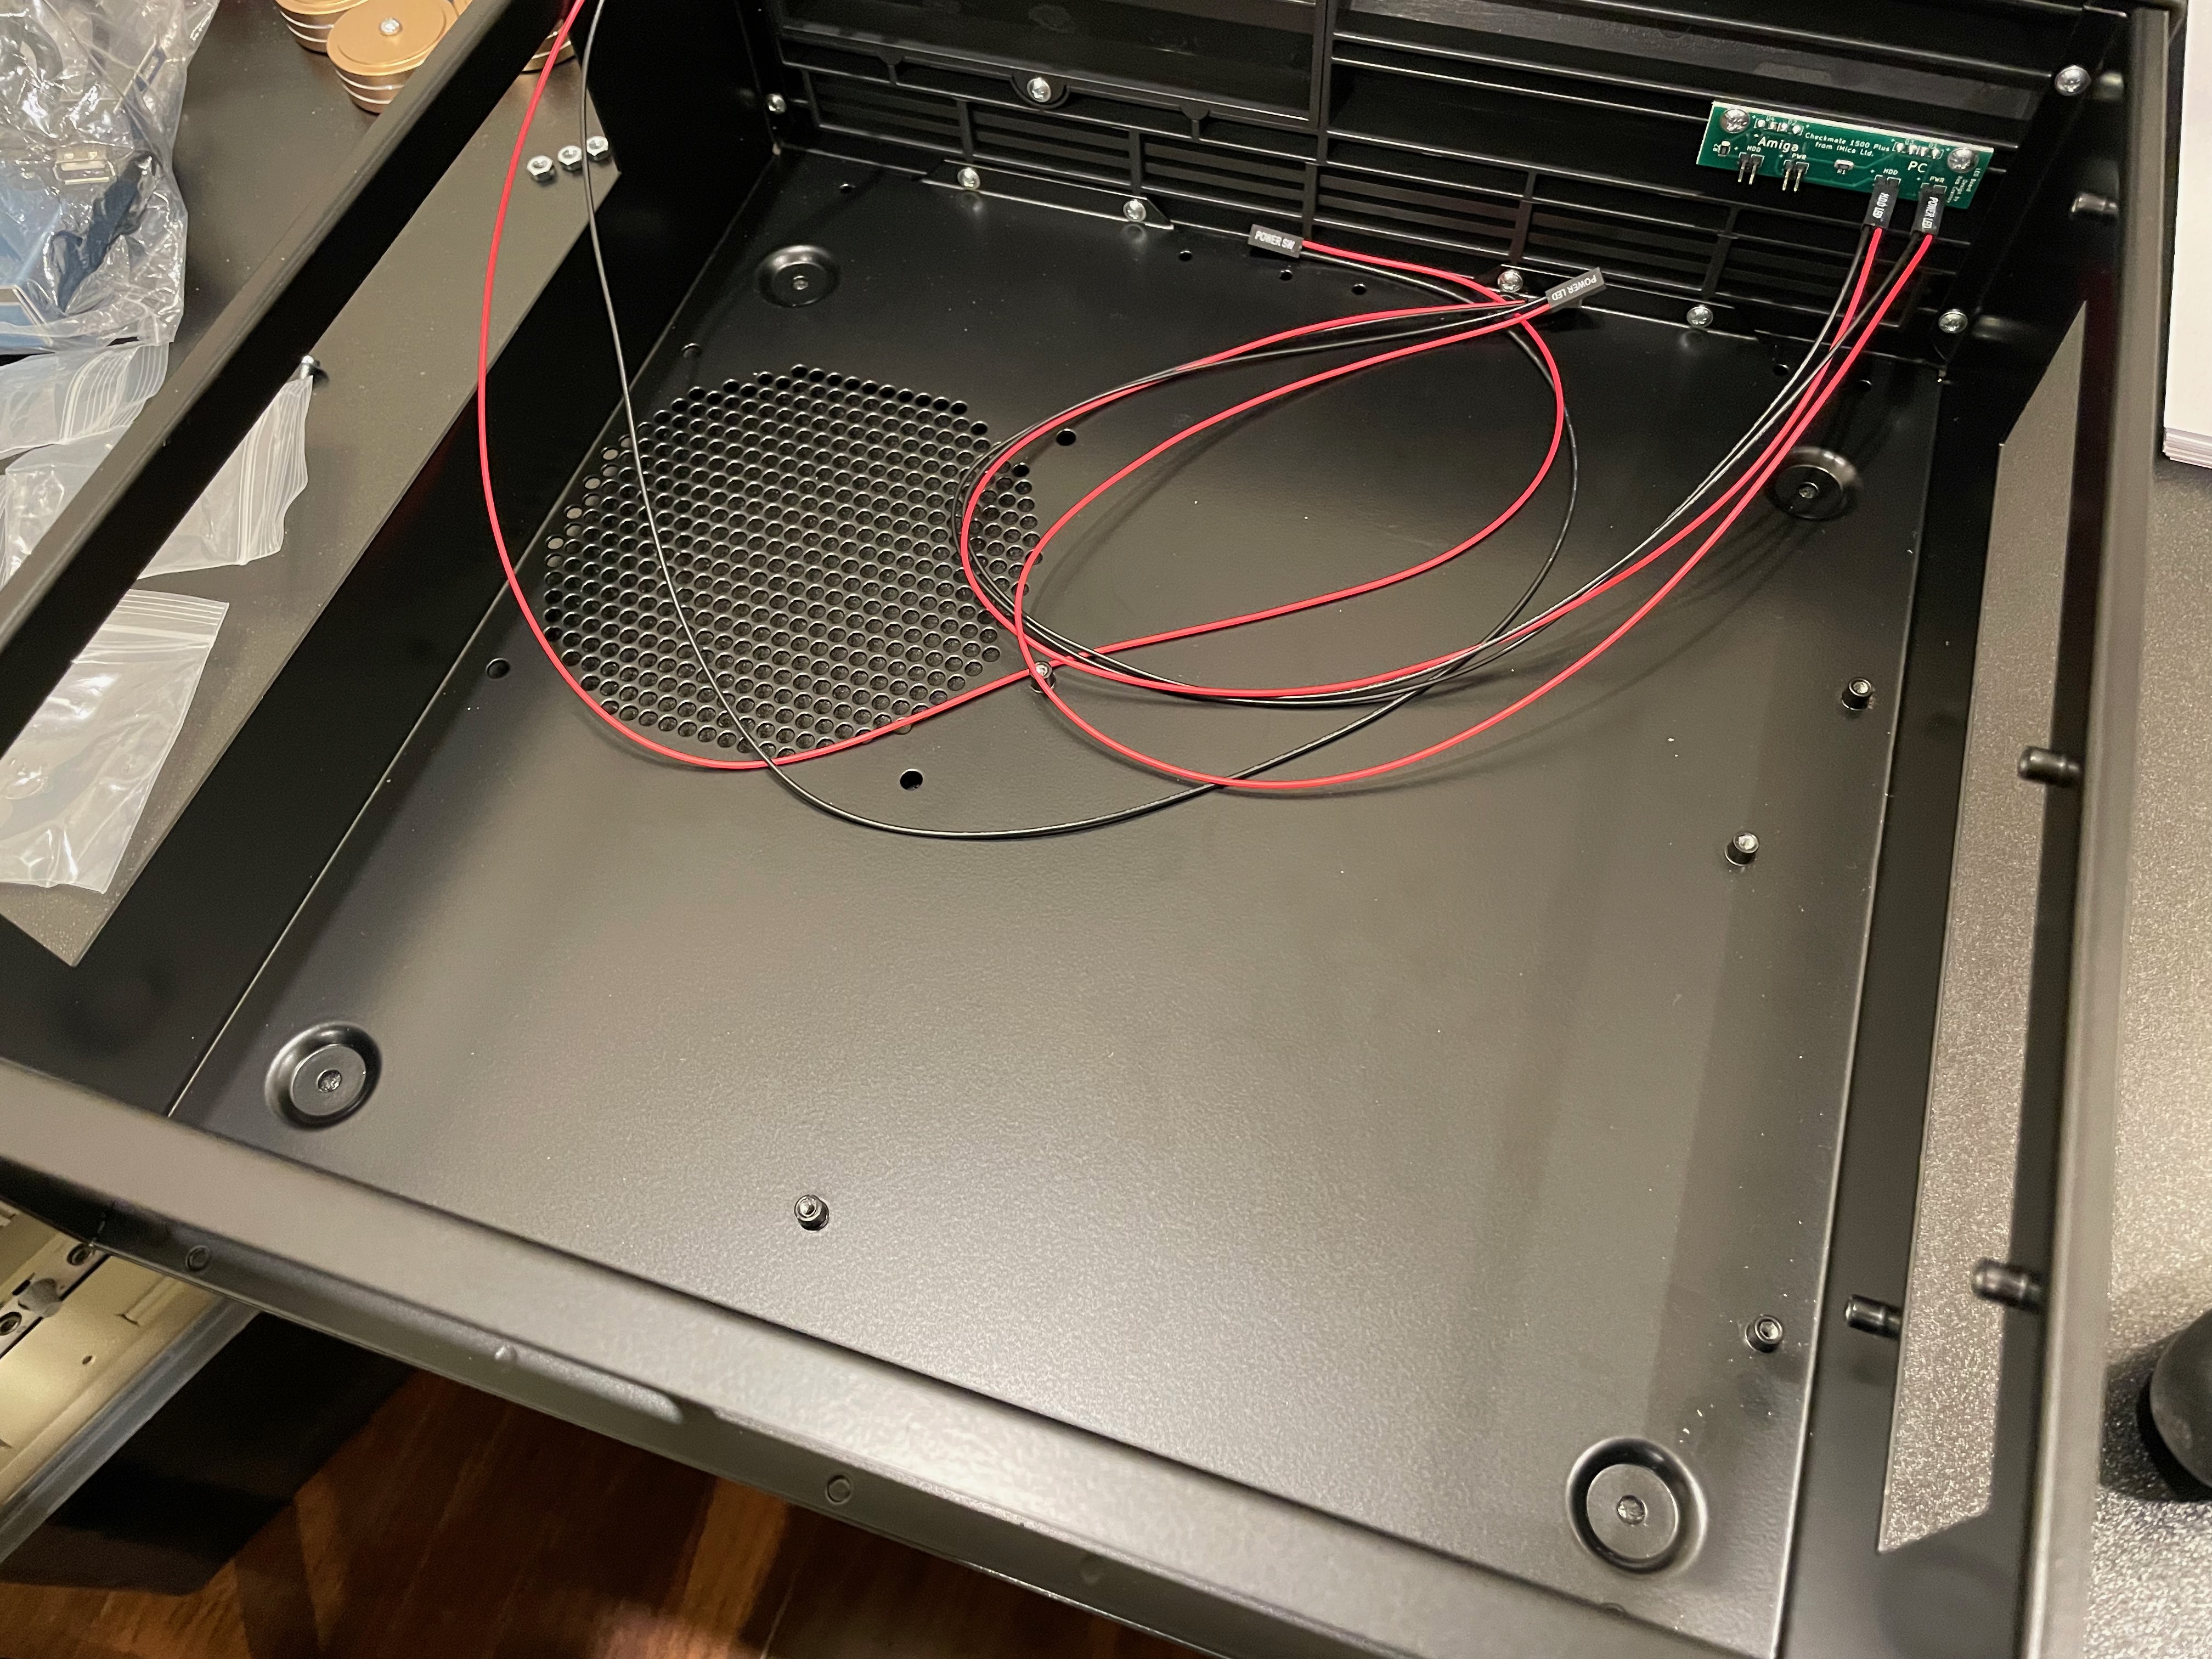
The other board allows connection of the main power from the included PSU motherboard connector, and supplies the connectors for the Power LED at the front of the case, and the front power switch connection.
You can see both boards are mounted on a seperate plate that is then secured to the bottom of the case. This is important, as we will see later.
Looking around the inside of the case, looking to the front of it, you see the connectors for the LED's on the front. There are PC and Amiga connectors, although the Amiga connectors are only for use in the larger Checkmate 1500 plus case as the Amiga motherboards don't physically fit in this smaller Mini case.
Looking at the 5.25 bay internals, you can see it is easy enough to swap out the blanking plate for a DVD/CD faceplate or 5.25 to 3.5" bay faceplate for a floppy drive, USB hub mounted in a 3.5" enclosure, etc. With the Van Helsing pack, you get all these faceplates included, and a shorter 5.25 riser if you need more cooling solution space in front of the 5.25 bay.
The screws needed for the case are taped to the riser, screwed in the 5.25 bay area (includes the logo sticker for the case front also).
The riser can be used to mount a DVD or other 5.25" device onto and align with the bay.
Turning the case over you can see the cooling fan vent area and also the four velcro feet at each end of the case.
This nicely gets us to the first task to work on, attaching the optional "gold" feet to the case. They are metal and very solid, but not quite gold in colour - very close though.
Checking the case I realised I would need to remove the PSU, 5.25 bay riser plate, and the plate holding the power board and pi port extender, as the hole for the feet is located under them. This is why I am doing this task first.
Also, note that the screws for where the Pi 4B motherboard is to be positioned already have the nuts on the screws. You need to remove these first before installing the Pi, otherwise motherboard damage can occur.
With the plate removed, I can now see the empty case, with all the screw holes for the feet visible, ready to be attached.
I found turning the case front facing up was the easiest way to do the feet installation.
I ripped off the velcro feet and got to work screwing in the "gold" feet.
A few minutes later and I have all the feet screwed in. They look great already.
Here are some more closeups of the feet with the case the right way up now. It is worth getting them in my opinion, as they look very stylish, especially with the black case.
I should get some more of these feet for the Checkmate 1500 Plus case! That said, I do have the extenders to create a keyboard garage underneath the Checkmate 1500 plus.
As an aside, I opted not to use the keyboard garage extenders on the Plus case, as the converted Amiga 500 keyboard doesn't fit underneath it. The keyboard garage extenders are intended to be used for projects using a smaller USB keyboard (no numeric keypad), rather than the original Classic Amiga keyboard.
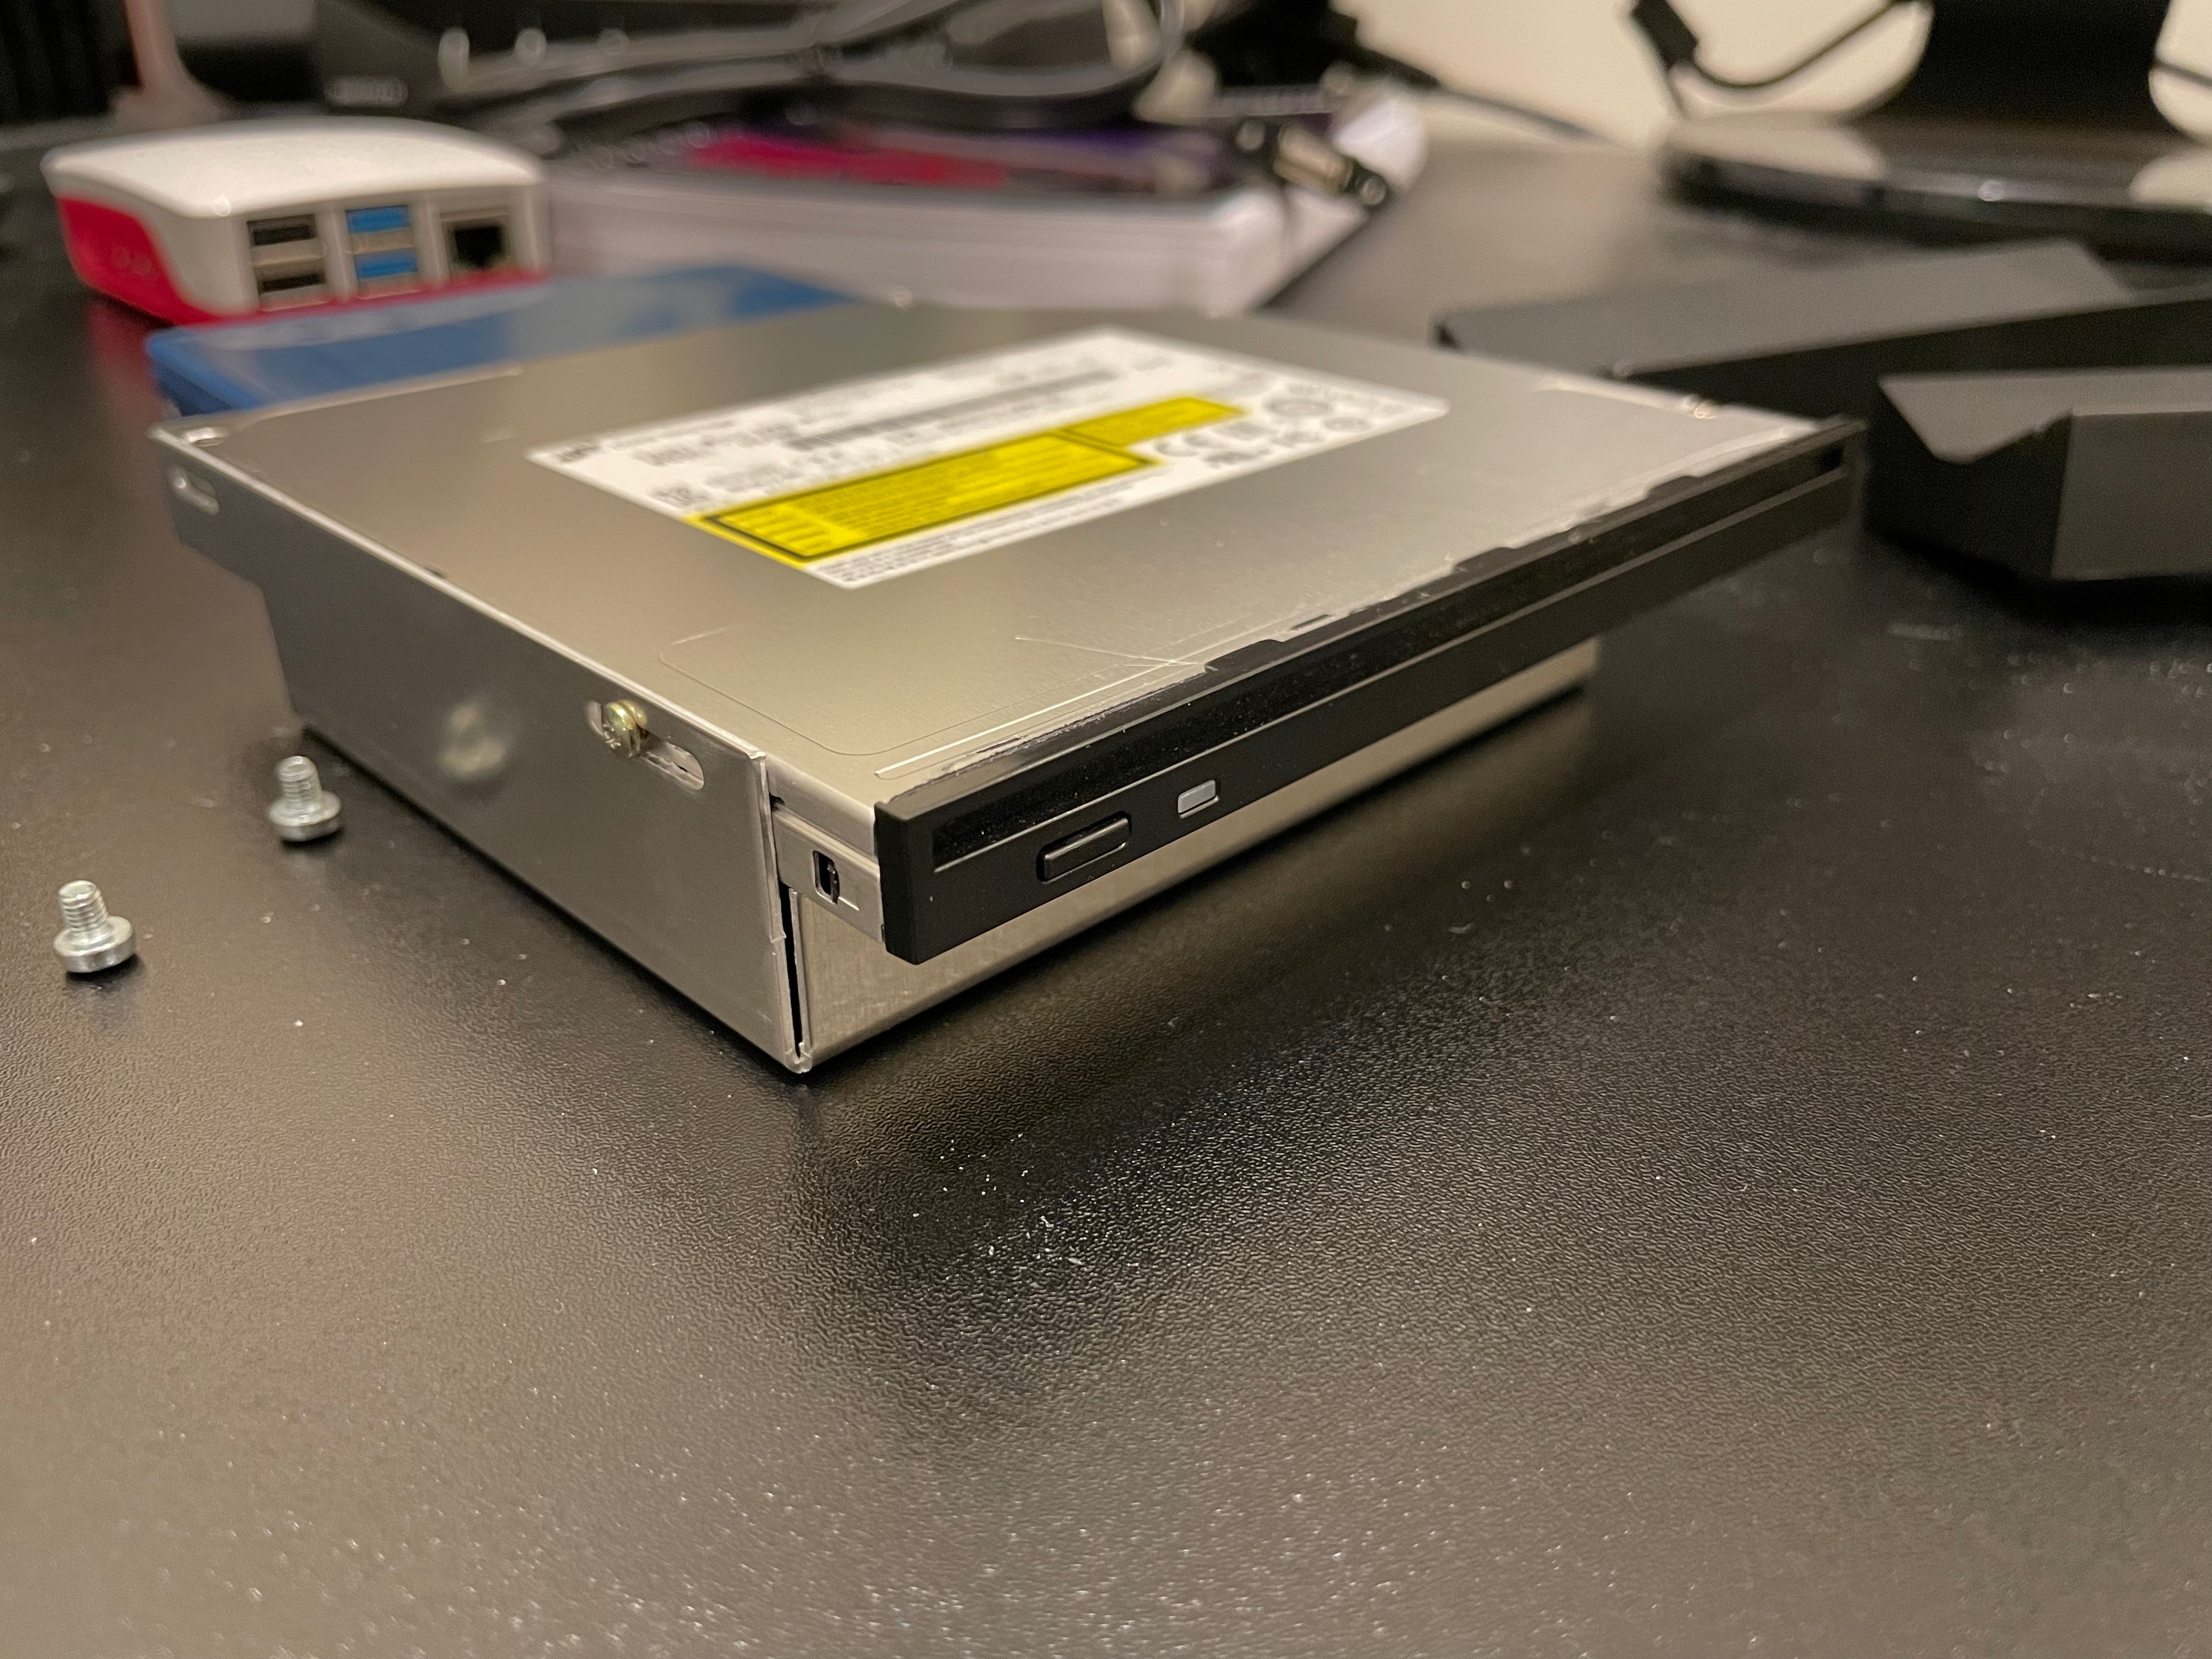
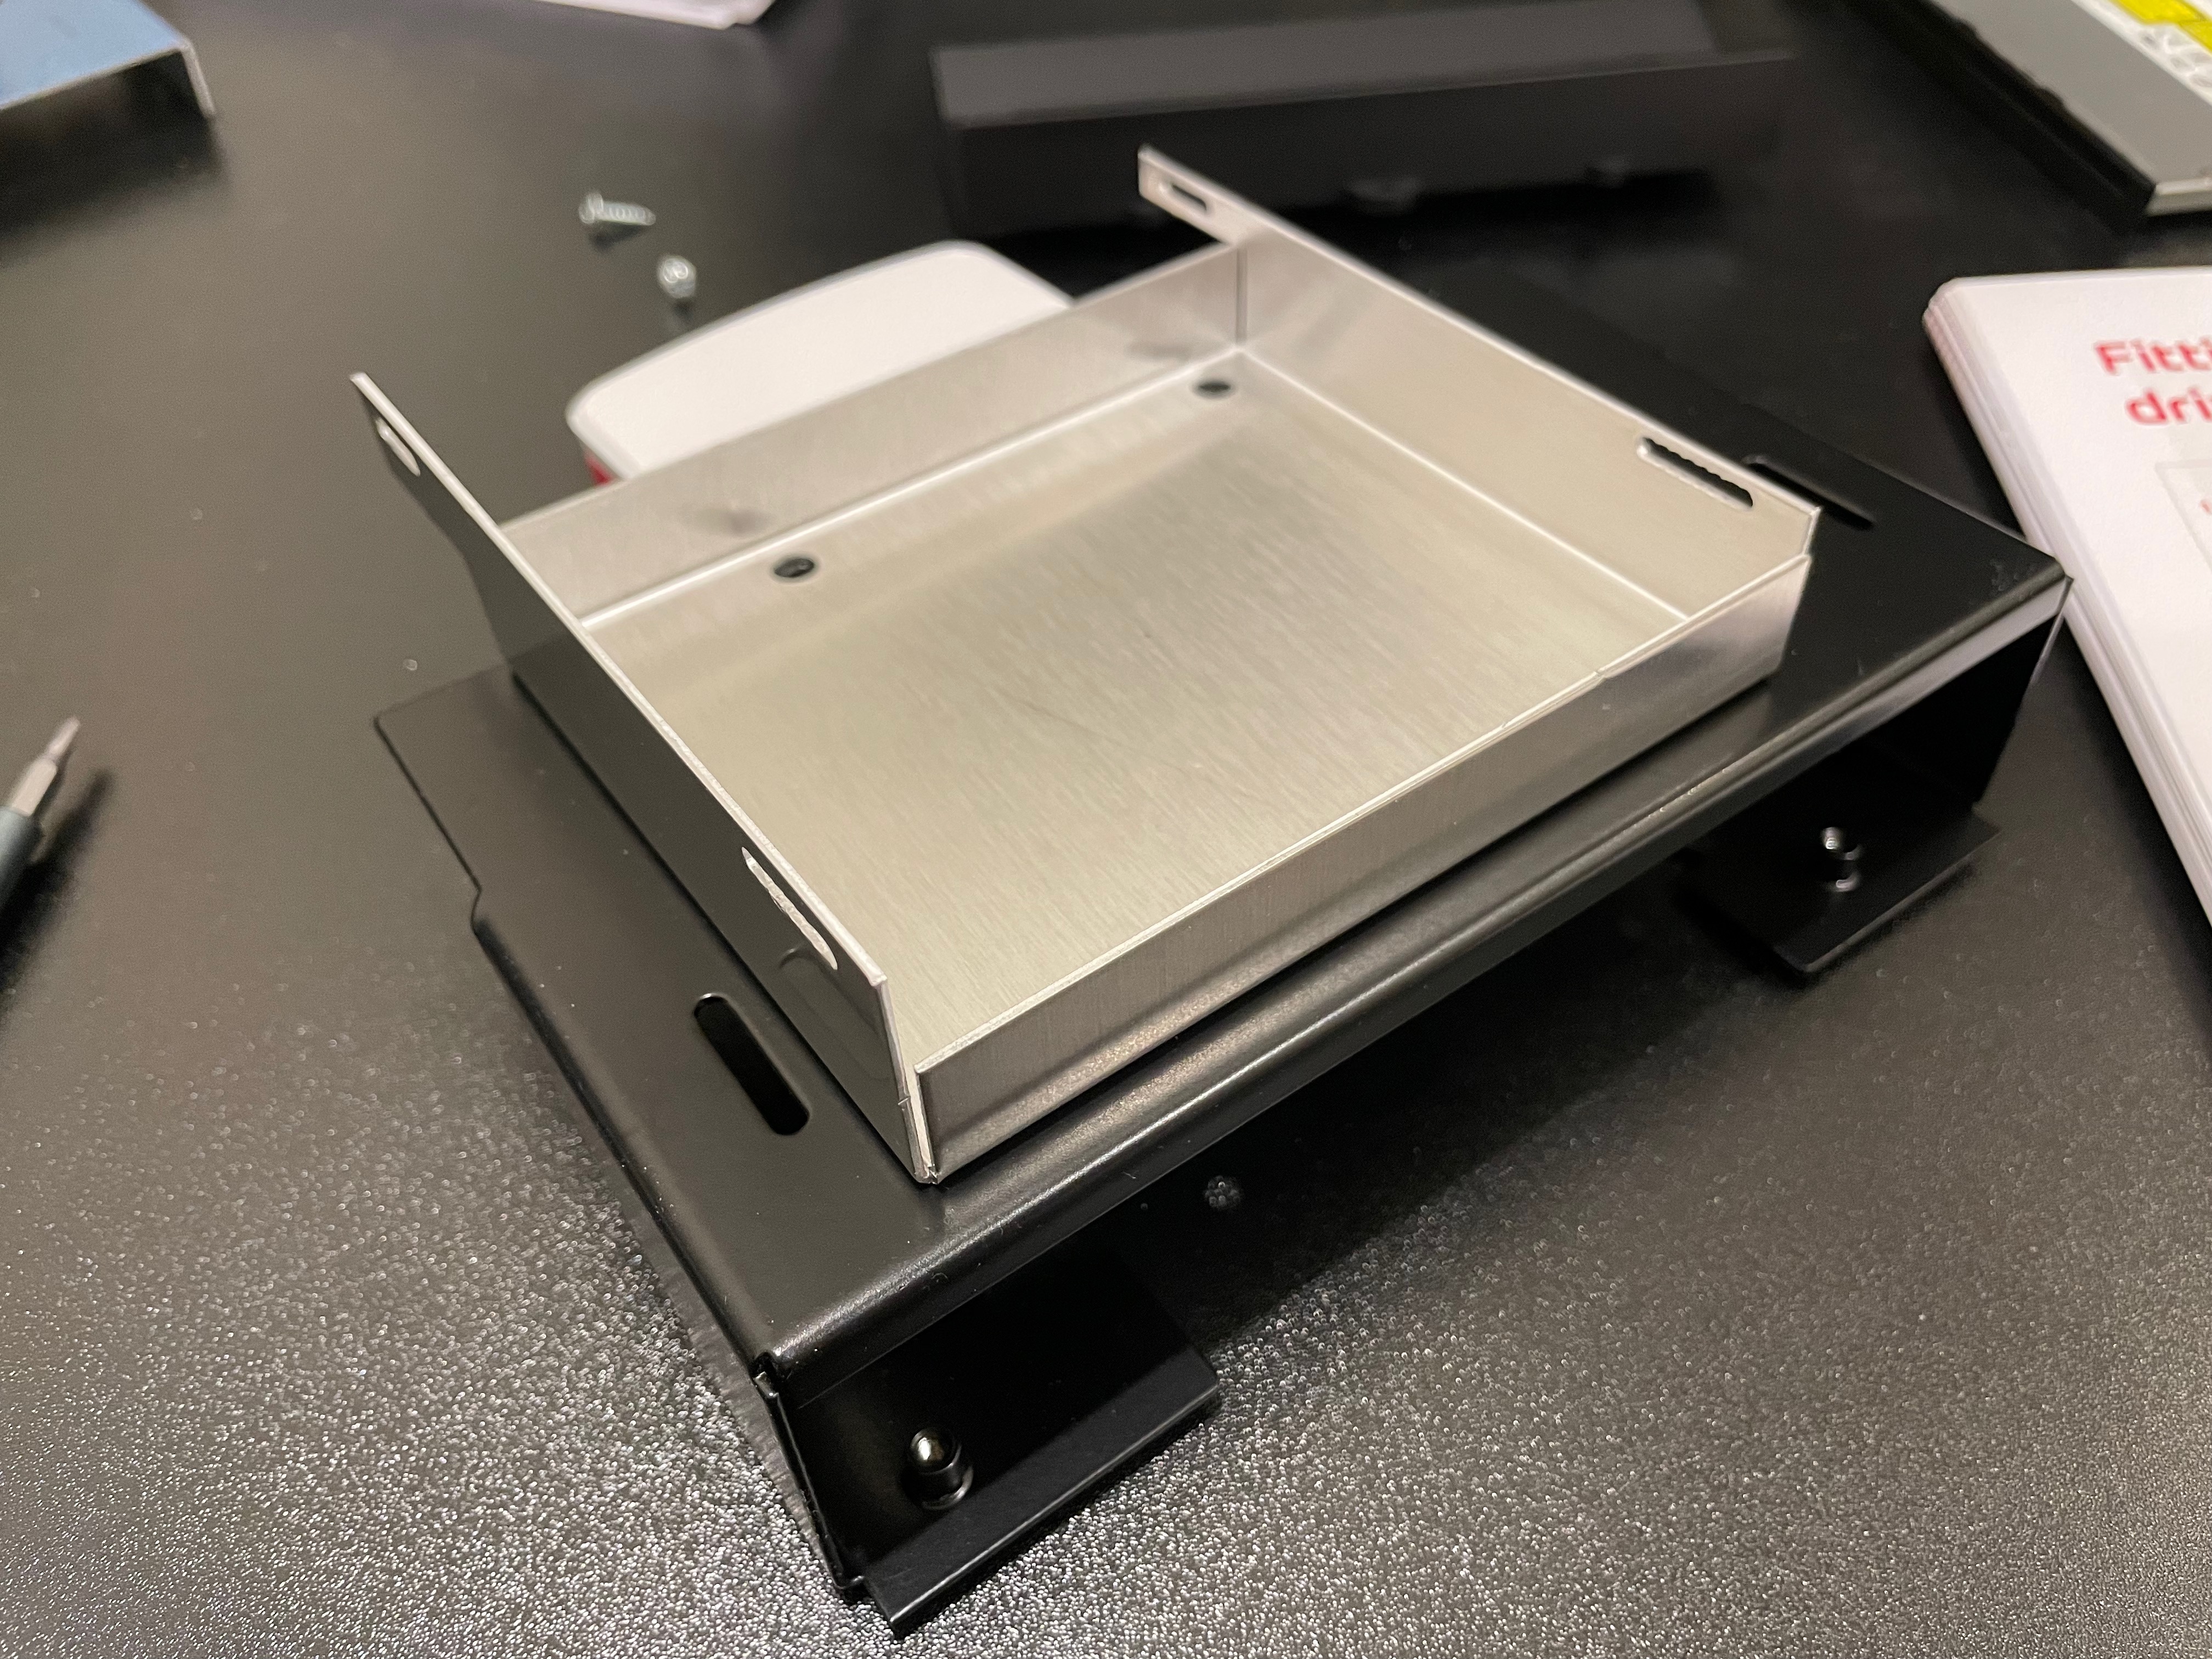
Next up, I started working on mounting the slot load DVD drive onto the 5.25 drive bay slim drive frame.
The User manual provides plenty of information here on how to do this, so I found myself referring back to it quite a lot.
You need to position the DVD slim drive frame over the screw holes in the 5.25 riser so it is in the right place for the DVD drive to align with the hole in the DVD faceplate.
With that now screwed in, I could do the next step..
I mounted the DVD slot load drive on the to DVD drive frame, screwed in loosely. This because I needed to work out the correct position for it when in the case before tightly screwing it in. You don't want the eject button pushed against the front fascia, just very close.
Here is the DVD faceplate now installed in the case - you can see (with difficulty) the DVD slot load drive is lined up behind it - small adjustment needed as a little bit high still:
This is where the case really comes into its own. Being able to use the DVD drive with the Pi 4B, all integrated in the one Amiga 3000 style case looks fantastic.
To connect the DVD drive to the Pi 4B USB ports, we will need a mini-SATA to USB converter, which I have, and will connect a bit later on, once the Pi 4 is installed in the case.
Installing the Raspberry Pi 4B means removing the extender module from the case, so they can be connected together carefully. Be really careful not to bend either board while doing this. They connect easily, without need to apply much force.
The next tip that will help (as you do assembly) is to remove the mounting plate for the extender and pi from the case (it was already for me since I installed the feet) as it is much easier to mount the boards on to the screws.
I deliberately loosened the mounting screws as shown, to make it easier to align the screws with the board holes, without putting any pressure on the connection between the boards to mount them both safely.
Once mounted safely, I then tightened the screws gently.
The fit is exact, and the ports line up nicely.
I then applied the nuts onto both boards to secure them to the plate underneath. It is easy to damage the boards putting the nuts on as there is no room between the holes and important traces on the motherboards, so I just did it finger tight, which is fine.
Here is the ports showing in the rear to the case.
I applied some heat sinks to the Pi 4B chips to allow for overclocking it (you must have these applied if you plan to do that). By default the MicroSD AmiKit XE (as delivered) is not overclocked.
I also connected the SATA connector to USB cable and connected via the open slot to the USB ports on the back of the case.
One thing worth mentioning here is that the Pi4B has nowhere to connect a Hard disk LED to illuminate the HDD led on the front of the case.
I know that there are ways to achieve it if you are electrically inclined, but I am not, so for now I have to live without it. Hopefully there will be an easy to install solution for this down the road.
I then connected the Power switch and Power LED cables from the case to the ports on the PSU control board.
The SATA to USB converter for the DVD drive uses two USB plugs, which is annoying, so I wanted to reduce it to only use one, so I can use the port for something else.
I found a Molex to USB converter cable online which neatly solved the problem. I connected it to a free PSU molex power connector and connected the second USB cable to it.
Now I only need one USB port for the DVD drive - excellent.
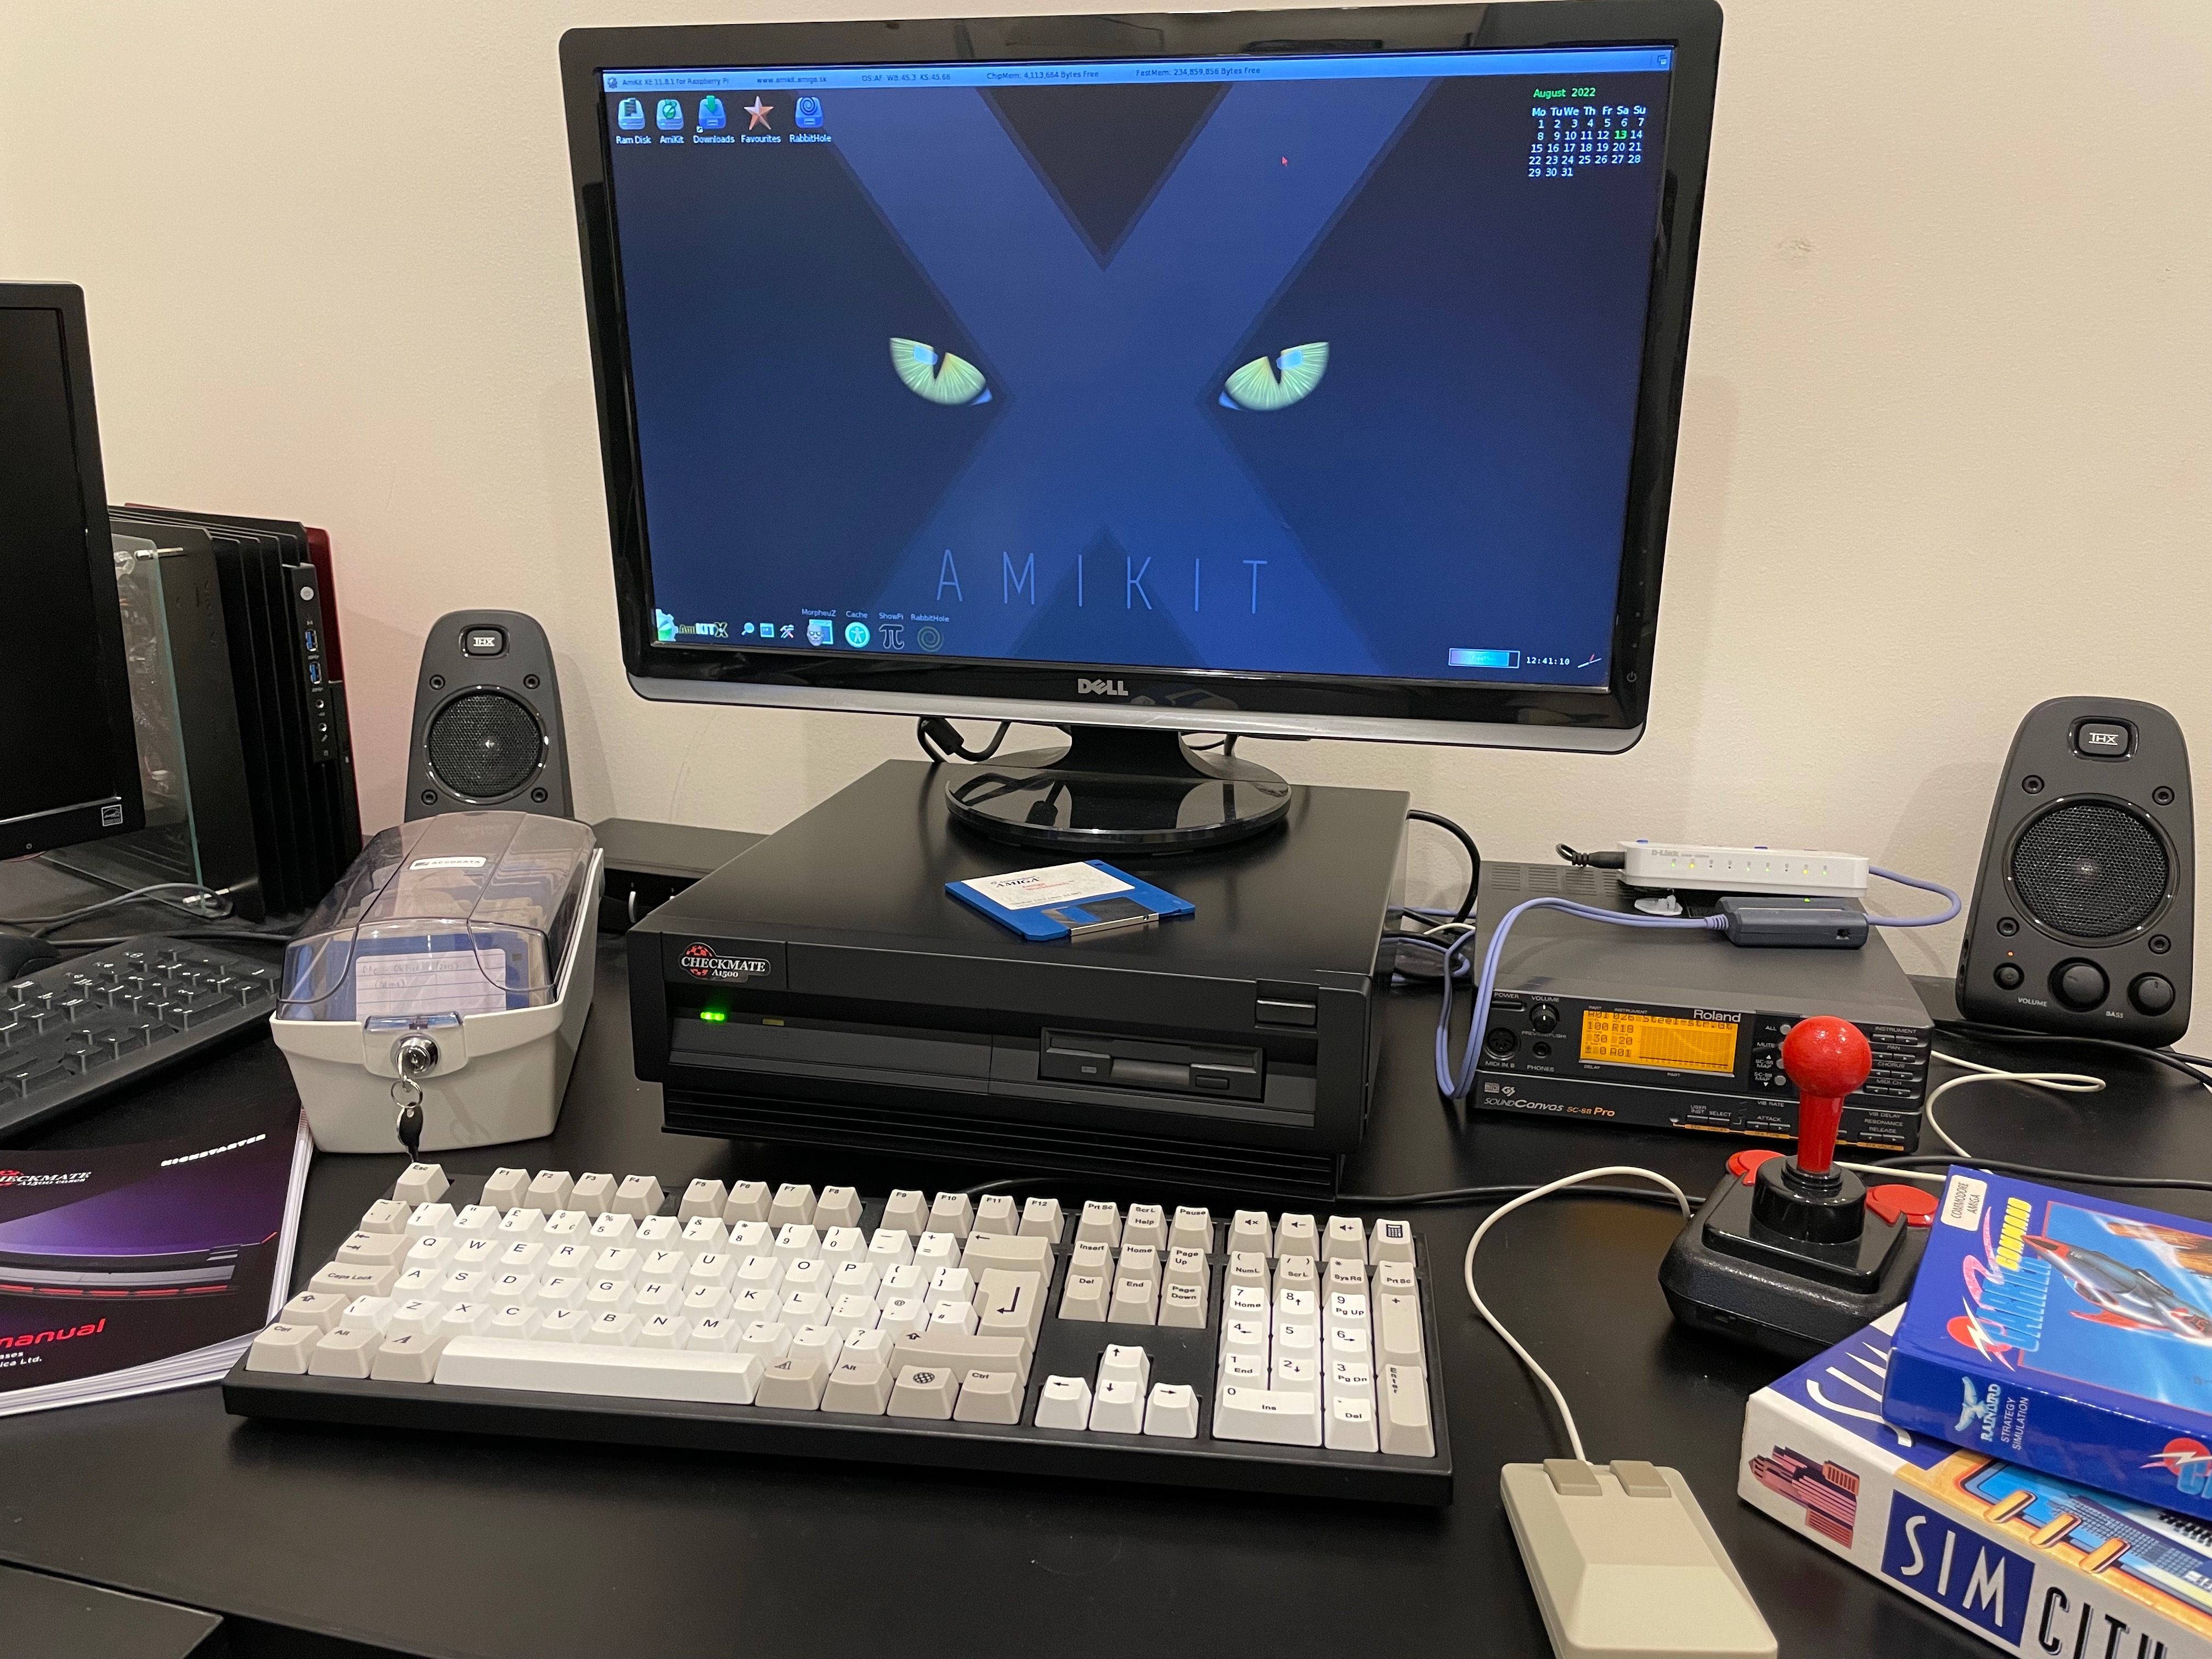
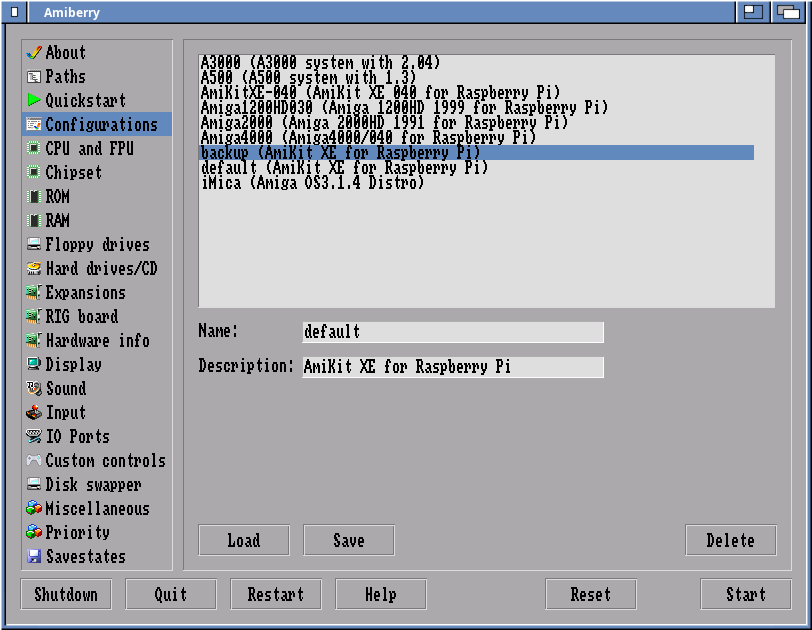
With that done, we are almost ready to try it out. I opened the User Manual again to retrieve the Ami-Hybrid 32GB MicroSD card, which is prepared with licensed AmigaOS 3.1.4, kickstart roms and AmiKit XE, ready to use.
I pleased to say it booted straight up in AmiKit XE.
I have spent many blog posts covering AmiKit XE features. So rather than spend more time covering the same ground, I will encourage to read the posts I did most recently which cover AmiKit XE in a lot more detail, on Raspberry Pi 4B/Pi 400, Windows, Mac and Linux as well:
With this Van Helsing package, AmiKit XE and all required AmigaOS and kickstart rom legal licensing is included in the price!
Playing around in AmiKit XE, I then thought about using my A500 Mini USB mouse spare I bought with my
A500 Mini earlier this year - which I thought would be perfect for this system.
I then plugged in the A500 Mini USB mouse in place of the X1000 mouse, and it looks much more Amiga with this mouse. (although admittedly you do lose the scroll wheel functionality doing this)
I needed to quickly adjust the settings in Amiberry (F12 while running) to set the mouse and Competition Pro USB joystick to the right ports. It assigns them in the wrong ports for some reason. YMMV.
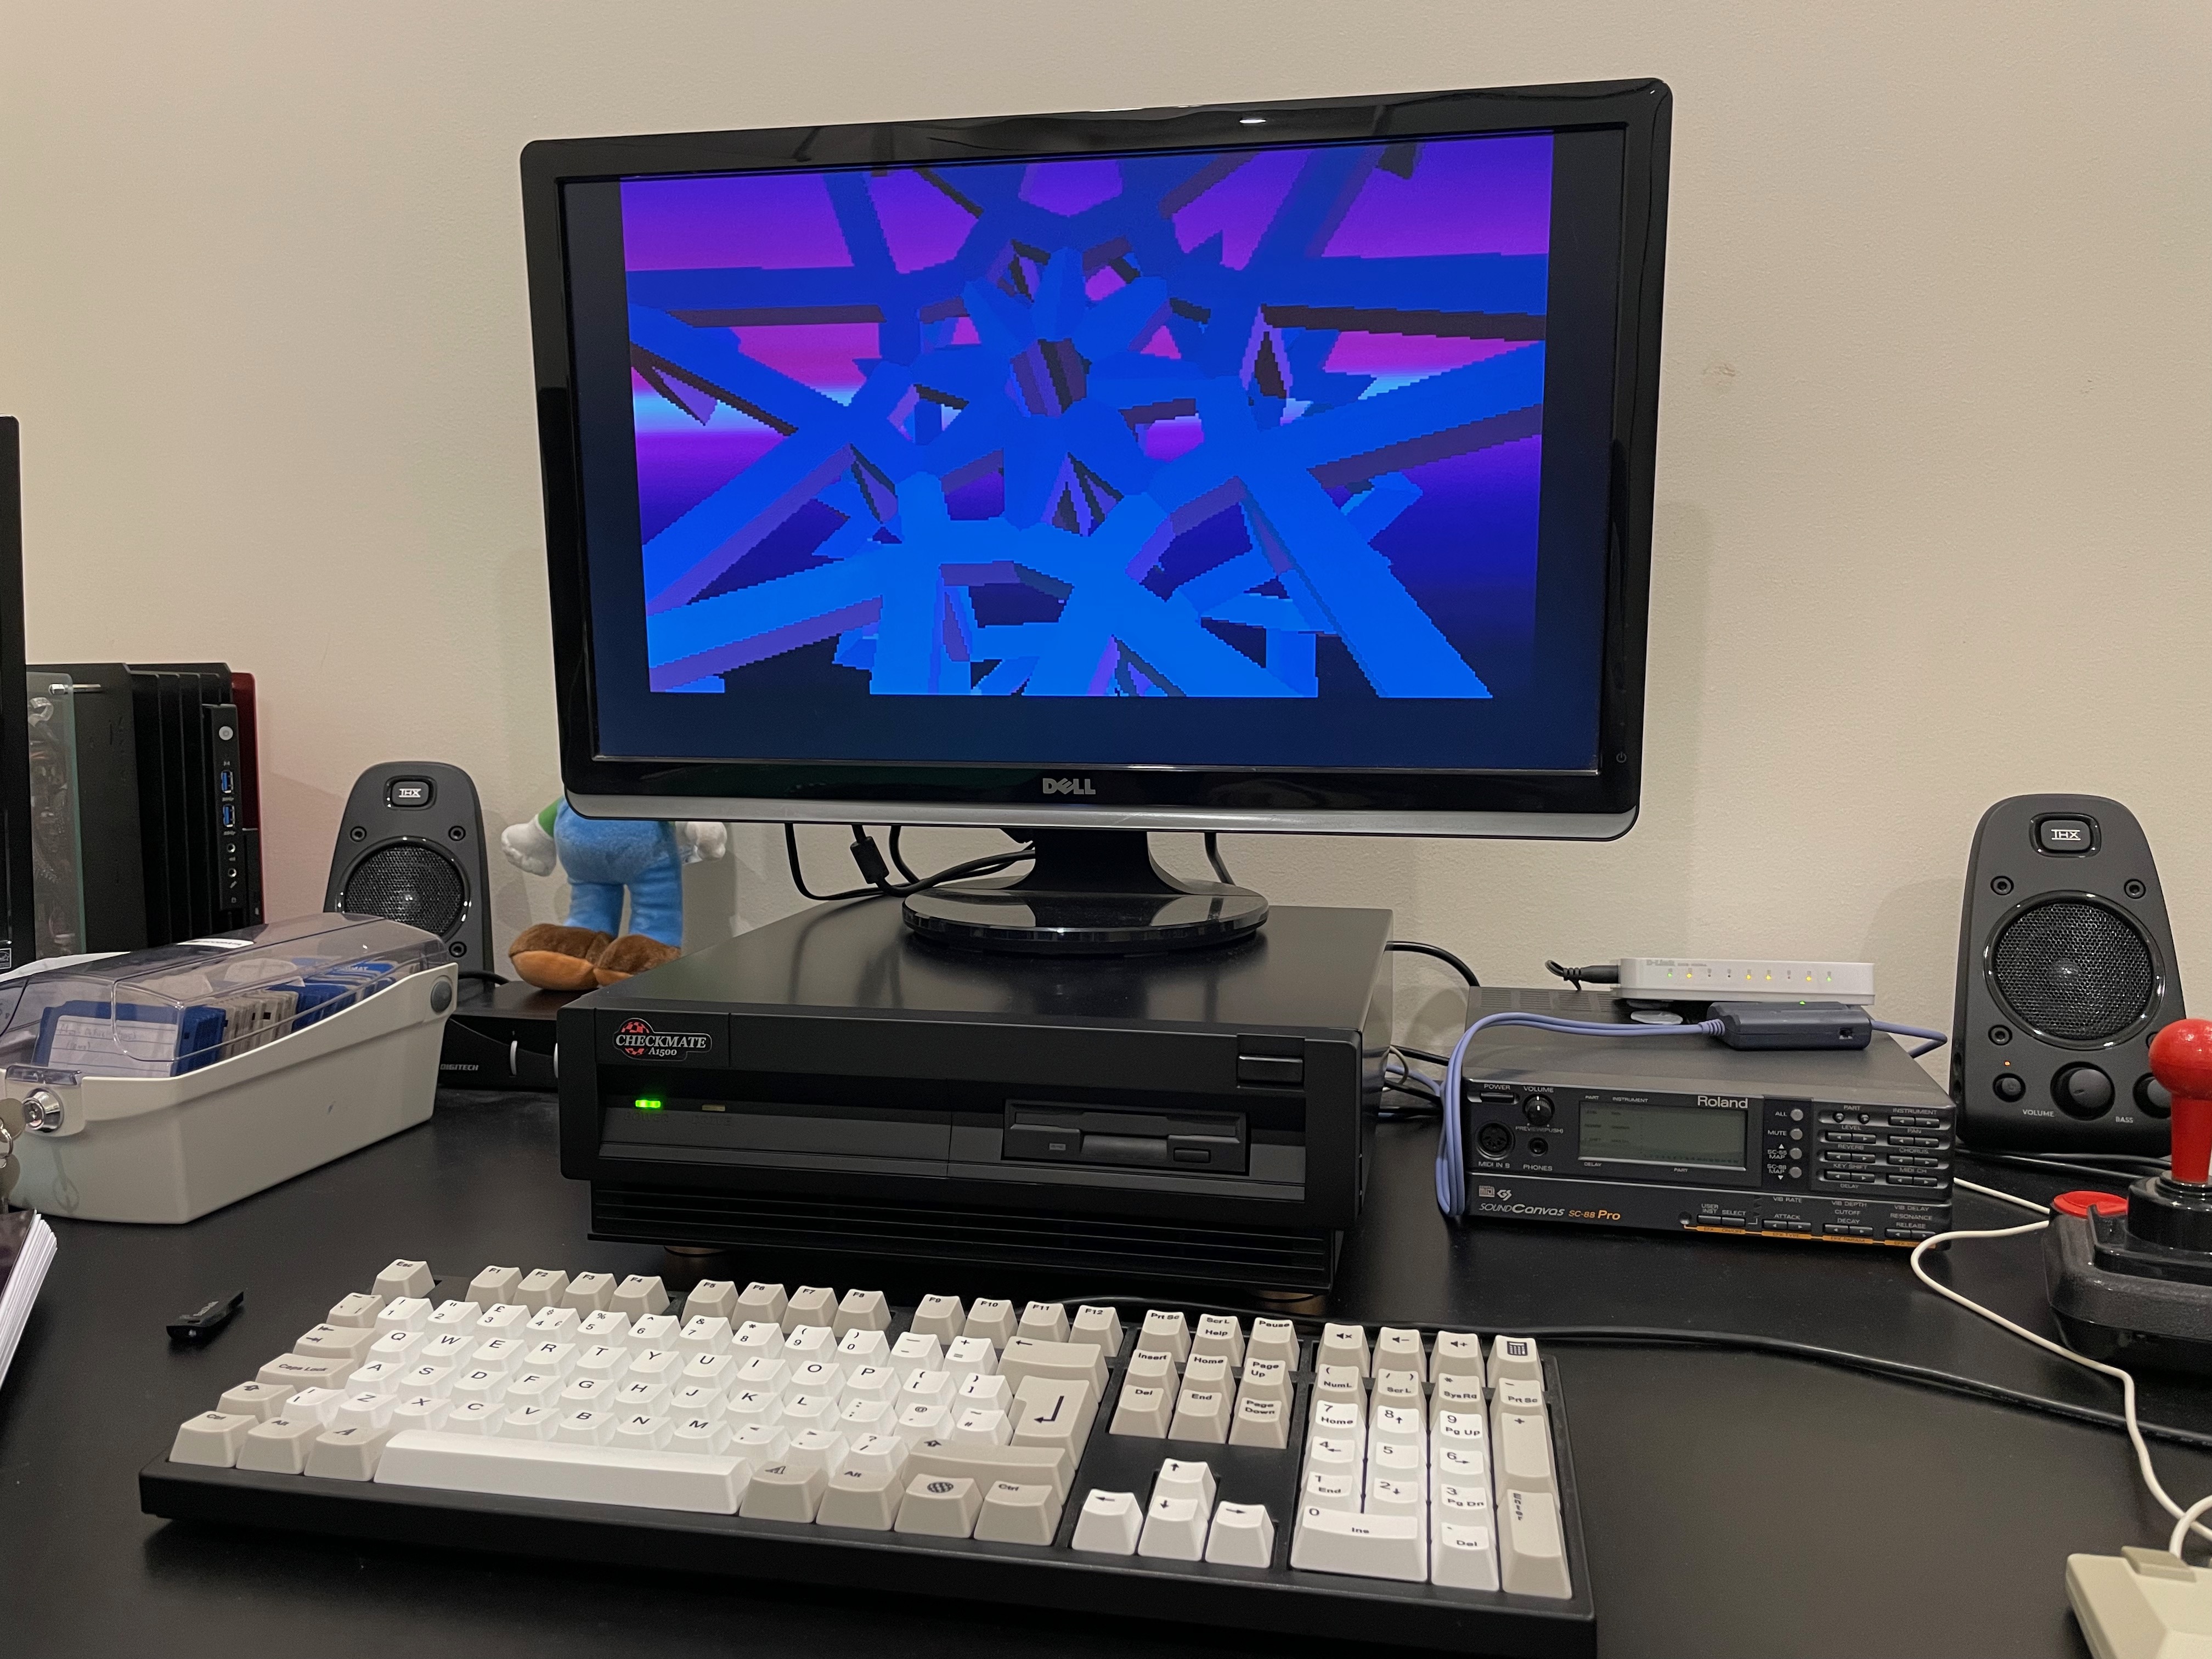
I settled back and enjoyed my 1080p AmiKit XE workbench and played a few mods and games to celebrate.
Worthy? Definitely.
An AGA demo or two as well - I think so. Running perfectly.
I checked and confirmed the DVD drive is detected correctly under Linux, which is great!
Having established it works, I put the case back on and take some pictures of the build - I reckon it looks awesome.
If you get the black case, definitely get the gold feet option.
But I am far from finished with the build work!
I still have more setup work to do, and a project involving the Greaseweazle V4 floppy drive solution I wanted to try out on this system. I purchased mine from
AmigaKit here.
Greaseweazle is one of the most interesting developments in Amiga emulation in recent years and I am very excited to try it.
First though, I set to work updating the AmiKit XE to the latest build. I connected the system to the internet via WiFi, and then set to work in AmiKit Live Update.
After rebooting it upgraded a number of upgrades at once. You can see the warning that I need to Update Linux to support the 11.8 version of AmiKit XE, and instructions on how to do it.
The Linux upgrade was also a major version upgrade, so this took a while to complete - a few hours actually. Time for a coffee or two.
I adjusted the time/date setting to my timezone, as the default is set to Europe.
Finally the Linux upgrade completed:
I then rebooted the system and checked again - all up to date.
There is a setting that needs to be changed in /boot/config.txt after the Linux version upgrade, to change the dtoverlay setting from fkms to kms to resolve a small bug causing the mouse pointer to delay its movements. I read up about this fix on the AmiKit Discord channel.
This is the original setting to change:
Here is the changed setting:
With that done, I could now use the Linux and AmiKit XE environment perfectly.
As mentioned earlier, the Ami-Hybrid setup of this system allows me to use Rabbit Hole functionality to access applications on the linux host from within AmigaOS, and to access the drives of the Pi from within the Amiga emulation. You can configure this functionality within Amiberry GUI.
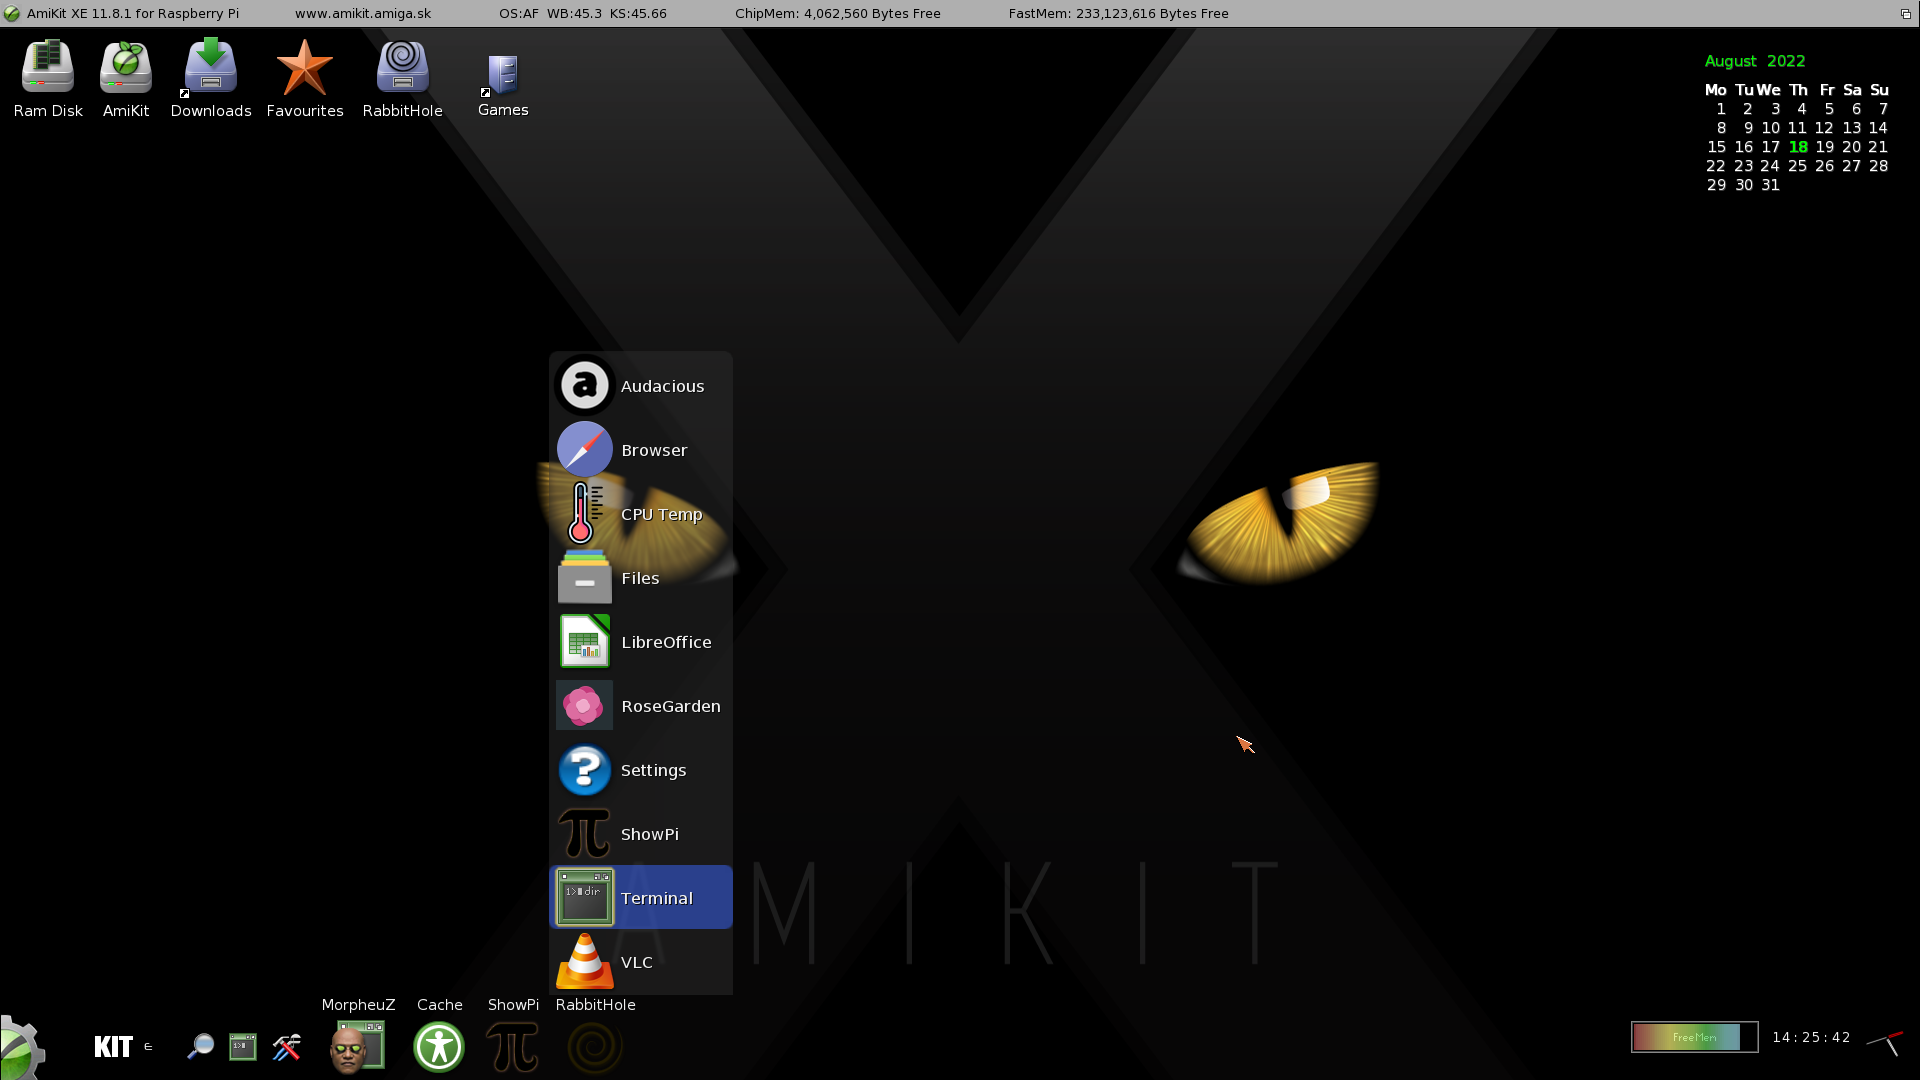
So I launched VLC from the Rabbit hole shortcut at the bottom of the AmiKit XE Workbench screen to enjoy some 1080p videos that I definitely couldn't playback on the original Classic Amiga, or even a Vampire enabled one!
I then ran LibreOffice to create a document while enjoying Eagleplayer banging out the modules while I worked.
I also could download the latest Aminet software directly to the emulation, via Rabbithole drive mappings to make the Pi Linux partitions and Amiga folders visible and available from the host Linux system and from the Amiga side.
I also tested an Amiga 500 emulation configuration in Amiberry, as you can run multiple configuration in AmiBerry. My default is AmiKit XE setup, but I can run Amiga 500 stock setup configuration also.
Next I connected up my Roland SC-88 Pro MIDI device with a Edirol MIDI to USB device to playback MIDI songs under Linux. I hope to get this working on the Amiga side eventually (i gave it a good go but Amiberry MIDI support is limited compared to WinUAE). For now, MIDI playback via Linux will have to do.
I am pleased to say it works well - I installed the Rosegarden MIDI sequencer from Add & Remove Programs in the Linux start menu, and quickly started enjoying MIDI songs from the Pi 4B.
I have the roland SC-88 plus serial MIDI controller setup normally on my Amiga 3000 system, but it is nice to be able to use it on the Checkmate 1500 Mini build as well.
With that done, it is time to turn my attention to setting up the Greaseweazle V4. I read about this a while ago, and was really impressed.
Basically, the Greaseweazle provides the functionality to control a real Amiga floppy drive from WinUAE or Amiberry Amiga emulations! In effect, allowing us to boot games/demos and read/write real Amiga floppy disks from an emulated Amiga!
This is a brilliant use case for the Checkmate 1500 Mini case with Raspberry Pi 4B installed!
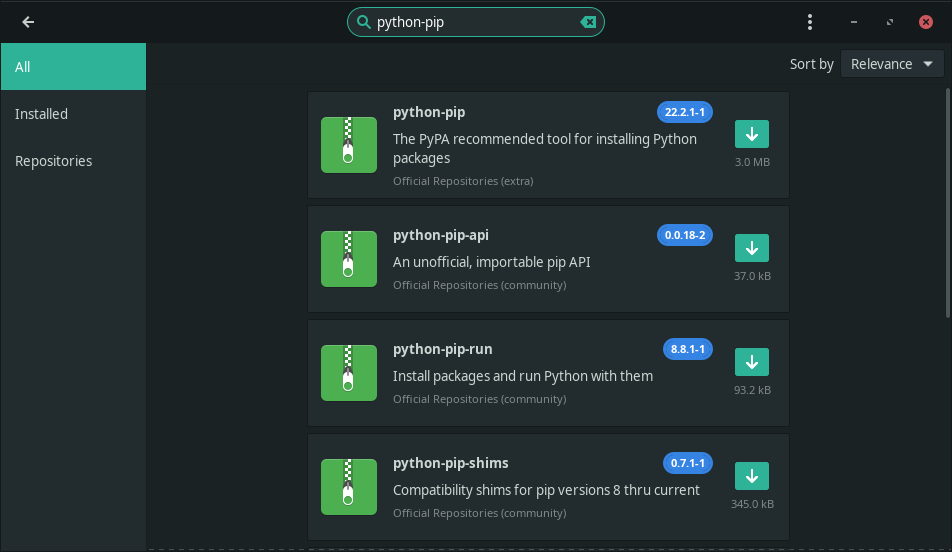
There are some excellent instructions on the website on how to install it under Linux, which I followed closely:
Some adjustments need to be made to those instructions given it is Manjaro and not Ubuntu/Debian Linux, so we need to go to Add & Remove programs in Manjaro to install the python-pip package:
I installed the Greaseweazle package from the online GitHub command line as per the instructions.
With that done, I connected the Greaseweazle hardware. I bought the GreaseWeazle V4 hardware from AmigaKit, as mentioned previously.
I sourced a standard 1.44 MB PC floppy drive and USB cable from my spare parts bin - The floppy drive needed to be black fascia though, because, you know, it needs to look cool in the case right? :-)
I used an Amiga 600 floppy power cable to power the drive from the Greaseweazle card.
Next I removed the DVD slot load drive from the Checkmate 1500 Mini case, and the DVD fascia too, as we can only have one of them installed at a time. I could then mount the floppy drive frame on the riser.
I suppose someone might mention in theory the DVD slim and floppy drive would both fit potentially, but I don't have the skills to make a suitable frame..maybe someone might make one in the future? I know some people have already made
Gotek fascias for the Checkmate 5.25 drive bay and
others too.
Anyway, moving on, I then mounted the black floppy drive onto the floppy drive frame, loosely initially, so I could line it up correctly to the floppy drive fascia on the case.
One thing to note though is the floppy drive can only be screwed in at the front. The rear holes can't be screwed in, and the holes underneath the drive don't quite line up with the screw holes on the riser.
It doesn't really matter, as it is secure, and the flexible positioning makes it easier to line up with the front bay fascia. I added some spacers in the back to level it up.
Here it is installed, and looking great.
I am surprised how nicely the black floppy drive fits in - it just works! :-)
To complete the hardware installation, I routed the USB cable from the Greaseweazle to the USB ports on the rear of the case. The Greaseweazle is not screwed into anything for now, and it is sitting above the floppy drive.
I then booted up the Pi, and needed to go to ./local/bin to run the gw tool. This is not in the system path, so initially I went to the folder to run it from there. Running ./gw info detects the Greaseweazle is working!
It also noted that the Greaseweazle needed a firmware update to 1.2, so I ran
./gw update to do this. It worked without any issues.
I ran
./gw info again afterwards to confirm the upgraded version was now in place, which it is.
I then ran the
export PATH="$HOME/./local/bin:$PATH" command to add this folder to the system path so I can run gw from anywhere.
I then tested that worked by going back to
$HOME and running
gw info and it works - great!
With that done, and the Greaseweazle detected, I ran Amiberry (v5.1 as of this blog entry) to reconfigure it to use the Greaseweazle V4. The first setting to change is under
Floppy drives:
In the
Drawbridge driver section, we need to change it to Greaseweazle, as below:
Then, under the DF0 section, we need to change the
3.5" DD option to
FB: Compat, as below:
I then saved the configuration and resumed the emulation. I then put in a real Amiga Workbench 1.3 floppy disk into the floppy drive and it comes up!
Such a big deal for me! It means my Amiga floppy disks can be used on something other than a real Amiga for the first time!
I then changed the Amiberry configuration to use the Amiga 500 mode, and removed the hard disk so it would prompt with the classic 1.3 insert disk prompt.
I then booted the Amiga emulation into Workbench 1.3 from a real Amiga floppy disk!
This is such a cool thing!
I tried out Sonix 2.0 next, which booted and ran from the original disk with no problems.
I tested a non-DOS original commercial disk game after that - Carrier Command.
It worked perfectly as well!
I then cleaned up the case a bit and attached the Greaseweazle to the top of the floppy drive so I could put the case lid back on.
I reckon this looks sensational with the greaseweazle floppy drive solution installed. I like it more than the DVD to be honest, as it provides me an Amiga emulation that boots and uses real Amiga floppy disks. I love it.
Feels right that I can have a disk box next to the system now, as I can now test all sorts of Amiga games and applications on disk!
I tried a number of games in Amiberry on the Pi 4B that all worked booting from floppy drive, starting with Simcity...
Games that I thought might trip it up like commercial copy protected non-dos game disks such as New Zealand Story, SWIV, Agony and Xenon 2 - didn't. All booted and run perfectly.
Dimitris (author of Amiberry) has done a great job with the Amiga emulation on the Raspberry Pi. It works very well indeed and is regularly updated with more features, bringing it close and closer to the functionality of WinUAE on Windows PCs.
There are the occasional Amiga disks (some trackmo demoscene disks) that I found can trip up the Greaseweazle, like below.
Also remember that 1.44MB high density floppy disks with Amiga floppy images written to them need to cover the hole on the top left as the PC floppy drive will detect them incorrectly otherwise.
But on the whole, nearly every floppy disk I tried worked well, and the drivers are regularly updated so I expect it will still improve further too!
I feel like the Greaseweazle solution compliments the Checkmate 1500 Mini system beautifully, providing us all an Amiga experience using modern hardware and Amiga emulation, while keeping all the modern applications and toys we expect to use today via Ami-Hybrid environment and directly via Linux.
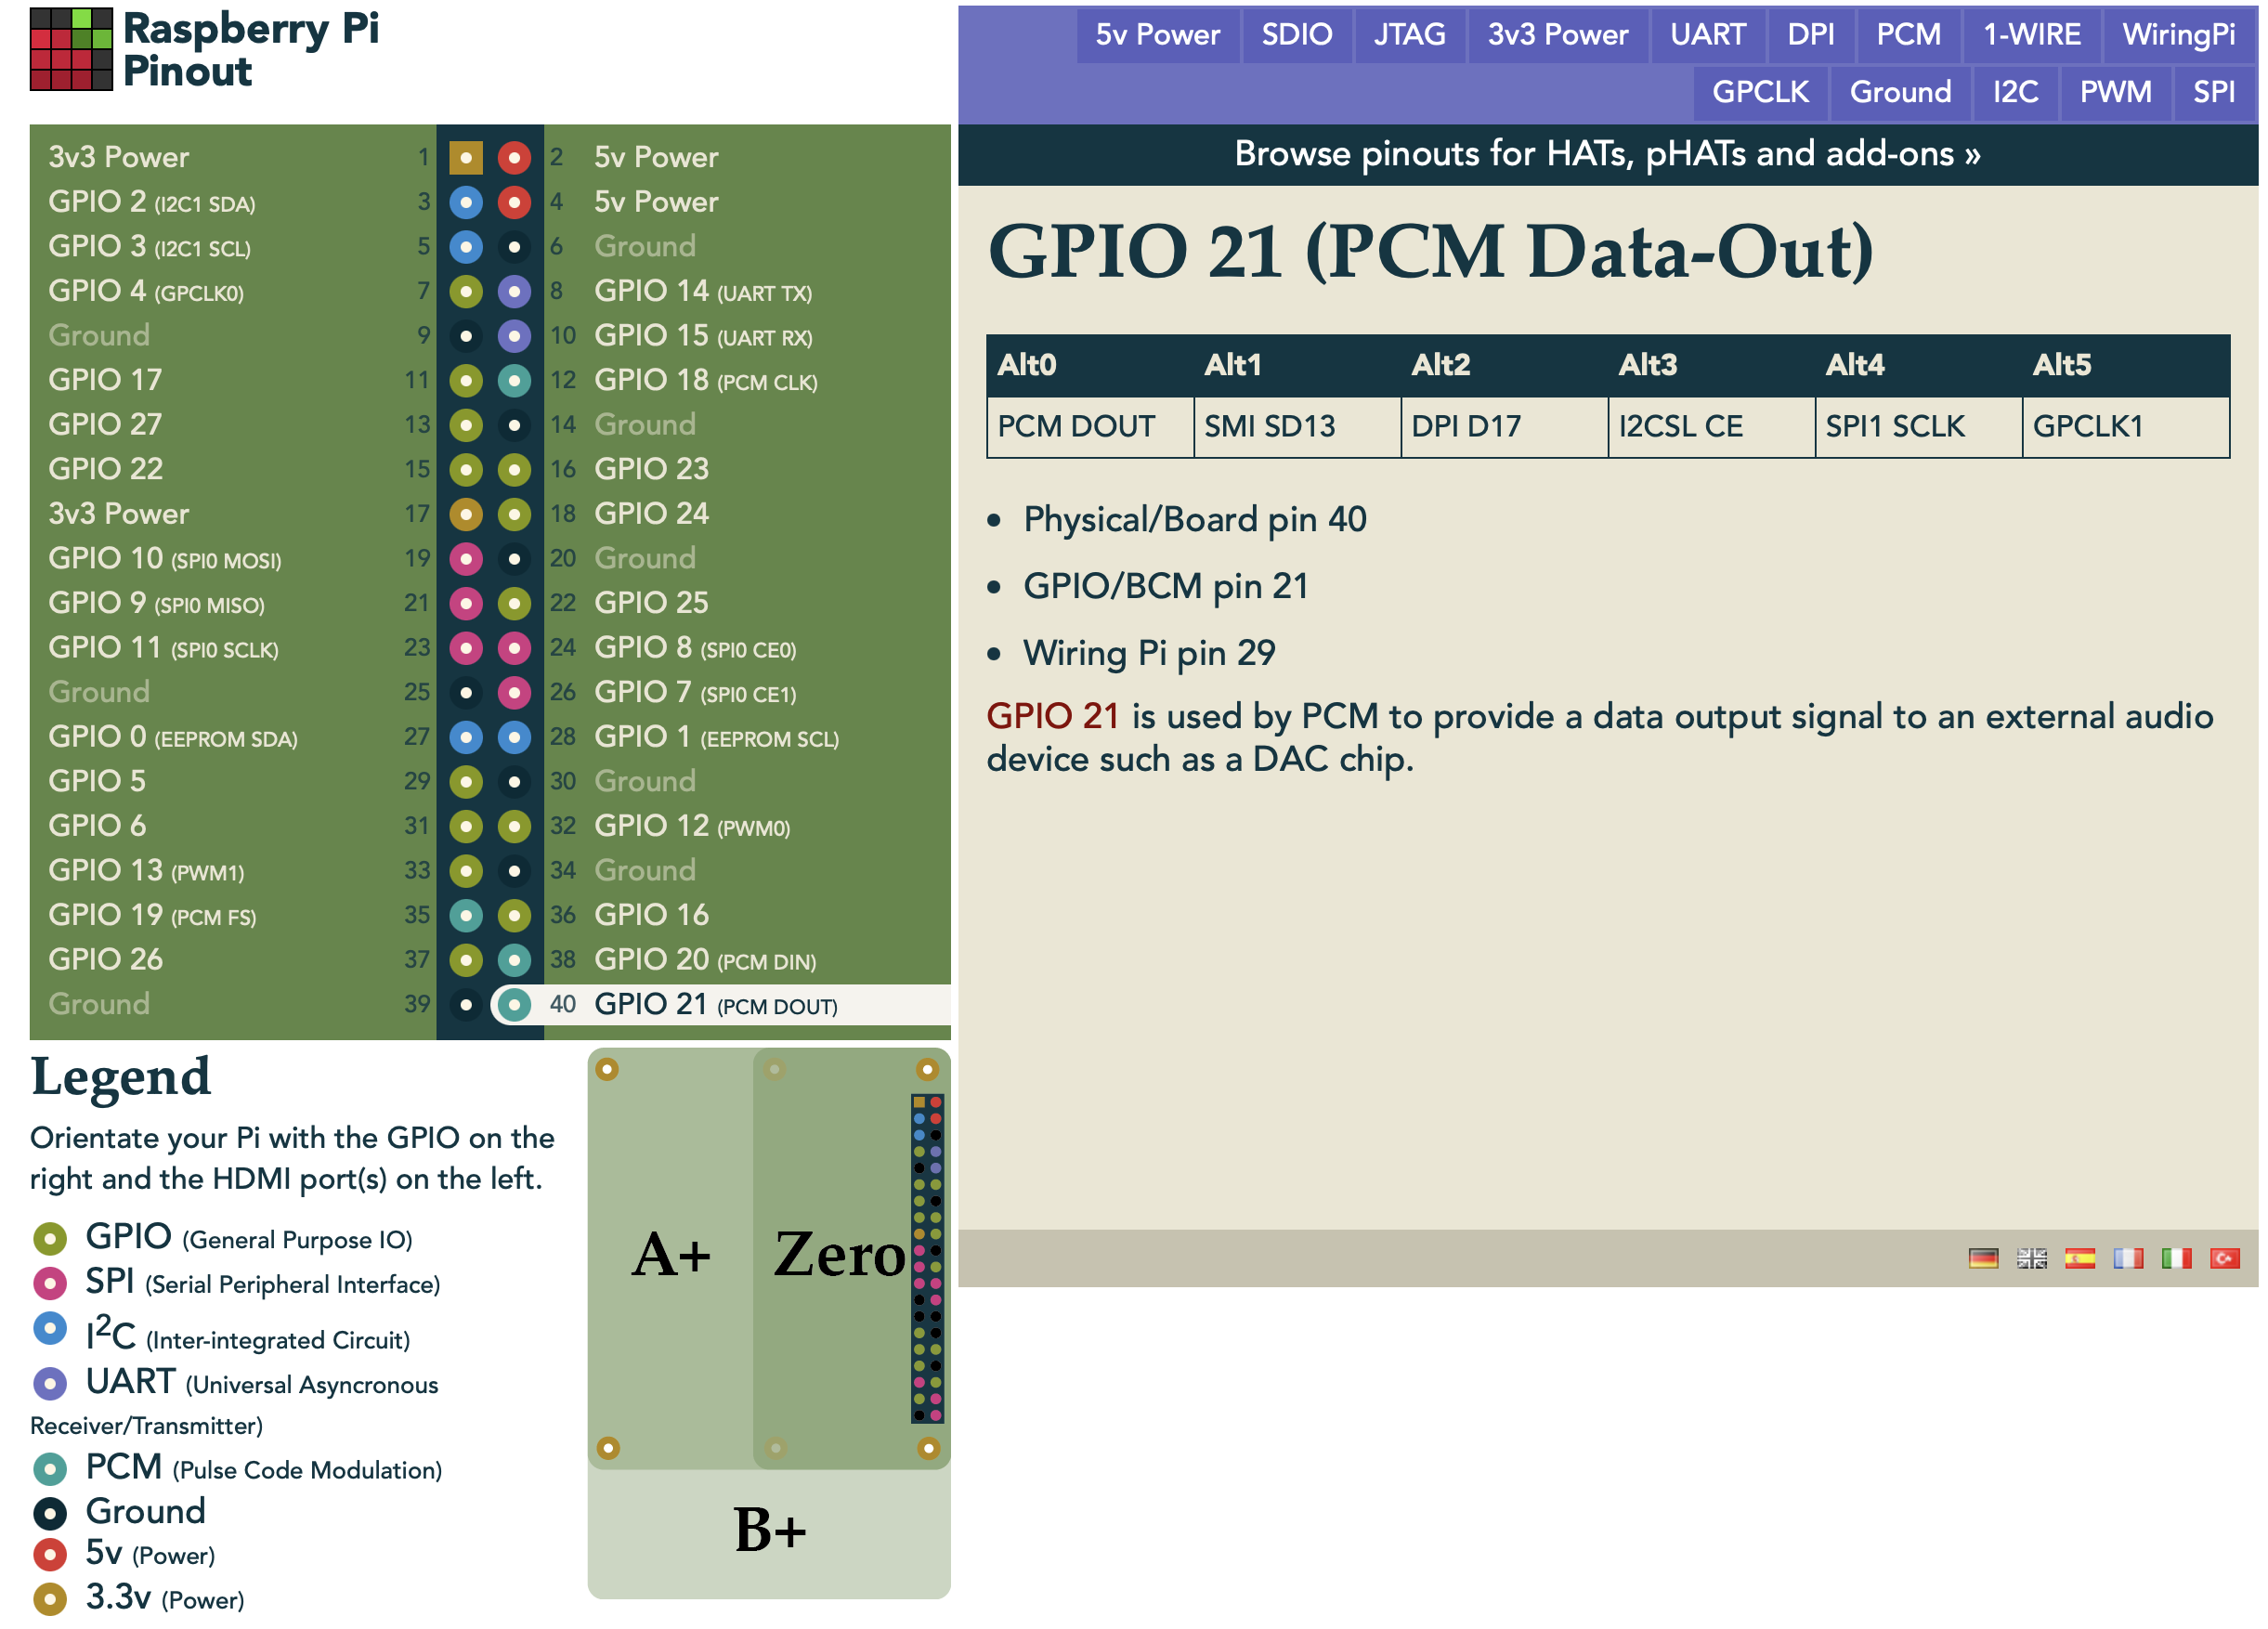
As a follow up to earlier on in this blog post, after investigating the HDD LED functionality further, I found out that there is a
Python script you can run to flash the HDD LED activity LED on the front of the case when connected to a specific GPIO pin, for example the default one is set as GPIO Pin 21.
The script first requires python3-gpiozero to be installed via Add & Remove Programs in Manjaro Linux.
I looked up a table to find out what Pin 21 was. This table for Pin 21 was produced from the website here.
I haven't yet tried this out so I don't know if it works, but when I have some more time I might give it a go!
I opened up the case again, so I could connect the HDD Led to the right pins on the GPIO ports for when I have some more time to work on it.
I also took the wise precaution (since the case was open) of taking an image file backup of the 32GB MicroSD at this point, as I don't want to lose all the work I have done to this point! I use Win32 Disk Imager for this task on my
Windows 11 Alienware PC.
I then wrote the backed up image out using Win32 Disk Imager to a larger 128GB MicroSD card, so I could have more space for my many games, mod collection, MP3's and demos!
I then booted the Pi 4B with the new 128GB MicroSD which worked fine and proved my backup image is also working well!
I then used GParted on the Pi to extend the drive to use the full 128GB.
Extending the partition just requires you to select it, and then use the Partition > Resize option:
I drag across the partition to use the whole space:
I then apply the pending operation:
It goes away and starts resizing the partition - time for a coffee.
The resize completes successfully, and I now have the full space available for more Amiga files!
I then started a copy of my large Module collection, as well as WHDLoad and HD games & demos from my Amiga 4000 system using USB sticks to transfer to the Pi 4B!
Later in the evening I then enjoyed some Amiga demo goodness, and adjusted the CPU in the Amiberry settings to use 68040 instead of the stock 68020 so I could enjoy the latest demos too, which ran perfectly.
It was about this point with the Amiga demos running, the empty floppy drive clicking away, with the custom Amiga keycap Cherry MX mechanical keyboard, A500 Mini mouse, together with the Amiga 3000 inspired Checkmate 1500 Mini case, that I really felt like I was using an Amiga!
I know it isn't a real Amiga, but for casual Amiga fans, this is exactly the kind of setup where they can enjoy all the Amiga has to offer for applications, demos, games and RTG Workbench, and not just a handful of WHDLOAD OCS/AGA games like on the A500 Mini. (and yes, I know it can load ADF files now with the latest update - that should have been there from day one)
Another customisation you can do with the setup is make the Linux theme match the AmigaOS theme, and adjust the AmiKit XE theme to use the AmigaOS 3 window theme style as well.
This creates a more integrated look between the Linux applications launched with RabbitHole, and the AmigaOS environment.
I found this great looking AmigaOS Linux environment theme (AmigaOS 1.3 or 3.1)
lordwolfchild has submitted on GitHub that works with Manjaro Linux and the XFCE4 window manager used on the Pi.
First I installed Yay from Add & Remove Programs from the Linux start menu:
Next I ran the
yay amigaos-xfwm4-themes command in a Linux terminal session:
I asked it to install
1-3 to get everything, I then got this prompt which confused me:
I typed in
1-3 again and it showed me what I presume is a preview of the make file. User friendly this part isn't.
I then typed q and it then asked if I wanted to proceed with the install - I said Y naturally:
With that, it went on and did the installation work, eventually completing successfully:
I then went into
Settings in the start Menu and selected
Window Manager - I can then see the available Window Manager themes, the new Amiga ones are
Amiga1.3,
Amiga3.x in normal and high DPI options:
I selected
Amiga3.1_hidpi theme. Personally I think the 1.3 themed one looks awful - I remember it being used in Icaros at one point and it looked terrible to be honest.
There is an option to download the horrendous Topaz font to use with the theme too, but regular readers will know how much I hate that font. I'll stick with the standard one.
I then rebooted the Pi so that Window Manager would restart with the new theme settings I selected. I have to admit I like the look already:
It definitely makes everything on the Linux side feel more integrated. Here is Amiberry with the new theme applied.
Next, I needed to change AmiKit XE's theme to more closely match what I selected in Linux. I opened AmiKit and then ran Morpheuz, which allows you to change the theme in use - here is the preview of the Blue theme, which is the closest to the Linux Amiga 3.1 theme I chose earlier:
Morpheuz then prompts me to restart AmiKit XE for the changes to take effect.
On relaunch, AmiKit XE looks very different, with a blue background along with the updated Amiga 3.1 style window theme applied.
I will change the background for sure. But before I do that, let's try out RabbitHole launched linux apps and see how it looks...
The colour is slightly different, but I am impressed - it looks great. Here is VLC and a Terminal window opened via RabbitHole under AmiKit XE:
But let's look a little deeper into this Ami-Hybrid magic. Under the hood.
So, in reality, the key to Ami-Hybrid and the RabbitHole functionality is an AmigaOS command called host-run, which bridges between AmigaOS and Linux to run Linux programs.
Looking in the Rabbithole assign (above), you can see the drawer contains .info files for the applications, and a file corresponding to the program being run. This file is a executable file containing one line:
host-run <linux application name>
(as shown above with the vlc launcher script)
So you can see that adding your own Linux applications to launch through RabbitHole (beyond the initial set included with AmiKit) is fairly easy to do.
Let's try adding one right now - the Linux MIDI sequencer I was running on the Pi earlier, called RoseGarden.
Looking at the properties of the RoseGarden application in the Linux Launcher, I can see the command it runs is rosegarden %f
I test from AmiKit XE first by running the command
host-run rosegarden in Amigashell. It runs straight away:
Having established it works, I now need an icon and Amiga launch script for it to execute without the need for the Amigashell.
First, I copy an existing Rabbithole icon called Settings.info to RoseGarden.info
I then took a screen grab of the region surrounding the Rosegarden icon from the launcher properties window in Linux I showed earlier, and saved in PNG format. Yeah, I know I should just locate the Linux icon file, but I was lazy ok?
Another cool thing is the AmiKit setup has direct access to the Raspberry Pi system drive via the RPi: assign, so I can view the folder where I just saved the screen grabbed png file.
Next, in AmiKit XE I rename the Rosegarden.png file to RoseGarden.info
I then change the lister view to show icons only. Now I can see the .info file as a icon.
I also bring up the Rosegarden.info Information from the RoseGarden.info I created in the RabbitHole drawer earlier.
I then drag the Rosegarden image icon over the top of the
? icon in the Information window. It replaces it with the new image, but looks a bit corrupted. Have faith, it has worked. I click
Save to commit the change.
I then refresh the RabbitHole drawer in AmiKit XE and I can now see the new RoseGarden Launcher icon! :-)
We then need to create the script launch file for RoseGarden to activate the Ami-Hybrid functionality via host-run. In AmigaShell, I go to the RabbitHole: assign again, and create a new file by typing:
ed RoseGarden
I put in the required command in the file to launch RoseGarden using Ami-Hybrid:
host-run rosegarden
In linux the filename being launched is case sensitive, so make sure to get this right.
I then saved the file and closed the editor. Next I modified the properties of the Rosegarden file so it can be run as a script executable file:
protect rosegarden FLAGS="srwed"
I then closed the Amigashell and double clicked on the new RoseGarden icon in the RabbitHole drawer and the linux Rosegarden application launches via Ami-Hybrid and runs on top of the AmiKit XE environment. Success!
So now we know how to add other linux applications to launch via RabbitHole in AmiKit XE.
Given I can't use MIDI via Amiberry just yet, it makes being able to launch the MIDI sequencer from AmiKit XE a good thing for me!
Next I quickly changed the blue backdrop via the DOpus Environment settings, in the Backgrounds settings - to be honest I preferred the original AmiKit backdrop as it was delivered. The backdrop file I wanted is contained in the OSX/FullHD drawer of the preset backdrops, as shown below:
With the background changed (but still with the AmigaOS 3.1 theme on AmiKit XE and in Linux, I am pretty happy with the setup now on my Checkmate 1500 Mini system build.
I would love for this AmiKit setup in future to include the AmigaOS 3.1 XFCE4 theme for linux all setup and colour matched to AmiKit XE, if it is possible to agree something with the creator of the theme. Just a suggestion, Jan! :-)
The integration via Ami-Hybrid functionality in RabbitHole is genuinely great, and helps to make this modern computer feel like an Amiga, without losing the modern applications we all use today!
As mentioned I am very happy with the setup of this system at this point, and I think I have shown a lot of information on how to build and customise it! I hope it is useful and encourages you to try your own projects with this CheckMate 1500 Mini case.