Showing posts sorted by relevance for query x5000. Sort by date Show all posts

Sunday, September 23, 2018

My AmigaOne X5000 has arrived!

I am very excited to say that I finally saved up the money to get a AmigaOne X5000, and it arrived in the post this past week from AmigaKit in the UK. To say I am very excited to receive it is an understatement. 6 Years after I bought my original AmigaOne X1000 it is time to upgrade to the latest AmigaOne system in 2018!


I opted to purchase the full system in the case with the Boing ball cover and X5000 logo:


The case is smaller and lighter than my AmigaOne X1000 case.

Here it is side by side with my AmigaOne X1000 and Sam460CR systems. The A1222 is sitting on top of the Sam460Cr and is mostly not in view:


Next I took off the X5000 case to take a look at the interior:


I decided to include a 1TB hard disk, 4GB memory upgrades with this X5000 system.


I realise that the X5000 has been available for some time, with many articles covering it in some detail. So I won't go crazy with 10 million photos of the board - it is well documented already. But I am so glad to finally have one of my own:


The cardboard box inside the case located in the bottom bays contains the tower case spare parts and most importantly the recovery AmigaOS 4.1 Final Edition USB stick.

I checked all the X5000 internal cards and cable connections to ensure everything was connected as it should be after it's long trek from UK to Australia!

Here is the rear view of the X5000, showing the usb ports, network ports and serial port for troubleshooting. There is a PCI sound card and network card in the bottom of the expansion bays.

Unlike the X1000 the X5000 doesn't have onboard sound so the sound card is necessary. The X5000 does have network driver support for the onboard network ports, but they still include an extra RTL8139 PCI network card with the system too.


Included with the system is the Enhancer Package CD, AmigaOS 4.1 Final Edition registration card and X5000 technical reference manual. Unlike earlier systems there is no AmigaOS 4.1 final Edition CD included since the version released on the X5000 is a Prerelease version.

Instead, as mentioned earlier, there is a recovery USB stick to restore the system if something goes wrong with the hard disk installation that comes with the system.


I quickly hooked up the system to try it out.


I am pleased to say it booted up first time with no problems!


The default AmigaOS 4.1 final Edition Update 1 installation has Enhancer pre-installed, but initially using a low screen resolution (presumably for maximum monitor compatibility)


I quickly fixed that - 1080p tested and set using Screenmode prefs:


I also received a Boing ball keyring (with torch light), AmigaKit floppy disk labels with Amiga checkmark, and a Boing ball ruler:


The floppy disk labels will come in handy for me as I have some disks that need relabelling, and the torch on the boing ball key ring has already come in handy!


The Amiga 1200 board cardboard cutout frame was an interesting inclusion! Not sure what I will use it for.

I quickly fired up Tunenet and got some internet streaming music going while checking out some of the backdrops with Multiviewer - both part of the Enhancer package installed already with the X5000 out of the box:


Here are some screengrabs of the X5000 in action:


I was thinking to add my 2TB SATA disk to the X5000, but I will need to add a SATA PCI-e card to the X5000 first - it only has two SATA ports onboard - one is used for the DVD drive and another for the 1TB hard disk.


I would have to take out my SATA card from the Sam460CR to add the extra drive. This would render the Sam460cr inoperable since it has no onboard sata and needs the card. I might still do this though as I rarely use the Sam460cr these days. I might pick up another SATA card to backfill the sam460cr...

I am hoping to use the extra drive to host data for Linux and MorphOS builds on the X5000 in the future.

Unlike the X1000, the X5000 uses the UBoot firmware (similar to what is used on the Sam460Cr and also the upcoming A1222). You have an Early startup menu (like the Classic Amiga one) accessed by pressing enter while the X5000 boing ball animation boot screen is running.

The firmware is stored on a MicroSD card on the board, making upgrades easier to do and easy to revert in case of problems. This is also on the A1222 system board too.

From the UBoot early startup screen you have the option to boot AmigaOS, MorphOS, Linux, other boot options and System Information.


This is the System Information screen:


On the Other Boot Options menu option, you have the ability to Boot from hard disk, via DVD, Ethernet or USB Mass storage (which includes USB flash drives):


Booting from USB from UBoot is a new feature I haven't played with before. The recovery AmigaOS 4.1 Final Edition Update 1 USB stick included with the X5000 can be booted by using this menu option:


My issue here is that everything I use is on my X1000. Well over 700GB of stuff, not to mention the 6 years of customisation, upgrades and configuration of AmigaOS4.1 to get it the way I like it.

I really don't want to do all that work again. (Yeah I know, lazy Australian, etc)..

The X5000 hard disk (1TB) is split up into 20GB for the System drive, and the rest for Work partition.

I do plan to put MorphOS on the machine at some point, so it was necessary to use Media Toolbox to delete and recreate the Work partition to use 800GB instead of all of the space, leaving enough room to put a MorphOS system partition and Linux partition. The Work partition was empty as delivered, so nothing was lost by doing this step. I renamed Work to Work2 temporarily (you'll see why in a minute)

I read that MorphOS needs to be installed on the primary hard disk so I think this resizing step is quite important to avoid having to do everything again later on...

With that done, I then took out the sata hard disk from the X5000 and installed it in my X1000 for the large data transfer:


My X1000 already has two hard disks in it, the second one being for Linux. So I simply removed the Linux drive and swapped it with the X5000 drive.


With the X1000 now booted up, I needed to use the Mounter tool in the System drawer to mount the Work2 partition. This is because the device names (DH0 and DH1) are the same as the X1000 system drive partitions...

When the X1000 mounted the Work2 partition from the X5000 drive, it was easy to tell the two partitions apart by the name to avoid mistakes, which is of course why I named the X5000 partition Work2 temporarily..

With the disk mounted I set to work copying the 700GB of data from my X1000 Work partition to the X5000 Work2 partition. This took a number of hours to complete, so I just let it run.


On completion, I then created a X1000_System drawer on the X5000 Work2 partition. I then copied the full System partition from my X1000 to that drawer.

When that was all completed, I took the X5000 drive out and put it back into the X5000 system and booted up the X5000, now with all my data from the X1000. I renamed the Work2 partition back to be Work again.

With that done I then created a new drawer on the Work partition called X5000_System, and copied everything from the System partition to this drawer.

At the end of this process, it meant I have a full backup of the X1000 and X5000 System partitions on the Work partition on the X5000. This I believed was good insurance for the stupid thing I planned to do next...

I really, *REALLY*, didn't want to have to do all the work and configuration I did on the X1000 again on the X5000.

I decided to copy the X1000 System drawer contents over the top of the X5000 System partition. Yeah I know, stupid right?

And so it proved. I thought I could stop problems by changing the System:kickstart/kicklayout file to be the X5000 version and not the X1000 version.


I was partially right but not completely. I also removed the catweasel DF0 dosdriver since it is not installed on the X5000 and know it would cause problems. I thought that would be enough - I was wrong. Don't do what I did!

Sure enough, after rebooting the system wouldn't boot. I realised what I did wrong instantly but fixing it meant using the USB recovery stick since I could no longer boot to a working system.

When I tried booting from the USB recovery stick using the UBoot Other Boot options menu and selecting Boot from Mass Storage menu option, but it continued to boot the Sata disk everytime and fail, even though the USB stick was installed:


To resolve this, I removed the 1TB SATA disk from the X5000, and connected it to the X5000 via a SATA to USB adapter instead, after the USB recovery stick had loaded successfully on the X5000.

Note also that the USB recovery stick should be installed in the bottom USB ports at the back of the X5000.

Removing the SATA disk allowed the Recovery USB stick to boot as expected:


Yes, I have a Workbench screen again!


The lesson here - listen to your inner voice when it says you are doing something stupid. It is normally right :-)


The USB stick uses ADH0 and ADH1 device names, and System_Rec and Work_Rec partition names, so it doesn't clash with the 1TB SATA disk partitions at all :-)

With the USB AmigaOS 4.1 Recovery stick loaded, and the SATA disk connected via the USB to SATA converter, I could see the partitions (as above) and now fix my mistake, all thanks to taking a full backup first.


Of course I wanted to fix my mistake, but still don't want to lose my X1000 configurations. I don't want to do that work again. It took my 6 years of playing around to get it where it is.

So, to fix the problem I created copying the X1000 System backup drawer contents over the X5000 system drive, I first copied the full Kickstart drawer contents from the X5000 backup drawer on the Work partition to the System:Kickstart folder. This restores all the critical modules needed for the X5000. This was my main mistake in the process - I forgot to do this step, and only restored the kicklayout file.

I then did the same copy process for the Devs drawer and C drawer as the X5000 version contains different versions of programs to the X1000 contents.

These steps still keeps all my X1000 installed programs since it would only replace the X5000 needed files and not everything. I avoided copying over Prefs, S, etc, since all my X1000 settings and customisations are in there.

With that done, I then turned off the X5000, removed the USB stick and reconnected the 1TB SATA disk back into the X5000 SATA port.

On X5000 boot up on the SATA disk I could now get the Workbench again - success, and relief! In addition it now it has my full X1000 setup and customisations too! :-)

But I needed to fix up the internet settings for the network adapter, as the network adapter used in the X5000 and X1000 is different. I removed the incorrect X1000 adapter and added in the RTL8139 adapter in the X5000, restarted the network services and this was fixed.


So after some bumps in the road, I now have successfully moved my X1000 setup to the X5000 :-)


I also learnt a lot about how to recover the X5000 system, which is a good thing to know. Admittedly I didn't expect to have to learn it so soon but hey, it's all ok now.

I need to address some other points, like replacing Altivec versions of video players, etc, with non-Altivec versions as the X5000 doesn't have Altivec support, and linked library references but that will come later.

Something to note with the X5000 is that the USB ports on the top of the tower case don't work. This is because they are USB 3.0 ports and the X5000 board doesn't have support for those ports.

The A1222 board had the same issue with the case I bought for it, and I solved it with a USB 3 to USB 2 header converter cable.

I have a lot more to do yet with this X5000, but I will cover this in future blog entries. I am very glad to have the system at last!


Monday, January 27, 2020

MorphOS 3.12 on X5000

One of the interesting features of the AmigaOne X5000 is the compatibility of MorphOS 3.12 with it.
Let's take a closer look at it.


I was very keen to try this out but I read there are some sacrifices to be made if you want to run MorphOS 3.12 on the X5000. I have to downgrade the included graphics card to a much lower spec graphics card compatible with MorphOS.

By doing this I then stop AmigaOS 4.1 Final Edition Update 1 booting due it's reliance on graphical features of the updated drivers that need the new graphics card to work.

The X5000 doesn't have two PCI-e 16x sockets and doesn't support dual displays to my knowledge, so only one card can be installed. The X5000 also can't use a PCI Radeon 9250 graphics card (with or without a PCI-e card installed) to boot from - I tried it...

So you have to choose one or the other. Shame really.

I decided to try out MorphOS by downgrading to a Radeon X1950 Pro card that I bought from Ebay.


You can click on the images to supersize them, and see the specific model I bought.


Here is the card installed in the X5000:


I took a spare 2TB SATA hard disk to use for MorphOS, and removed the AmigaOS 4.1FE hard disk from the X5000 system.


This is beause the X5000 only has two SATA ports onboard (and one is for the DVD drive), that means I can only use one hard disk.


My X1000 is more flexible in this regard with 4 SATA ports built-in. You can add SATA PCI/PCI-e cards to the X5000 if you want more ports. You could also in theory set up a multi boot partition setup with AmigaOS4 and MorphOS but I have not tried that, so I don't know if that works.

For now I will run the X5000 purely as a MorphOS system. I will continue running AmigaOS 4.1 FE on my X1000, which was my intention when I bought the X5000.

Below is the X5000 booting up into MorphOS 3.12, from the CD I burnt from the MorphOS 3.12 ISO.


To do this I needed to select the Boot MorphOS option from the early boot menu (Press Escape on the X5000 boot logo while spinning).

I hooked up a HP 19" 4:3 TFT screen with DVI inputs to the graphics card initially, as MorphOS is quite picky about DVI output and I wanted to make sure it displayed before trying anything else. I pleased to say it works with the 3.12 CD which is great:


I tested it again with a DVI to HDMI converter and one of my X1000 HDMI screens. It worked also, and the install MorphOS program appears once MorphOS 3.12 has completed booting!


I then tried my main 32" HDMI screen with the X5000 running MorphOS 3.12 from the CD and it worked fine too, so exciting!


So I got on with the installation of MorphOS on the X5000 2TB hard disk:


After setting the usual screen resolution, date/time and network settings for the installation, I turned my attention to the partition setup. Given I have a 2TB hard disk, the default partition size is a bit small...I raised it up a bit. Later on I'll deal with the remaining space:


The MorphOS installer then went ahead and installed a bunch of files. Time for a coffee.

The install completed successfully, reboot time:


I get the X5000 logo and MorphOS logo as the MorphOS 3.12 system boots from the hard disk for the first time:


I only got a second to photograph the boot logo as it seriously boots really fast on the X5000 - way faster than AmigaOS 4 on the same system does:


MorphOS 3.12 desktop on my X5000 after the first boot:


I downloaded the fonts for the Odyssey web browser next so I could get online:


That done, I launched Odyssey, which is updated for MorphOS v3.12:


I visited the new AmigaRetro.com Australian Amiga forum website, started by the Amiga Retro Brisbane group members. I covered my December 2019 visit and presentation in the blog here.


I am glad to be part of a new forum focused on Amiga in Australia. If you are in Australia please sign up today!


My MorphOS 3.12 installation is still the demo version, limited to 30 minutes before it slows downs dramatically and requires a reboot to reset the 30 minute timer. I will register it now that I know it works well on the X5000:


To do this I run the RegTool in the System:Tools drawer, which packages my details and some of my X5000 details (as a MorphOS license is tied to the physical machine) to send to MorphOS team.


You need to be connected to the internet for this part, as it submits the details to MorphOS team to process the registration:


After filling in all the details and submitting, the registration tool (but not the registration itself) is successfully completed. You receive an email later with instructions on payment for the license using PayPal.


With the payment done, you receive a license file via email that removes the 30 minutes time limit for MorphOS and instructions on how to install it. I found that Gmail tends to treat it as spam mail so if you use Gmail check your spam folders for it!

With that done, I now have a full MorphOS 3.12 installation on my X5000!

There is a great resource on getting started with MorphOS, called the MorphOS library. I recommend new users to MorphOS read this as it will help you with getting started using it:


MorphOS Storage (WarmUp) is another great site for downloading MorphOS software - especially the Chrysalis pack for updating the base MorphOS 3.12 installation to include application, games, emulation and more, all setup out of the box:


I downloaded the Chrysalis pack iso, and opened it (mounted automatically) to start with:


It is recommended to read the Installation Guide before proceeding. You need a fresh installation of MorphOS. You should not install the Chrysalis pack on an install of MorphOS that has had other tools, application, games installed as that can cause issues for the installer.


As my MorphOS 3.12 install is indeed a fresh install, I stepped through the installer for Chrysalis:


A lot of files then get copied across:


With the installation complete, I rebooted the system to finish the installation.

With the Chrysalis pack now installed on my X5000, I can next use Grunch to check for any updates of programs installed on my MorphOS 3.12 system:


It will show version differences, and you can also install any other software that you may not yet have on your MorphOS installation.

In order to run AmigaOS4 specific titles under MorphOS (well, a only a handful work), you will need a program called os4emu - note that a lot of AmigaOS 4 stuff still doesn't work under MorphOS, even with this tool installed, but it can help for some older AmigaOS 4 software.

The legal status of this tool is somewhat dodgy, so I don't include any links here (Google is your friend) and I leave it to you to decide if you want it or not.


Next, I turn my attention to the hard disk partition setup. Right off the bat I have to say that the HDConfig tool for MorphOS is nowhere near as nice to work with as AmigaOS 4 HDToolbox.

That said, it is the tool we have to use under MorphOS 3.12, located in the System:Tools drawer:


With my current partition setup (setup when I installed MorphOS 3.12), HDConfig shows I have a 40GB FFS/LNFS system partition (DH0) and a 128GB SFS Work (DH1) partition. I still have a lot of free space!


Initially I thought I could just use SFS for the remaining space, and indeed HDConfig will happily allow you to set this configuration - I set up 4 partitions using SFS around 420GB each:


Here is an example partition setup, DH2 in this case:


I then went to format the new partitions in HDConfig:


It asks to confirm:


It then returns this error message, saying SFS partitions can't be larger than 128GB!


Why doesn't it tell you that when creating the partitions!! Anyway, I then tried FFS/LNFS instead of SFS as the partition type:


Because I already tried formatting in HDConfig, it confusingly displays DH2.0 and DH2, and the same for the other partitions I created...


The format then worked, and I formatted the other 3 partitions the same way, using FFS/LNFS - I can now see them under MorphOS desktop, ready for use:


I have covered a complete MorphOS 3.10 build before on this blog (Part 1 and Part 2), covered in lots of detail step by step if you want to see how to do that, without cheating with the chrysalis pack.

Because of that I don't plan to cover the installation build again here, as I would just be rehashing the same ground again.

I did establish YouTube works well(ish) on the new Odyssey version under the X5000, which is great to see.


Next up is getting E-UAE working. With the Chrysalis Pack installation, it includes an almost configured E-UAE setup for MorphOS, but you do need to supply the kickstart roms (available via Cloanto's Amiga Forever) into the Roms drawer under E-UAE, and then point to it from the configuration GUI called rhLaunch under MorphOS:


As you can see the kickstart rom folder is empty:


Having loaded some kickstart roms in (from my purchased Amiga forever software), I can now see them under the Roms tabs in rhLaunch:


I then need to change the Configurations one by one to use the correct kickstart rom file. You can use the search button to list the available roms to choose from:


Example after changing:


Don't forget the CD32 configuration needs the extra rom file specified:


You can set the location of your ADF files (Floppies section) as below in the Settings tab - I have them on a separate partition to the emulation as the ADF files use a lot of space:


What that done, rhLaunch will then scan the drawer (and sub-drawers) and list all ADF's to quick launch with a given configuration:


Next in rhLaunch is updating the hard disk locations for each configuration. 

Hard disk files are not supplied as installed by Chrysalis Pack, so I needed to copy my hard disk backups used on my X5000/X1000 for use on this machine - for the A1200 I use my A4000 backup and add the Work partition from MorphOS as it contains my WHDLoad games, demos and music (the all important modules!):


With that work done, I then launch the emulation - normally it launches in full screen, but you can change the amiga_screen_type field from Custom to Public, and it will then run in a window, as below - make sure you check the height and width fields fit the window size:


Running on the MorphOS 3.12 Ambient desktop, the A1200/040 emulated system runs very well:


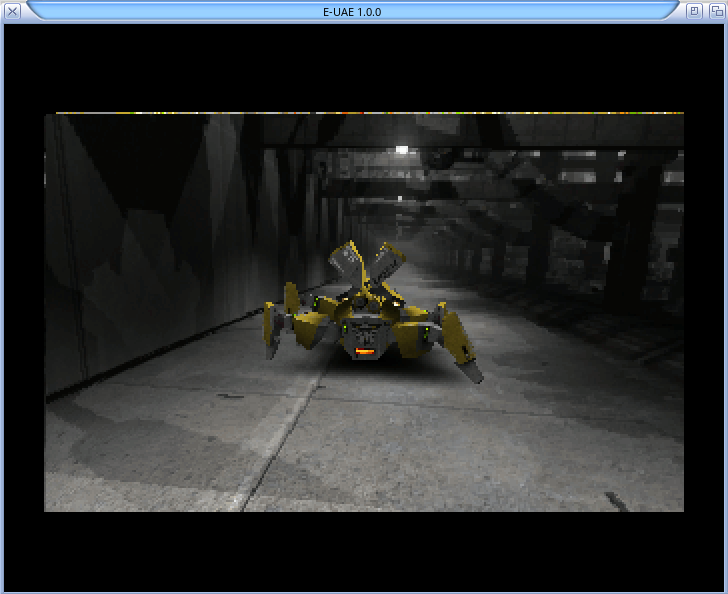
Thanks to the E-UAE JIT setup (similar as under AmigaOS 4), the 060 AGA demos run perfectly on the X5000 under MorphOS:


Feeling a bit ambitious to test the limits, I ran three E-UAE sessions simultaneously on the X5000 on the MorphOS Ambient Desktop:


I am happy to report they all work perfectly well on the X5000 simultaneously, although having three sets of audio at the same time is not so great!


Here I am running Battle Squadron, Red Sector's Cebit 90 demo and Sanity's Digital Innovation demo in three separate E-UAE instances under MorphOS on the X5000! Cool!


Here is some more information about the GFX card I have installed on the X5000, courtesy of the Graphics Board program under MorphOS:


I started copying across a backup of my MorphOS games from my Powerbook G4 system, which I had archived into one 2.0GB archive to make it easier to transfer. The transfer speed was around 20.6MB/s on the X5000.


I went back to Odyssey to see some real world examples of Web browsers with NG Amiga MorphOS 3.12 so people can know what to expect (and to keep your expectations in check!)

Accessing Facebook, I found it logged in ok, but the main page didn't display right - it was missing the content! I could see Odyssey was spoofing itself as an iPad from the way the Facebook screen was displayed:


I changed it to spoof Safari (MacOS) and things started working better and more compatible with Facebook. (no live Messenger though)


I use ProtonMail, and as expected with it's encryption requirements, after authenticating my account login, it gets no further.


Gmail works well, but only in backwards compatibility view mode - it doesn't use the modern mail web appearance.


Using YouTube in Odyssey, it plays video at 360p mostly ok, with some glitches. I suspect some optimisation of Mplayer settings is needed here:


If I manually select 720p in the settings for playback it is unwatchable in Odyssey:


The Australian ABC News website renders well, but can't playback video content:


The same applies to the BBC news website:


As you would expect, Amiga focused websites render well in Odyssey:


I tried to use Microsoft Outlook 365/Office365 - which only seems to make progress past the login page if I select to Spoof as Safari (Mac) in the Odyssey options:


Outlook 365 (Hotmail) works ok in Odyssey:


Things don't go so well when trying to use Word Online in Odyssey - CSS keeps trying to save as a download rather than being rendered in Odyssey:


Ultimately Microsoft Word online gives up and makes you exit:


The point of showing these rendering issues is to show how much progress is still needed on web browser development on NG Amigas. The same issues apply to AmigaOS 4 as well, which uses an older version of Odyssey than what runs on MorphOS 3.12.

A lot of progress has been made which is great, but there is still a lot more to do!

I hope all the remaining Amiga browser developers can unify their efforts under Odyssey and make it work with modern web applications and standards, really needed in 2020!

Next, I listened to some modules using Schismtracker for MorphOS.


I then tried out some of the MorphOS games from my Powerbook G4. Some work fine, some don't.

Gigalomania worked fine:


Voxelnoid worked ok for the most part:


Some other games that worked ok included Fruit'y, Giana Sisters Return, Open Tyrian, and more:


I was disappointed that Return To Castle Wolfenstein, GL Quake and some other 3D games either didn't run at all, or didn't render properly, like Neverball. These run perfectly on the Powerbook G4, so clearly the MorphOS 3.12 Graphics card 3D support for the X1950 card is likely the issue here. I had problems with many MorphOS demos too, likely for the same reason.

That said, many 3D games do run fine on the X5000 with the Radeon X1950 installed, so hopefully it can be fixed in a future release.

I have a lot more work to do on the MorphOS 3.12 build on my X5000 like setting up Iris email, applications, etc. However, at this point, with a working installation with music, games and classic Amiga emulation working seems to be a good point to end this blog post.

I plan to cover more about MorphOS 3.12 on the X5000 later on so stay tuned!