Saturday, July 12, 2014

Gotek Floppy Drive Emulator in Amiga 600

I read on various Amiga forums about a rival floppy drive emulator for the HxC floppy, called the Gotek floppy drive emulator. It is in reality a Cortex board, but flashed with the right firmware it can be used as a cheap Amiga floppy drive emulator on the Amiga 600 - I found a seller on Ebay selling a pre-flashed Gotek Amiga package with accessories and quickly bought it!


And here it is - Included with the Gotek package (as above) is the Gotek board mounted in a floppy drive sized plastic case (with controls, USB port and display mounted at one end), 8GB USB flash drive, engraved with the Amiga logo,  DVD with goodies, Instructions, USB flashing tool and cable for upgrading the Gotek firmware from a Windows PC and some jumpers and mounting screws.

It was very cheap compared to the HxC, only AUD$60. But keep in mind it does less too (more on that later).

Here is a closer look at the display end of the gotek floppy drive - you can see the 3 digit display, USB port, two black buttons and a green light:


Looking at the other end we can see the power connector and floppy drive cable connector:


The case is designed to be the same size as the floppy drive you are expected to remove to install this into your Amiga case.

It also has screw holes in the right places for the mounting points into the Amiga 600.


However, when I put the case on I found the first problem - you cannot see the display well, and the buttons are covered by the original case:


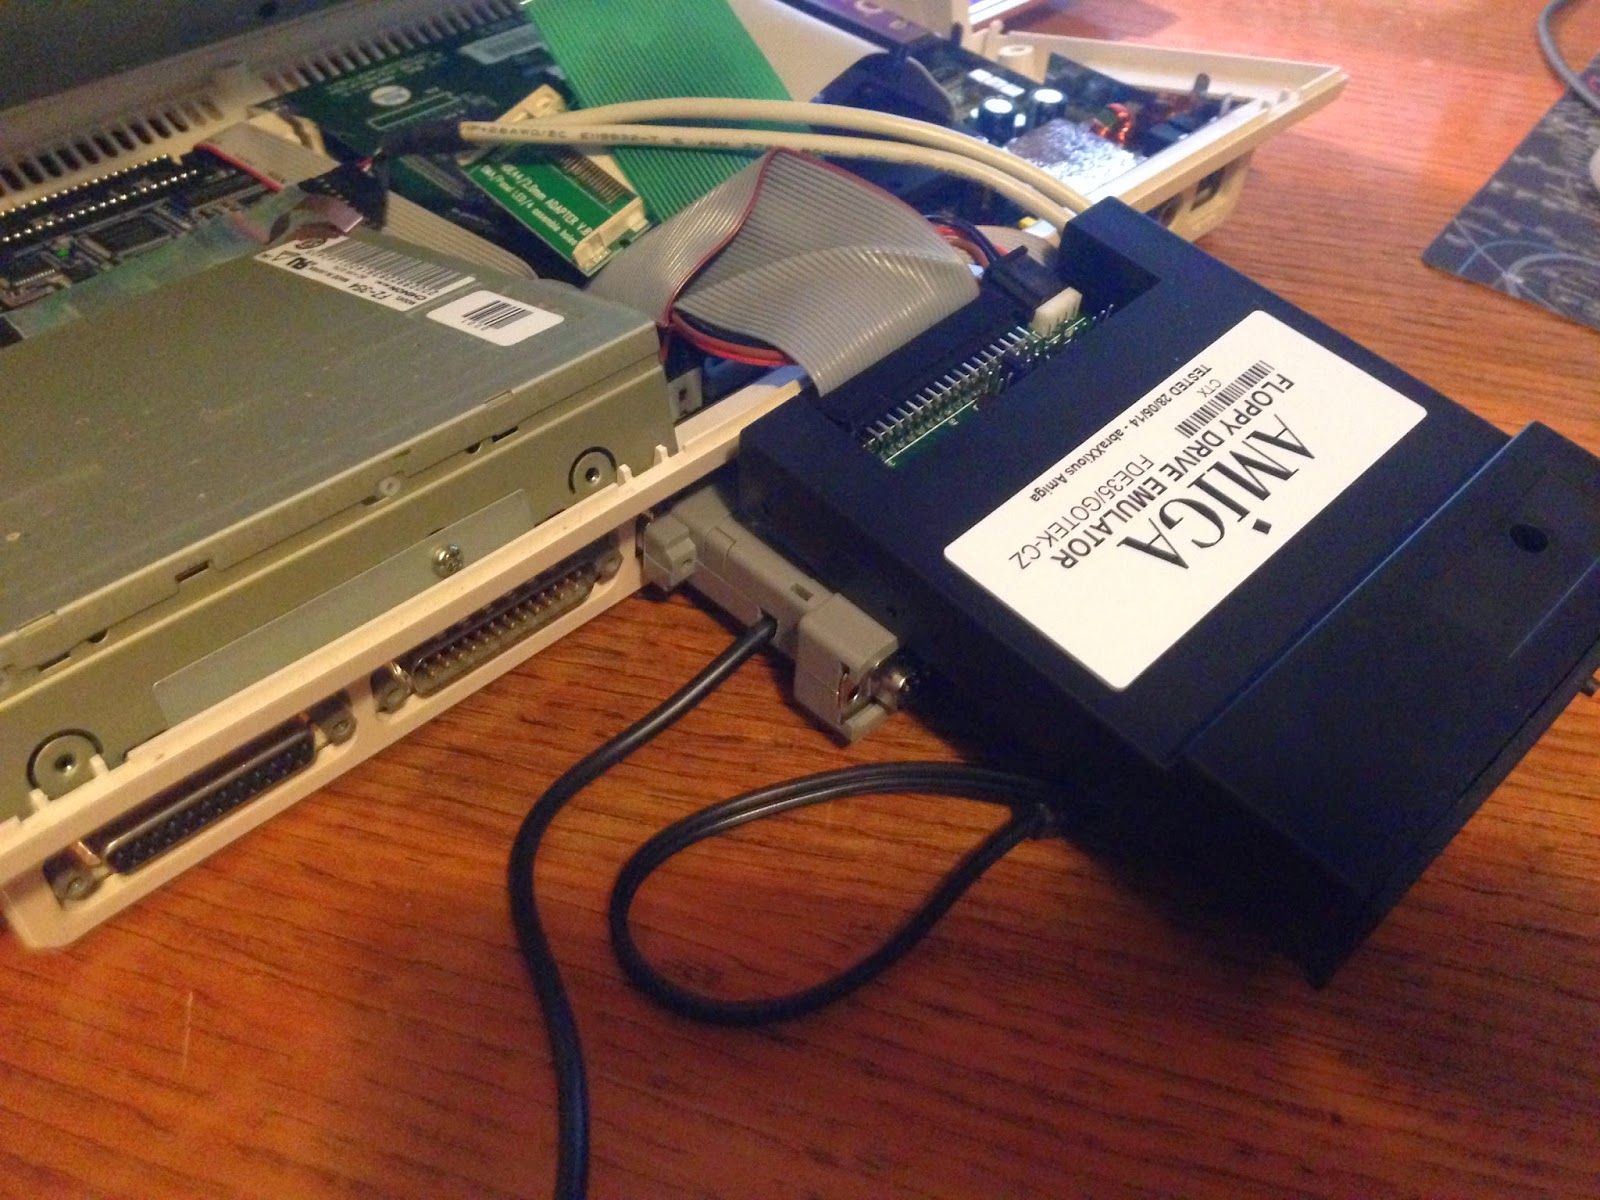
After looking online I noted that many people bought the longer floppy and power cables to mount outside, or simply cut the bottom part of the floppy drive section of the Amiga 600 case covering the ports and display so they could use it there - I don't want to do this and at this stage just wanted to try it out - so I put my original floppy drive back in, and connected the Gotek externally using the internal floppy and internal power cables as below:


I also removed the CF drive - reading the instructions the Gotek loads a SELECTOR.ADF from the USB stick, which you then program ADF files to the number slots selectable on the Gotek. Sounds fiddly, and hard to navigate when booting - to prevent HD damage from multiple resets I expect, I took it out first:

I then copied some ADF files to the 8GB USB drive supplied. It is important not to delete the SELECTOR.ADF file, as the Gotek uses this file when booting:


With the setup in place, I then connected everything and powered on - USB drive glows, the green light and the 3 digit display comes on:


Soon after I see the SELECTOR.ADF booted into it's menu screen:


It scans the USB drive and shows all the ADF's. In my case I put a bunch of Classic Amiga demos on it. Use the up and down arrow keys to select an ADF, then choose which SLOT number to assign it to:


The slot number assigned matches up to the 3 digit number displayed on the Gotek case. You can mount up to 999 ADF files with the Gotek.

Don't forget to select the Save and Restart option at the top when you have finished this task (otherwise it doesn't save the work you did!):


On reboot, use the two buttons on the gotek unit to select the Unit number that corresponds to the ADF file you want to boot. Having no Hard disk is good here because doing the going up SLOTS is tedious and slow unless the disk you want is within the first ten or so SLOTS:


Here is the Anarchy Digital Innovation demo ADF loaded via the Gotek Emulator - speed is the same as for the original floppy disk:


SLOT 2 selected and another reboot brings up the Andromeda Sequential demo from 1994:


Crusaders Micro Concept demo was a few more SLOTS along:


You can press down both buttons on the Gotek to quickly change the display to 000 to boot the SELECTOR.ADF again.

It does work well, but unfortunately it doesn't suit my needs really. I think this device is really intended to 100% replace an Amiga floppy drive on an unexpanded Amiga 500/600/1200.

The biggest problem for me is that although it is designed to mount into the floppy drive space on the Amiga, the external interfaces on it do not line up on the Amiga 600, requiring you to alter the case to make it fit - this was disappointing as I am not keen to do this. The attraction of the Gotek over the HxC is that I was hoping not to have to modify the case. Perhaps on an Amiga 500 it does line up better...

I should mention I have seen an external floppy drive mounting kit which I assume means the Gotek can be made to boot from the external drive if you run an Amiga with Workbench 3.0+ ROMS. This would avoid hacking up the original case. However, many games expect to be DF0 and will not work in this configuration, limiting it's usefulness.

The ACA630 accelerator in the Amiga 600 allows me to reconfigure the floppy drive assigns so that DF1 is actually DF0 in hardware, which bypasses this problem above!

The Gotek does not support IPF files, which means it cannot replace protected floppy disks (games, mostly). For me, this means it cannot be a true floppy drive replacement - you still need the floppy drive to boot protected floppies in your collection. For people without a large collection of original game floppy disks this would not be an issue - I bought most of my games so it is for me.

Perhaps this IPF support will come in time.


On the other side of the fence, the HxC floppy drive emulator supports ADF and IPF files amongst others, and has a nicer application to select files and mount them/reboot too - it also has a nice big display to show the active ADF to make switching ADF's easier without the selector application. However, installing it as a floppy drive replacement also involves modifying the Amiga case.

Going back to the Gotek - Changing SLOTS is fiddly and slow - the selector application requires you to take a photo of the screen showing what ADF you assigned to which SLOT as you have zero chance of remembering this later on when selected the SLOTS using the buttons - there is no other display.

This also means you are likely to need to modify the SLOT list often to keep the number of active ADF files low, so that you don't have to press the button so many times....this also means taking photos regularly when you change it..and don't forgot to Save before rebooting from the SELECTOR.ADF each time!


Multiple floppy disks being changed is also a little bit fiddly due to the digit display location, and important to assign the multiple disks to sequential SLOT numbers to avoid slowness switching disks.

I will gloss over the DVD filled with "all the ADF's and DMS files you will ever need" included with the package - do with this what you will. Not totally convinced the seller has a license to use the Amiga name and logo, or permission for the re-flashing of the Gotek for Amiga support either, but maybe the seller does - I'll give them the benefit of the doubt here.


It sounds like I am being a bit harsh on the Gotek, but in summary it is a workable solution for booting ADF files on a real Amiga, with some caveats. I am grateful to have the Gotek flashed with the Amiga floppy firmware with everything you need to plug it in and get started, and the price is certainly attractive.

I do prefer the HxC though, and I will show the HxC on another occasion (I have one of these too) as I work through my Amiga 600 upgrade work.

I first wanted to see what the Gotek was all about since I only found out about it recently. The price of the Gotek is initially attractive, but keep in mind the restrictions I mention above. If these are not an issue for you, then go for it!

Sunday, July 6, 2014

North Adelaide Railway Station

Yesterday I was in Bowden to attend the Fork on the Road food event nearby, and decided to have a closer look at the North Adelaide Railway Station.


From the vantage point below at the pedestrian crossing, you can see the freight line on the right heading towards Adelaide (also used by the Ghan and Indian Pacific). The other lines are the Adelaide Metro Broad gauge lines servicing the Gawler line, and also providing access to the Dry Creek Depot where Adelaide Metro trains are stored and serviced when not in use:


This station is active and is the first stop on the Gawler line. It is not used a great deal though, and often trains pass through the station without stopping.

Here is the view on the Adelaide Metro Platform which is heading towards Gawler, looking at the bus shelter style stop on this platform and the North Adelaide Station building on the opposite side:


Here is a closer view of the North Adelaide Railway Station building, which is not in use and is sealed up on the platform side - does provide shelter when it is raining though, like today:


North Adelaide Station signage on the platform:


Further along the platform I can see the Park Terrace bridge in the distance, freight line on the left and two broad gauge Adelaide Metro lines on the right:


When the electrification works to Dry Creek and beyond take place, this view will change a lot from how it is today!

Here is a another shot of the North Adelaide Railway Station building:


As I was taking photos, a regular service Gawler line train passed through North Adelaide station without stopping, on it's way to Adelaide Railway Station:


Here is the train as it passes through the station - 3 carriages on this 2000 series Diesel train service:


After the train passes through the station:


Here is the bus stop style Train Stop information board at North Adelaide Railway Station, Platform 1:


Given that trains infrequently stop at this station is it important to check the schedule to make sure you can catch the train from this station. Bowden Railway Station (on the Outer harbour and Grange lines) is walking distance from this station, as is the Entertainment Centre Tram stop - so it is not a great surprise that it sees little use.


When the Adelaide Railway Station was closed in January 2014 for electrification works for the Seaford line, North Adelaide Railway Station was the start/terminating Railway Station for the Gawler line, where people transferred here to buses to go to Adelaide Railway Station. For that month it was very busy at this station!


Tuesday, July 1, 2014

Webcam Viewers on X1000

Today I wanted to take a quick look at three webcam viewers for AmigaOS4.1 on the AmigaOne X1000 - Little Brother, Big Sister and AmiWebView 2!


First of all I shall look at Big Sister v53.3, which is written by Massimiliano Scarano and is available on os4depot.net here. This is being actively updated in 2014.

Although it is free to use, please feel free if you can to donate to support this program and ongoing AmigaOS4.1 development - after all, developers need incentives and feedback to keep developing their programs and making them even better!

Big Sister is a webcam viewer that works with webcams featuring frequently refreshed jpg images. Here is the extracted folder:


The BigSister.doc in the folder explains how to use the program:


Here is the BigSister program on first launch:


You can put in a specific webcam url you want to view by typing or pasting into the Webcam image URL field and pressing Enter. Alternatively, you can choose some of the webcams already put into the Webcam Image Name field (which can be edited from the Big Sister program Icon Information screen - more on this later).

Here are some of the inbuilt webcam URL's included to select with BigSister, which all work. Note that they run at different sizes depending on the source jpg size:


The software will auto refresh the display after the number of seconds you specify in the interface - it makes sense to check the original webcam url for the time refresh interval the website uses, and then set this figure to the same - you can then see the updates like this:


Here is one last webcam from the built in set of url's included with Big Sister:


So when you get bored looking at those, how do you add more? The answer is google to find the url's you want to view, and then add them into the Big Sister icon, right click -> Information, and then add them on the Icon Information tab as below:


Each section consists of:

NAME_X=Location of webcam
URL_X=URL

I added in Adelaide and Tokyo webcams as above. When I run Big Sister again I can now select them from the Webcam image name selection:


This program works well, and can even auto cycle through the defined URL's in the list if you want it keep changing the webcam view being shown every few seconds.

A different take on the webcam viewer is provided by the Little Brother program, made by Guillaume Boesel (zzd10h) who wanted to provide a AmigaOS4 dock functionality unlike the Big Sister program above. This is why it is called Little Brother! This is actively updated in 2014.

As with the Big Sister program, the Little Brother webcam viewer shows refreshed jpg webcam images from a specific URL.

Although it is free to use, please feel free if you can to donate to support this program and ongoing AmigaOS4.1 development - after all, developers need incentives and feedback to keep developing their programs and making them even better!

Here is the Little Brother folder once downloaded from os4depot.net here and extracted:


Please ignore the Australia and Japan folders - I created these by accident and forgot to remove them before screen grabbing....

To create multiple webcams for the dock, I then renamed the Little Brother folder to Adelaide, and then created a new (empty) Little Brother folder and moved the Adelaide folder in it. I then duplicated the Adelaide folder twice (right click, Duplicate) and renamed the resulting folders to Paris and Italy to get the folder structure below:


The reason I did this is because the Little Brother docky displays only one webcam. It is necessary to create a duplicate folder structure for each additional webcam you want to display.

For each folder as above, you then edit the LittleBrother.docky icon information tab (Right click, Information) and fill in the WEBCAM and WEBCAM_TITLE fields with the URL of the webcam, and the location of the webcam to appear underneath the webcam picture. Don't forget to set the REFRESH field with the refresh time in seconds - 120 seconds (2 minutes) by default:


Now you can drag these dockies into your main dock, but in my case it was pretty full. The author helps further by showing his settings (images in the Settings_Sample folder) to create another empty dock, which is better suited to displaying the Little Brother webcam images. This is very helpful to get a new dock created quickly that makes the most of the programs jpg views on your desktop. Here is the images and one example from the folder below:


In my case, below I show my settings for my new dock I created for LittleBrother. You can access these settings by left clicking the Amidock so it is in focus, and then right clicking on the Amidock and selecting Edit (or select Edit Preferences from the Amidock title bar menu).

Next, click Add in the Docks section to add a new Dock - I named it LittleBrother - then make sure it is highlighted as below:


Leave the Categories as default, and then fill out the other tabs as per the below:


Click on Save. This gives us a nice transparent vertical dock on our desktop.

Then drag the dockies from each folder I created earlier one by one into the new dock on your desktop and move the dock to where you want it - in my case I chose the right side of my desktop (click to expand):


Here's another view, this time with some other things running too - Odyssey and AmigaAmp:


I then added a few more Little Brother Dockies from Tokyo to fill things up even more on the right side (click to expand):


And here is Little Brother and Big Sister running side by side on the X1000 (Click to expand):


The final Webcam viewer program I am looking at on the X1000 is AmiWebView 2.

Alinea Computers sells this commercial webcam viewer for AmigaOS4, available here for EUR5,95.

Once purchased, downloaded and installed (I bought the CD version) you get the following folder:


When you run the AmiWebView 2 program for the first time,  you should see the screen below:


You can see webcams are sorted by various groups like Worldwide and Miscellaneous and then broken down into country and topic sub groups.

This structure is nice and easy to navigate, making browsing a large list of webcam URL's much simpler. When you highlight a particular webcam you want to view, simply click on connect and a window opens up with the webcam in question. You can open more than one at a time, as below (click to expand):


Due to the age of this program (most recent update in 2010), many of the included webcam url's no longer work, but they are easy to change or to add new ones.

To create your own groups, select Add Group, as below:


Call the group name what you want and press Enter. Then select Add Cam to add a webcam URL to the group you created:


Put in the descriptive Name and the URL in the Address field (you can also specify the refresh time and which HTTP protocol to use for the connection if needed). Fortunately, like Big Sister you can copy and paste the URL you want straight into the program:


After hitting connect you can see the Adelaide webcam showing on the separate webcam window in AmiWebView 2:


Don't forget to Save your updated list from the Title bar menu before closing the program!

Which program you ultimately want to use is a matter of personal preference and choice, all three offering different features.

In my case, I do like the dock option in Little Brother - it makes it easier to have multiple webcam images permanently visible on the desktop without using too much space on the desktop.

However the method in Little Brother to duplicate folders by hand to create multiple Webcam dockies is a bit clunky compared to the single icon multiple Webcam configuration method in Big Sister. In turn the GUI based configuration in AmiWebView 2 is even easier to configure.

The auto-cycle option in Big Sister means you don't need to run multiple images to see what is happening across multiple webcams. However, you can't show multiple webcam windows and you can't run the webcam images in the dock, which means the image window will be floating around the screen rather than fixed in one place. You also can't run the AmiWebView 2 windows in a dock, but it does support multiple webcam windows at the same time.

One suggestion I have for all three programs, is the facility to save the images sequentially into a folder while the program is active (I believe they all overwrite the same image each time instead). This new feature would then allow me to be able to put together all the image frames (normally 5 seconds apart) into a nice movie of each webcam's activity! I would think this would not be too hard to do but then I am not a programmer!

It is certainly nice to be spoilt for choice, and the relative merits of each program provide plenty of scope for all three programs to improve into the future!

It is certainly nice to see webcam programs that show what is happening across multiple cities all over the world in close to realtime on my X1000! Please try them out!