Monday, March 16, 2015

AmigaOS 4.1 FE Classic on FS-UAE 2.5.29

Today I decided to install my AmigaOS 4.1 Final Edition Classic onto FS-UAE running on my MacOS X Yosemite (10.10) Macbook Pro.
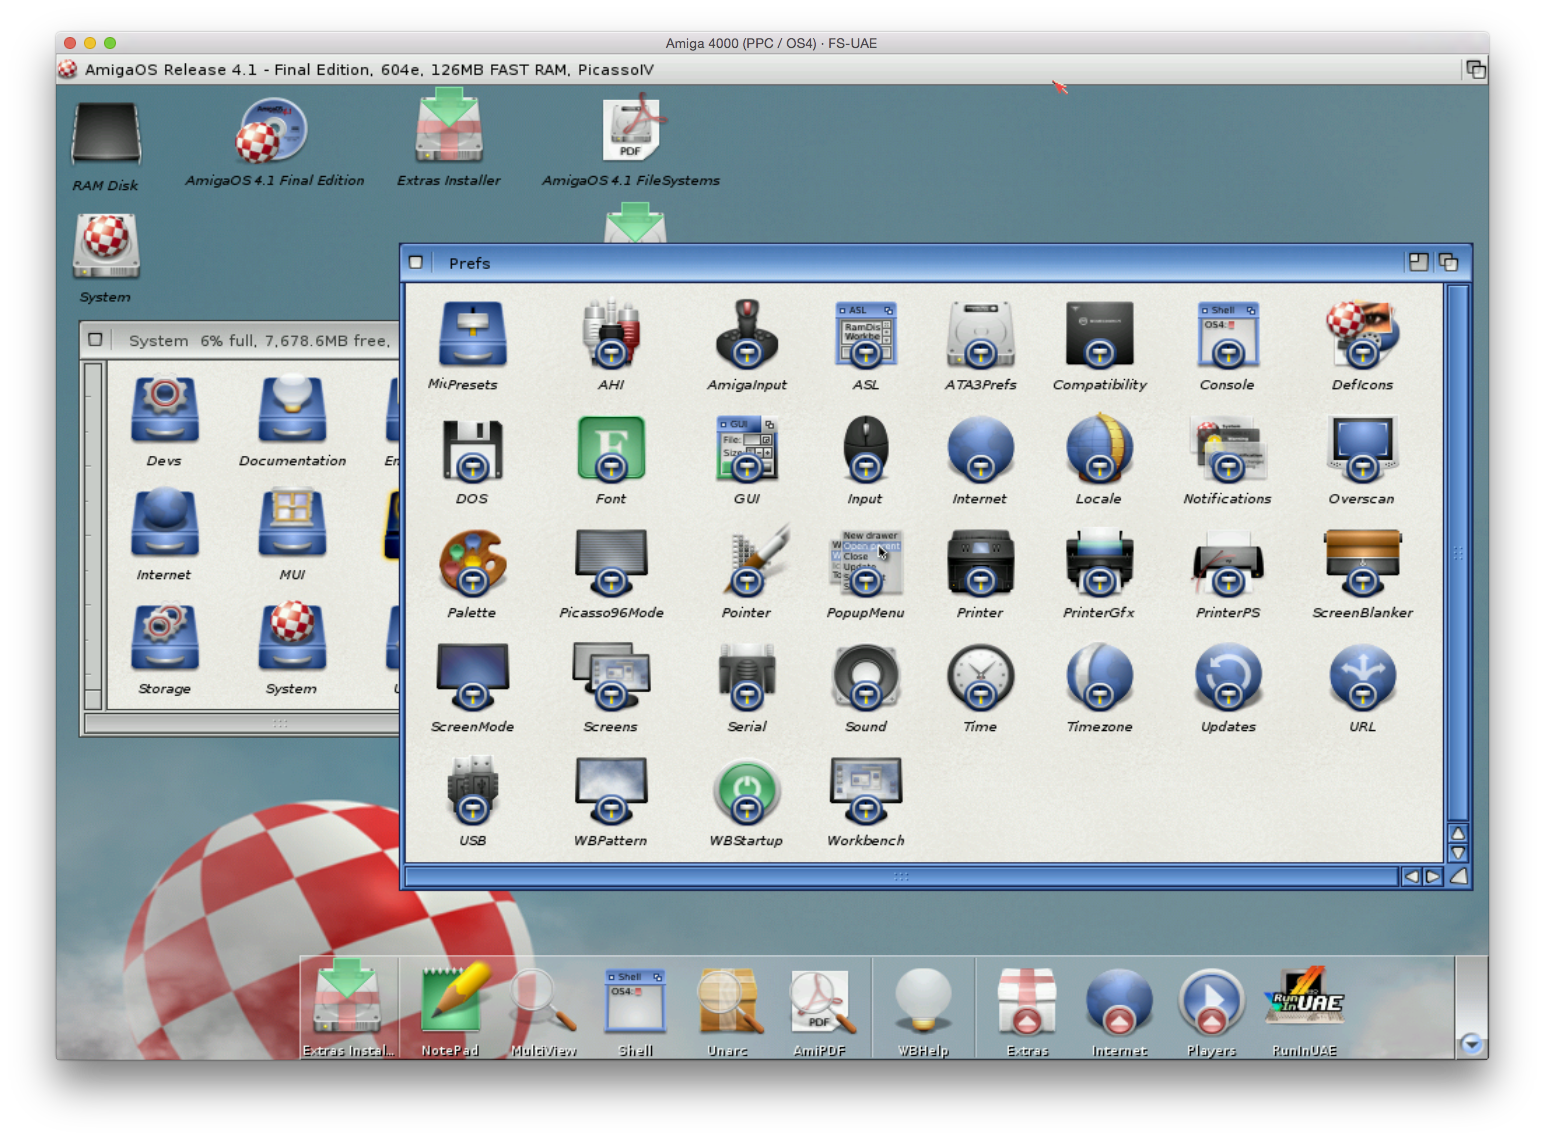
Last year I setup AmigaOS4.1.6 Classic on FS-UAE on MacOS X Yosemite for AmiWest 2014. 

With the release of the new Final Edition Classic version and the considerable updates to FS-UAE since then I thought it was a good time to get AmigaOS4.1 Final Edition Classic installed and running under emulation on my MacBook Pro. (which for reference is a Core i7 2.6 Ghz Late 2013 model with 16GB memory, Nvidia Geforce GT750M 2GB, and 1TB SSD)

I followed the procedures outlined on EAB's FS-UAE support forum thread here on how to install AmigaOS4.1 on FS-UAE. This is a very good guide indeed!

Some changes since I installed AmigaOS4.1 Classic on FS-UAE last year include several major upgrades to the WinUAE base build used for FS-UAE, the support of VHD (resizable) virtual hard disks, SFS0 hard disk partition support (enabling SFS0 hard disk installs to larger HD sizes), Tocatta Sound card support and more too!

Another change is the update of the QEMU PPC plugin to the latest 3.6 version here (at the time of writing) to use the latest development build of FS-UAE 2.5.29dev, available from here for Mac OS X.

Another new tool in Mac OS X is the VHD Creator tool that can be used to create hard disks that grow as data is put into them, rather than consuming all the space allocated straight away. You can download this VHD Creator tool from here. Once downloaded you get this program to create the VHD virtual hard disks needed for the AmigaOS 4.1 Final Edition Classic installation.


So let's get started with creating an AmigaOS 4.1 Final Edition Classic setup using FS-UAE on Mac OS X Yosemite!

I will assume you have downloaded and run FS-UAE Launcher for MacOS X (you need to run it once to create the FS-UAE folder structure under Documents).

I also assume you have the QEmu 3.6 plugin and have put the legal Amiga Forever CD kickstart ROMS, Picasso IV ROM and Cyberstorm PPC ROM file into the correct places in the Documents/FS-UAE/Kickstarts folder.

As a reference my Documents/FS-UAE folder structure looks like this (before I put the latest QEmu 3.6 into the Plugins folder):


I then copy the latest QEmu PPC 3.6 plugin to the FS-UAE/Plugins folder, and archiving the old versions under a new sub-folder I called Older Version:


I used VHD Creator to create the virtual hard disk. when I run VHD Creator it prompts to specify whether you want a fixed size or dynamic:
Next, it asks how large you want the disk to be. If you were planning to format the disk as FastFileSystem (FFS) then 2048 is the correct value here. In my case, I am planning to use Smart FileSystem (SFS0), which allows me to specify a much larger disk - I chose 8192MB (8GB):
VHD Creator then asks for the name of the hard disk file - I called it AmigaOS4.1FE.vhd, and after that you press Create...
It then asks where you want to save it - make sure you save it in the Documents/FS-UAE/Hard Drives path:
After this step the program closes and the VHD hardfile is ready to be formatted inside the emulation later on...

Next we need to create an image (iso) of our AmigaOS4.1 Final Edition Classic CD, to be able to mount it in  FS-UAE. I used Toast 11 for this, but you can use whatever your favourite image creation program is on Mac OS X. Select the Disc Copy function.


Make sure to select Disc Image as the destination (select from the drop down list):


Once created it will prompt to save the .toast image file somewhere - be sure to save it to Documents/FS-UAE/CD-ROMS - I called the file AmigaOS 4.1 Final Edition.toast:

Then from the Finder (I use Pathfinder as a superior Finder replacement) you need to rename the Disc image from .toast to .iso.


That done, now run FS-UAE 2.5.29 Launcher and we can start to configure.

In my case I have some configurations from previous setups - click on the New configuration icon (shown below next to where it says AmigaOS 4.1 Final Edition) to create a new configuration, and title it AmigaOS 4.1 Final Edition (or whatever you want to call it) - select Amiga 4000 (PPC/OS4) as the Amiga Model:

Click on the Hard disk icon to configure the hard disks. Add in the AmigaOS4.1FE.vhd we created earlier:


The hard disk is now added:

Next we go to the FS Amiga logo in the top left and select Custom Configuration... from the menu:


Then add in some lines to set the type of the hard disk to rdb, and optionally you can specify the location of the cdrom and hard disk here too (click to expand any of the pictures):

Then click on Close to close the window.

I went into the CD icon tab and added some additional iso's I created from the previous AmigaOS4.1 classic install from last year that contain some utilities and programs I want to install once the installation of AmigaOS4.1 Final Edition is done. You need to add these iso files to the CD-ROMS folder in FS-UAE to have them visible immediately when adding them in here:

Now I clicked on the Save button (next to the AmigaOS 4.1 Final Edition configuration title) to save the configuration (it shows a red arrow when you have made changes that have not been saved yet).


It will then  appear as selectable on the left hand pane:
 

 Now we are ready to launch the emulation - Click on Start to get underway - you can use the window/full screen button next to it to change if it runs in full screen or window mode:

Initially the CDROM will not boot in FS-UAE and you will get the Insert disk screen:


Use Function + F12 (if using a mac keyboard) to bring up the Emulator control menu as above, and select Reset Amiga > Soft Reset. Immediately press the ESC key to get the Cyberstorm PPC menu as below:
Select the SCSI button, then double click on the Unit 1 entry in the scsi device list as below:
The Unit 1 settings then appear as below:
We need to change the settings so the device can boot and is removable (rather than Auto-removable). Change the settings to what is shown below and click on Use:
Then click on Save to save the configuration:

The FS-UAE emulation should then boot from the AmigaOS 4.1 Final Edition Classic iso as below:
It will then reboot, all going well initialise the PowerPC plugin and then boot the CD into AmigaOS4.1 Final Edition:

Shortly after we get the initial Live CD installation screen:

First step here is to start the Hard disk Preparation utility option - select the cybppc.device in the window that comes up and then select Start:


It should prompt to initialise the hard disk and give you a screen similar to below - make sure the Total Disk Size field matches what you specified in VHD Creator tool and then click on OK - accept changes:
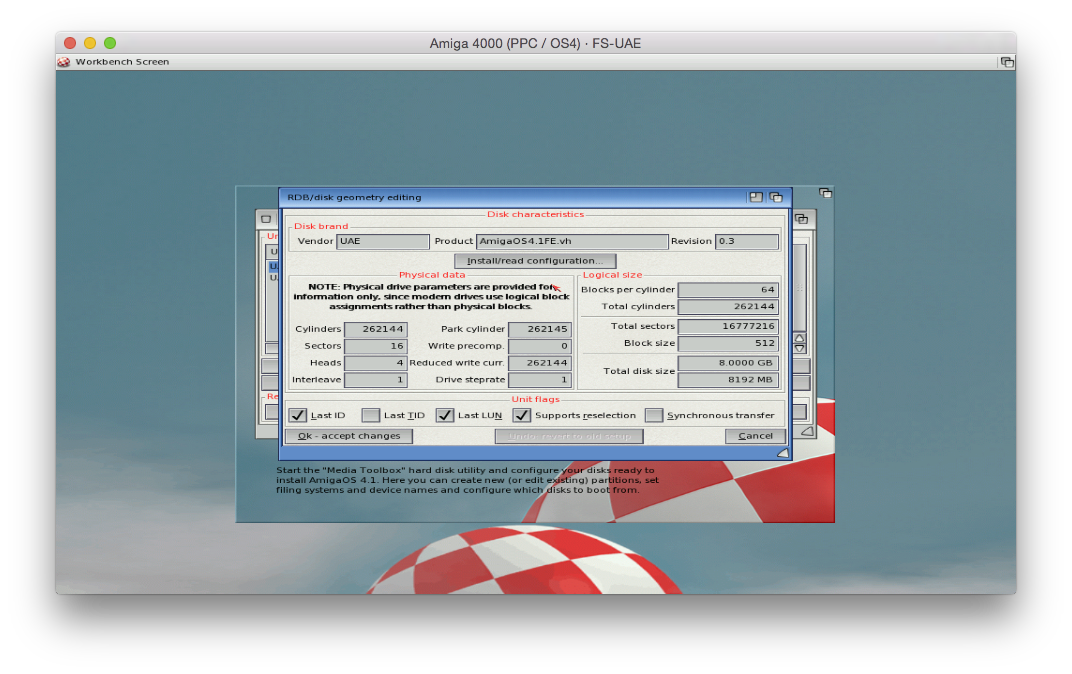
The AmigaOS4.1FE.vhd hard disk appears in the list along with the CD:
Select the AmigaOS4.1FE.vhd disk and then select Edit partitions and filesystems:
You may remember that I intend to use Smart File system (SFS) rather than the usual FastFileSystem (FFS). In order to do this, we need to install the SFS support to the RDB of the bootable hard disk - otherwise the disk will not boot.

To do this, click on Add, remove or edit filesystem option - you will then get the screen below:

Click on Add new FS option, and then select SmartFileSystem from the dialog box that appears and click on OK:
It will then prompt for filesystem parameters - we need to modify the DOSType field, as it is currently using FFS to use SFS instead:
To do this, we change the DOSType field to 53465300 and press Enter - this will then change the filesystem on the right side to SFS\00:
After you click OK you get the following screen confirming the additional SFS filesystem - click on Ok - accept changes:

We need to create a partition, so click on Add partition - It will create DH0 using the full partition space:
Click on Select filesystem/edit details button - you will then see the following screen:
 We need to modify the filesystem Type field from Standard filesystem (FFS) to SmartFilesystem (SFS\00):
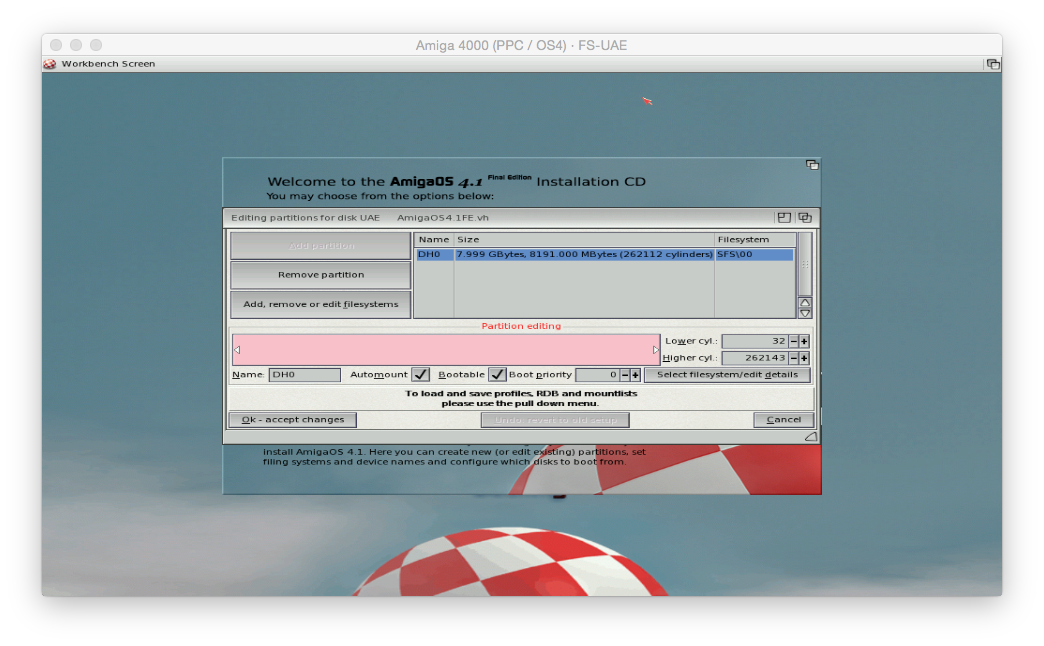
Click on Ok - accept changes and you will then go back to the Hard disk partition screen:
You can see that the filesystem of DH0 is now SFS\00. Make sure Automount and Bootable flags are ticked, then click on Ok - accept changes.
Now click on Save to disk:
It will prompt if you are sure - select Yes, save:
It will then prompt that a reboot is needed. Select Yes, reboot NOW!:
The AmigaOS4.1 Final Edition Classic iso will then boot again to the initial Installation setup screen as before:
Set your localisations and keymaps option as you desire:
You can then click on the option to start the installation of AmigaOS4.1 Final Edition:
Choose DH0 as the destination:
It will then prompt to format the disk. I labelled the volume as System. Make sure you uncheck the Use Trashcan option and then use Quick Format:
When the format is done you can proceed with the installation to DH0:
I have skipped some screens here as many you just accept the defaults - however, do select Picasso IV as the graphics (not AGA), ensure cybppc.device is selected (it is selected by default) as you go through the install, and that the screen size as 1024x768@60 (48Hz):
A final confirmation of your choices appears before the installation proper begins:
Installation then proceeds - coffee time:
Installation is completed successfully!
Do not click on Finish on the last screen yet....
First, Press Function + F12 to bring up the FS-UAE menu and eject the AmigaOS4.1 final Edition iso as below - use cursor keys to navigate to the Removable Media, highlight the iso, and press Enter:
You now have the option to Eject - press Enter on it to do so. Then you can click Finish on the last screen to reboot the Amiga. (If you don't do this then the live cd will boot instead of the hard disk)

If it doesn't boot for you, make sure you check that the SFS file system is installed as I detailed above, the CD has been ejected, and that the hard disk is set to bootable.

The first time I did this I forgot to set the Bootable flag (!), so I just got the Insert disk screen and a non-bootable hard disk as shown below in the Early Boot Menu (press both mouse buttons when booting):  
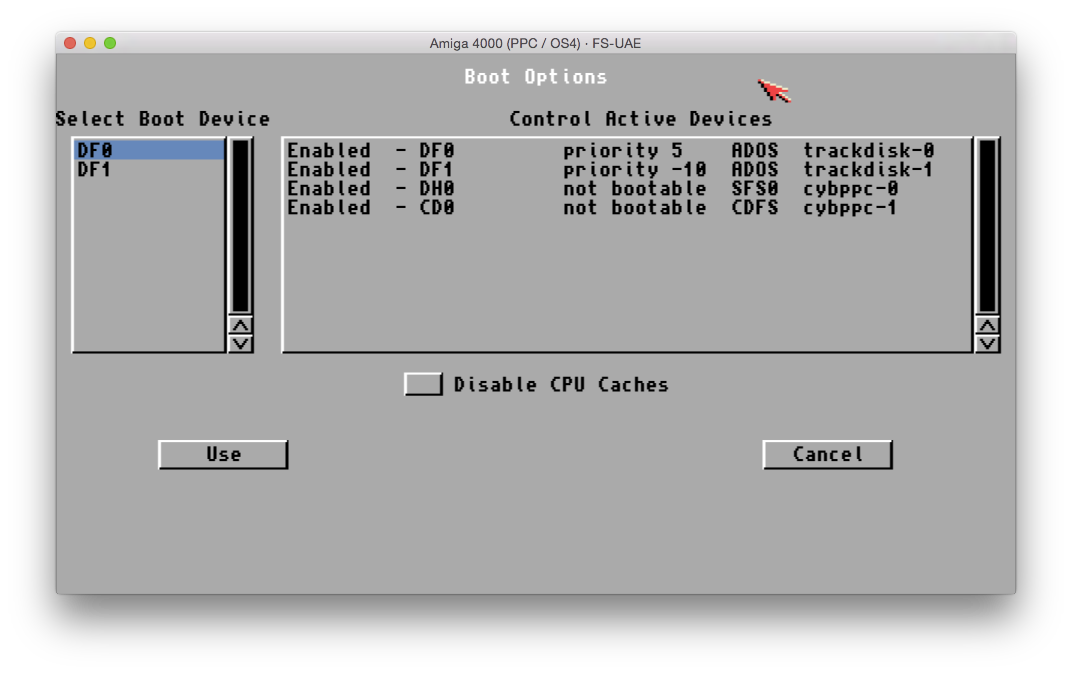
I then mounted and booted the AmigaOS 4.1 final Edition Classic iso again (via Function + F12), ran the hard disk partition tool option and quickly fixed DH0 to be bootable and all good:

Success - it now boots AmigaOS 4.1 Final Edition from the virtual hard file and presents me with the standard post-installation options screen!
I then mounted the AmigaOS 4.1 Final Edition Classic iso again briefly while I ran through the Extras installation:
Extras installation in progress - I just left out the PCI Catweasel drivers:
I now have a working AmigaOS 4.1 Final Edition Classic setup on FS-UAE on my Macbook Pro
Next step will be getting the network card working on emulated system...which requires the ethernet.device driver from Aminet. Then Amistore, toccata support and more! But that is enough work for one day - I'll cover these in a future blog entry!

Thursday, March 12, 2015

Cockle Train at Victor Harbor

While I was in Victor Harbor this past weekend I arrived in time to see the Steamranger Cockle Train running it's afternoon final return trip to Goolwa.


I thought I would grab a few photos to share - it is too early for them to run steam services, but it should be soon as we are now in Autumn!

The consist was quite long today! Some close ups:


The Buffet Carriage internals:


This is the view inside the Victor Harbor station building, showing the ticket windows and the Station Masters entrance:


Some more views of the Cockle train from the Victor Harbor Station platform, just prior to departure:


Another view of Diesel Loco 507:


Last Passengers boarding the train:


Green flag raised and Whistle blown - Ready to go!


Diesel Loco 507 underway then gets underway, with plenty of diesel grunt in evidence!


The Cockle train then crosses the last manually operated gates for a Road crossing in Australia (Heritage protected):


Last carriage crossing over the road on the way out of Victor Harbor Station:


Volunteers from Steamranger then put the manually operated gates back in the original position to allow road traffic to pass again:


I have a lot of plans for train travel during 2015 - in Australia and Japan, so look forward to more photos soon!

Monday, March 9, 2015

Swamp Defense 2 for AmigaOS 4.1 on X1000

Today I wanted to take a look at the recently released Swamp Defense 2, released on AmigaOS4.1 on my AmigaOne X1000.


Swamp Defense 2 is by Entwickler-X, the team behind the original Swamp Defense (which I reviewed in 2012 here), and countless other games for AmigaOS 4.1 in recent years.

A demo of the game is available to download from their website here, and the full game costs EUR16.99 and can be purchased for immediate download from their website.

Alternatively, you can also purchase Swamp Defense 2 on AmiStore for GBP10 for immediate download as below (click any photos in this post to enlarge):


You can also soon buy a physical boxed version with CD and manual from various Amiga dealers too!

I decided to purchase it from AMIStore on my X1000.

BTW if you haven't installed/used AMIStore yet, it is an App Store for AmigaOS 4.1 released in November 2014. I covered AMIStore in some detail here and here if you want to check out more about it.

Once purchased in AMIStore, I started downloading Swamp Defense 2 from my purchased items:


When download is completed, the installer then starts automatically:


Choose where you want to install the game:


Installation of files happens quickly:


And we are done!


Now I have the Swamp Defense 2 drawer with the following icons in it:


I run the Config program first to check out the options available:


From the Config program I can change the game to run in full screen or a window, and the screen aspect ratio, Sound card AHI selection, amongst others. I chose to run it in full screen 1920x1080 with 16:10 aspect ratio, and clicked on Save.

When I run Swamp Defense 2 itself, it initially comes up with the AmiBoing online profile login, which allows your progress and high scores to be submitted to an online global highscore table.


Once logged in, the main title screen shortly appears:


The Question Mark option allows you to see a quick guide on how to play Swamp Defense 2.


In summary the game is similar in gameplay to it's predecessor Swamp Defense in that it is 2D and viewed from above. It consists of a series of maps you need to complete, now divided into mulltiple zones, each with a number of maps to complete. This is very much like the popular game Angry Birds in zone concept. 

Each level has one clear route (generally left of screen to right of screen but does vary) which a number of different aliens take in separate waves. The route changes with each level. You need to stop the aliens from reaching the end of the route, which require you to place various people with different levels of weapons at key points along the route to shoot them. You can also attack with other weapons (new to Swamp Defense 2) that can be purchased with in-game money earned as you play the game.


You clear the first level when you have cleared 10 waves of aliens. The next level is 20 waves, and the difficulty of killing the aliens and the map strategy changes each time, providing quite a challenge.

You get money for each alien you kill, which can then be used to add additional people or upgrade the weapons people can use, depending on what kind of person they are. 


From the Main Title screen you can click the Shop icon to see what People and weapons can be purchased with your money:


As you can see, the upgrades have been enhanced substantially here for Swamp Defense 2, with the addition of extra bombs and weapons you can use during the game, in addition to the familiar people (called Towers in the game) from the original Swamp Defense:
.
Much like with Angry Birds, Swamp Defense 2 includes a Star earning system, that allows you to get extras along the way. Clicking on the Star icon on the Title screen allows you to see your progress to date:


For those all important bragging rights, you can also click on the Podium icon on the title screen to see how you rate compared to the global competition!


When you start the main game from the Title screen, you are presented with a map, which shows your current zone progress and which level is next to conquer - initially we are in The Swamp zone - if we have money we can click on the Shop icon to purchase weaponry and upgrades before we attempt another level:


You can see I have already attempted this first level and completed it successfully. It also shows the stars earned, and the option to select Normal or Hard mode (Hard mode needs to be unlocked - here it is). You can only attempt levels that are green, the others are locked and cannot be played until you complete the previous level that then unlocks the next one.

So let's see if I can do any better this time on the first level! As the game begins, I position two people, one that slows down the aliens by shooting them with some kind of pink glue, and two shooters.


Positioning of people along the route is crucial to how successful the kills are. People have a certain range that they can fire at the aliens and no further. For example, locating people inside a turn where they can twice at the aliens delivers better results than people positioned on the outside of a straight piece of the route where they can only fire once.


As each wave of aliens comes through, we get more money to afford to buy more people to defend the route. This can be done while the aliens are progressing through the level, allowing you to add extra firepower downstream if you find that you are not able to get all the aliens before they pass your last line of defence!


To position people, click on a valid location on the level next to the main route. Certain positions are not allowed - eg. in the swamp itself, on the far left and right of the map and where obstacles have been placed. When a valid location is selected, the people available to be purchased for the position then appear - the others are greyed out:


As this point I have made it through 7 waves of aliens of the 10 waves required to pass through this level. You can click on the 1x lightning icon on the top of the screen to speed up the wave advance so you can't move through the levels quicker (useful if you have everything positioned and don't need to add anything):


You can also upgrade the weaponry or remove a person from their position on the level during the game. By clicking on the person you get these options. You get a partial money credit that helps to buy another person. This tactic is useful when you want to replace a low end killer with a higher level one but have no spaces left to put them in on the level:


You have 10 lives to start with - every time an alien makes it to the end of the route you lose a life. The game ends when you have no more lives left:


My game is going well and I have reached the 9th wave on the first level now:


Last wave and the last alien is proving rather tricky to kill:


I didn't manage to kill the last alien, but only lost one life to complete the first level:


As the game progresses, it gets a lot harder - here I attempt the fourth level, a level I am still stuck on! This level has 20 waves, and my best attempt so far got my to Wave 17 - as you can see the Hard mode for this level is locked still:


This level is tricky as there are much less spaces to position your people initially (lots of positions that can't be used), and some of the enemies seem almost impossible to kill as the waves move on!


As normal I position my people for best effect in the level:


I could really use some of the extra weaponry but having trouble getting the cash needed!


Unfortunately things are not going well - starting to let too many aliens through:


When your lives get down to 2, it starts to pulse with a plus symbol in it - I believe it is possible to add extra lives if you have enough stars and money to buy it, but I don't regrettably!


The game over screen comes often, but this is definitely one addictive game - you can see the extra weaponry icons on the top right of the screen in this shot as I still have some left at this stage:


I can strongly recommend Swamp Defense 2 - the music and graphics are excellent, and the new features added into this sequel make it considerably better than the original game in my opinion!

The online scoreboard and addictive gameplay complete the package and definitely makes Swamp Defense 2 a worthwhile purchase!

It is really great to see new games for AmigaOS 4.1 in 2015!

Looking forward to even more games - but in the meantime, back to try level 4 again! :-)